If you’ve ever found yourself wondering what to serve alongside creamy, delicious mashed potatoes, you’re in for a treat! Pollo Tropical mashed potatoes are perfect combinations that elevate your meal.
Tender grilled chicken marinated in a tropical blend of spices, served with these dreamy potatoes.
Or, perhaps you prefer a vibrant side of roasted vegetables? The crunchy, caramelized edges bring an incredible contrast to the smoothness of the potatoes.
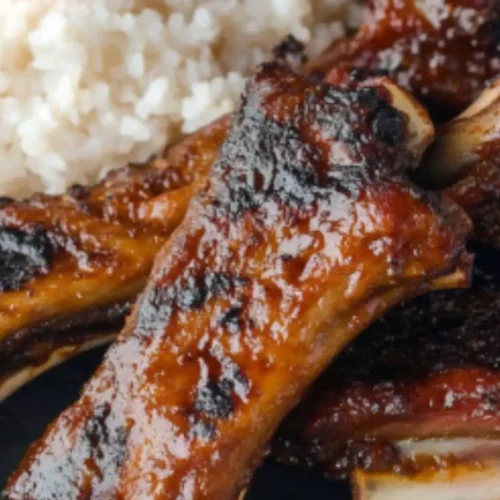
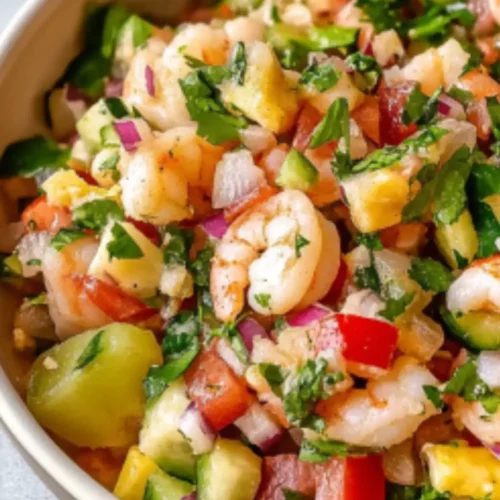
Now, let’s turn to those bold flavors. Pairs extraordinarily well with a tangy citrus salad. Tomatoes sprinkled with feta cheese and drizzled with a light vinaigrette provide a refreshing balance. For seafood lovers, consider grilled shrimp.
The smoky flavor complements the richness of the mashed potatoes perfectly.

When it comes to comfort food, nothing beats a warm serving of mashed potatoes. Now, picture these potatoes enriched with tropical flair and bursting with flavor.
Today, I’m thrilled to share my take on Pollo Tropical mashed potatoes, a dish that’s not just comforting but also a guaranteed crowd-pleaser.
It’s creamy, it’s zesty, and trust me, your taste buds will thank you.
Growing up, my family often gathered around the dinner table, sharing hearty meals reminiscent of holiday feasts.
There was always a space filled with mashed potatoes, right next to the roast. But, I wanted to give this classic dish a twist.
This vibrant recipe incorporates elements from one of my favorite restaurants, Pollo Tropical, known for its flavorful, tropical-inspired menu items. Let’s dive into how to create this delectable dish together, shall we?
You will also like the following Dinner recipes!
- Best Pollo Tropical Chicken Noodle Soup Recipe
- How to make Pollo Tropical Chicken Breast
- Easy Pollo Tropical Citrus Marinated Chicken Recipe
What Is Pollo Tropical Mashed Potatoes?
You might be asking, what exactly are Pollo Tropical mashed potatoes? Well, they aren’t just any mashed potatoes. These spuds are transformed with rich cream, zesty seasonings, and a touch of flair inspired by Polynesian flavors.
Creamy but not overwhelming, these potatoes incorporate ingredients that resonate warmth and a hint of adventure. You’ll find the perfect balance of flavors that complement a variety of dishes, particularly grilled meats.
This isn’t your average side dish; it’s an experience! Each bite promises to take you on a flavorful journey, while the creamy texture envelops your palate. With just the right amount of seasoning and a twist of freshness, it’s all about elevating that simple potato into a luxurious guest at the dinner table.
Why This Recipe Works?
Let’s explore why this recipe is a winner. Firstly, the combination of Yukon Gold potatoes and half-and-half results in an incredibly smooth texture.
These potatoes have a higher natural starch content, ensuring that your mashed potatoes will be creamy without needing any complicated techniques.
Next is the seasoned chicken. Cooking the chicken with olive oil and a blend of spices before incorporating it elevates the dish to new heights. The blend of garlic powder, onion powder, smoked paprika, and black pepper creates depth.
Each ingredient complements the others perfectly, resulting in a dish that is both cohesive and full of flavor.
Lastly, the addition of fresh chives, crème fraîche, and Parmesan cheese ties it all together. The chives provide a delicate onion flavor, adding brightness, while the Parmesan introduces a sharp, savory element.
What You’ll Need to Make This Dish?
Ready to roll up your sleeves? Here’s what you’ll need:
- For the Chicken
- 2 large boneless, skinless chicken breasts
- 2-3 tbsp extra virgin olive oil
- 1/2 tsp flaky sea salt
- 1 tsp freshly ground black pepper
- 1 tsp garlic powder
- 1 tsp onion powder
- 1/2 tsp smoked paprika
- For the Sauce
- 3 tbsp unsalted butter
- 2 tbsp all-purpose flour
- 1 cup low-sodium chicken broth (or stock)
- 1 tsp chicken bouillon granules
- 1/2 cup heavy cream
- 1 tsp garlic powder
- 1 tsp onion powder
- 1/2 tsp Worcestershire sauce
- 1/4 cup freshly grated Parmesan cheese
- 1 tbsp Dijon mustard
- For the Mashed Potatoes
- 3-4 medium potatoes (about 1-2 lbs), peeled and diced
- 3/4 cup half-and-half
- 4 tbsp unsalted butter, softened
- 4 tbsp crème fraîche
- Salt and freshly cracked black pepper, to taste
- 1-2 tbsp fresh chives, finely chopped

How to Make Pollo Tropical Mashed Potatoes?
This dish is straightforward and easy to prepare. As we step through the instructions, don’t worry; detailed steps will guide you all the way. The secret is simplicity, allowing the flavors to shine without fuss.
Step 1: Prepare the Chicken
Start by patting the chicken breasts dry. Then, in a bowl, coat them with olive oil, sea salt, pepper, garlic powder, onion powder, and smoked paprika.
Step 2: Cook the Chicken
Heat a skillet over medium heat. Place your seasoned chicken in the hot pan. Cook each side for about 7-8 minutes or until the internal temperature reaches at least 165°F (75°C). Once done, remove and let rest while you prepare the sauce.
Step 3: Make the Sauce
In the same skillet, melt your butter. Add the flour and whisk. Let it cook for a minute to create a roux.
Gradually add in chicken broth, stirring continuously to prevent lumps. After a few minutes, add the heavy cream, chicken bouillon, and Worcestershire sauce. Stir until the sauce thickens a bit.
Step 4: Prepare the Mashed Potatoes
While the chicken cooks, place the diced potatoes in a pot and cover with cold water. Bring to a boil, and then cook until tender, about 15-20 minutes. Drain and return to the pot.
Step 5: Mash It Up
Add half-and-half, butter, crème fraîche, fresh chives, salt, and pepper to the drained potatoes. Use a potato masher or electric mixer to combine until creamy. Taste and adjust seasoning as needed.
Step 6: Combine and Serve
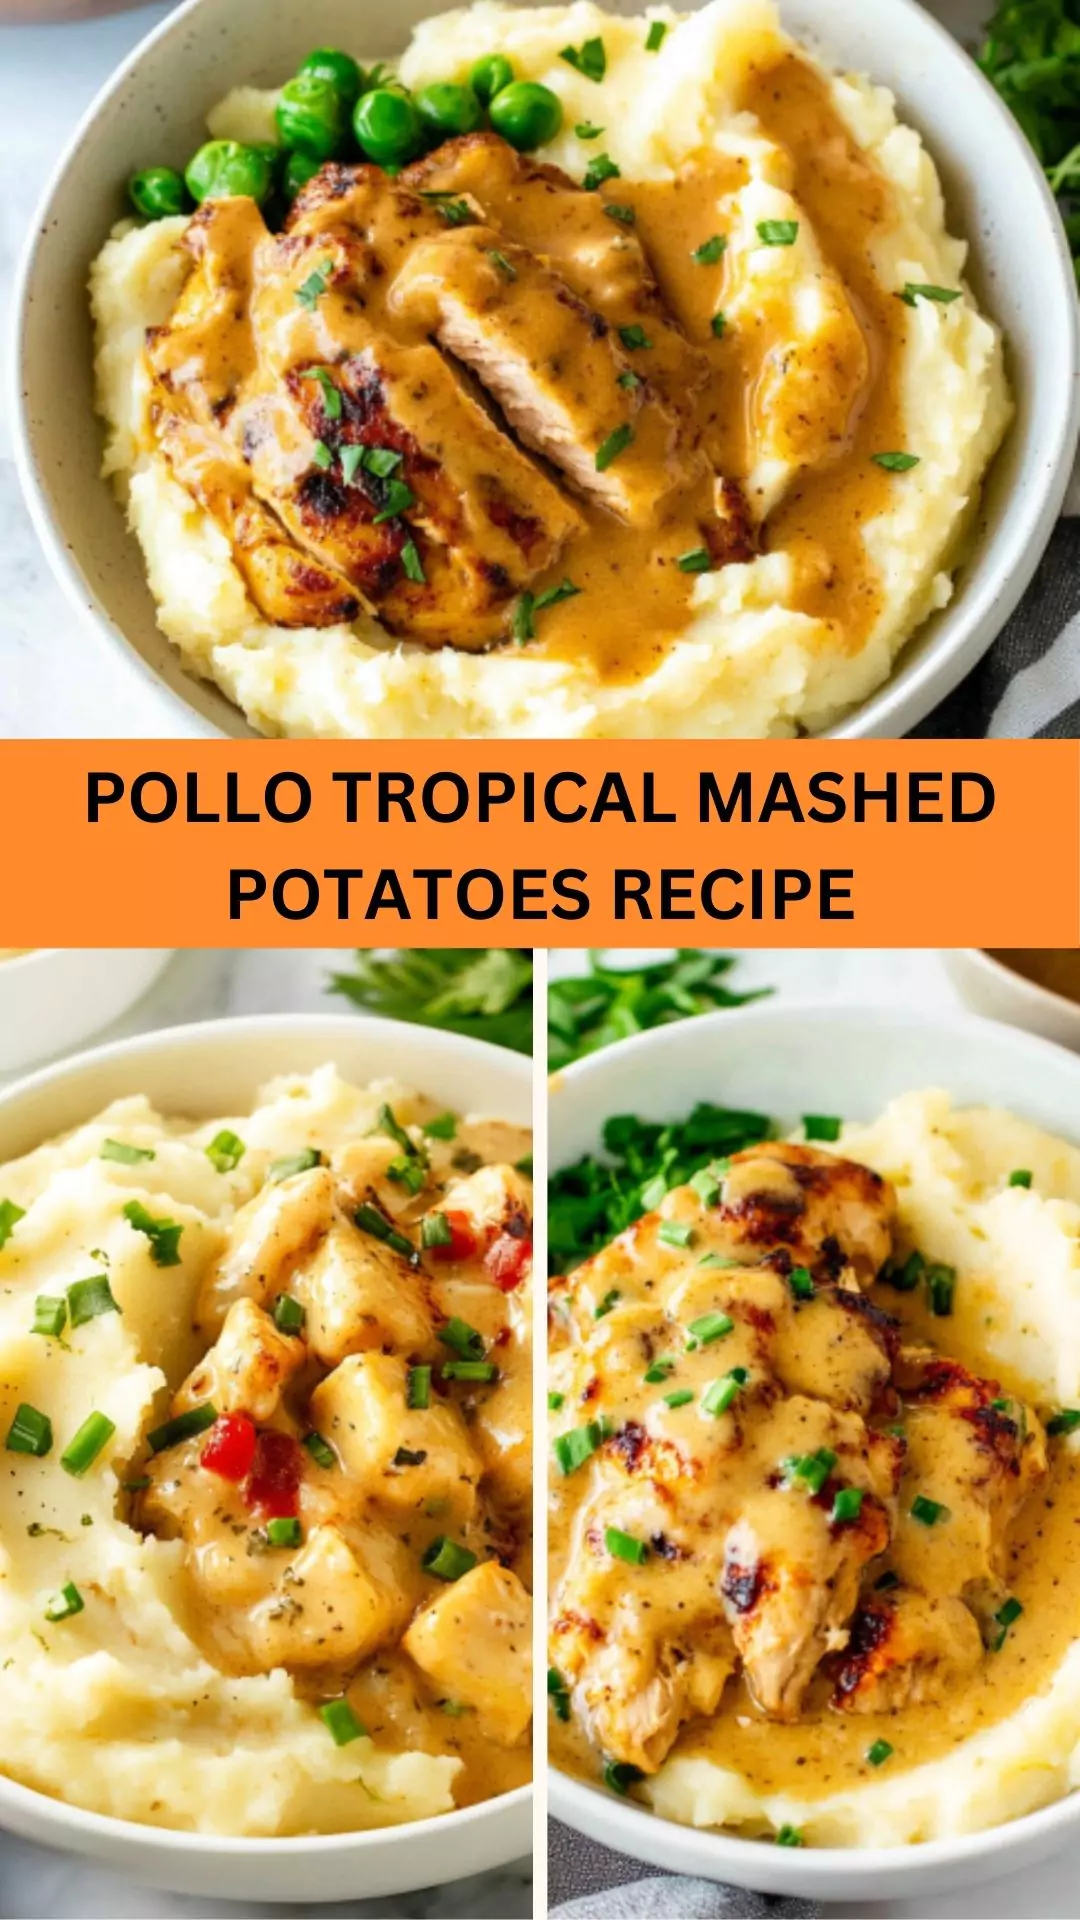
Slice the chicken, drizzle it with the sauce, and serve it over a bed of Pollo Tropical mashed potatoes. Enjoy the mix of flavors and textures!
Tips
Here are five helpful tips to perfect your Pollo Tropical mashed potatoes:
- Use Yukon Gold Potatoes: Their creamy texture makes all the difference.
- Don’t Overwhip the Potatoes: Otherwise, you’ll end up with gluey mashed potatoes.
- Season at Each Step: Season the chicken, the sauce, and the potatoes for greater depth of flavor.
- Adjust Creaminess: Depending on preference, add more or less half-and-half or crème fraîche.
- Let Chicken Rest: Resting allows juices to redistribute, giving you juicy, tender chicken.

How to Store Leftovers?
Leftovers can be stored in an airtight container in the refrigerator for up to 3 days. When reheating, add a splash of milk or half-and-half to maintain creaminess.
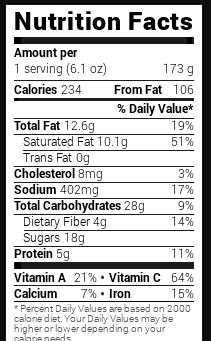
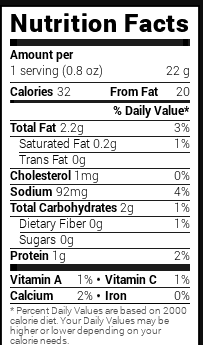
Nutrition Information
pollo tropical mashed potatoes recipe nutrition facts

How Would I Recommend Serving Pollo Tropical Mashed Potatoes?
1. As a Base for Grilled Chicken: The sauce drizzled over grilled chicken creates a winning combination. The tang of the sauce rounds out the creamy potatoes.
2. Accompanied by Roasted Vegetables: A side of roasted vegetables provides a crisp contrast. Think of carrots, zucchini, or broccoli lightly seasoned with olive oil.
3. With a Citrus Salad: Heighten the meal with a citrus salad. Greens tossed with sliced oranges and a light vinaigrette balance the richness of the potatoes.
4. For a Seafood Twist: Grilled shrimp or salmon pairs wonderfully. The fresh seafood complements the tropical flavors beautifully.
What Alternatives Can You Use for the Ingredients If Not Available?
Sometimes you might find yourself missing an ingredient. No problem! Here are some substitutes:
- Chicken Breasts: Thighs can be used for a richer flavor. They retain moisture well.
- Heavy Cream: Coconut milk works well for a dairy-free alternative with a hint of tropical flavor.
- Yukon Gold Potatoes: Try Russet potatoes if Yukon gold is missing. They’ll be slightly fluffier.
- Crème Fraîche: Sour cream acts as an excellent stand-in with similar tanginess.

Pollo Tropical Mashed Potatoes Recipe
Equipment
- Skillet
Ingredients
For the Chicken
- 2 large boneless skinless chicken breasts
- 2-3 tbsp extra virgin olive oil
- 1/2 tsp flaky sea salt
- 1 tsp freshly ground black pepper
- 1 tsp garlic powder
- 1 tsp onion powder
- 1/2 tsp smoked paprika
For the Sauce
- 3 tbsp unsalted butter
- 2 tbsp all-purpose flour
- 1 cup low-sodium chicken broth or stock
- 1 tsp chicken bouillon granules
- 1/2 cup heavy cream
- 1 tsp garlic powder
- 1 tsp onion powder
- 1/2 tsp Worcestershire sauce
- 1/4 cup freshly grated Parmesan cheese
- 1 tbsp Dijon mustard
- For the Mashed Potatoes
- 3-4 medium potatoes about 1-2 lbs, peeled and diced
- 3/4 cup half-and-half
- 4 tbsp unsalted butter softened
- 4 tbsp crème fraîche
- Salt and freshly cracked black pepper to taste
- 1-2 tbsp fresh chives finely chopped
Instructions
- This dish is straightforward and easy to prepare. As we step through the instructions, don’t worry; detailed steps will guide you all the way. The secret is simplicity, allowing the flavors to shine without fuss.
Step 1: Prepare the Chicken
- Start by patting the chicken breasts dry. Then, in a bowl, coat them with olive oil, sea salt, pepper, garlic powder, onion powder, and smoked paprika.
Step 2: Cook the Chicken
- Heat a skillet over medium heat. Place your seasoned chicken in the hot pan. Cook each side for about 7-8 minutes or until the internal temperature reaches at least 165°F (75°C). Once done, remove and let rest while you prepare the sauce.
Step 3: Make the Sauce
- In the same skillet, melt your butter. Add the flour and whisk. Let it cook for a minute to create a roux.
- Gradually add in chicken broth, stirring continuously to prevent lumps. After a few minutes, add the heavy cream, chicken bouillon, and Worcestershire sauce. Stir until the sauce thickens a bit.
Step 4: Prepare the Mashed Potatoes
- While the chicken cooks, place the diced potatoes in a pot and cover with cold water. Bring to a boil, and then cook until tender, about 15-20 minutes. Drain and return to the pot.
Step 5: Mash It Up
- Add half-and-half, butter, crème fraîche, fresh chives, salt, and pepper to the drained potatoes. Use a potato masher or electric mixer to combine until creamy. Taste and adjust seasoning as needed.
Step 6: Combine and Serve
- Slice the chicken, drizzle it with the sauce, and serve it over a bed of Pollo Tropical mashed potatoes. Enjoy the mix of flavors and textures!
Notes
- Use Yukon Gold Potatoes: Their creamy texture makes all the difference.
- Don’t Overwhip the Potatoes: Otherwise, you’ll end up with gluey mashed potatoes.
- Season at Each Step: Season the chicken, the sauce, and the potatoes for greater depth of flavor.
- Adjust Creaminess: Depending on preference, add more or less half-and-half or crème fraîche.
- Let Chicken Rest: Resting allows juices to redistribute, giving you juicy, tender chicken.
Nutrition
Frequently Asked Questions
1. Can I make this recipe ahead of time?
Absolutely! Prepare the mashed potatoes and sauce ahead. Store separately in the fridge, then reheat when ready to serve.
2. Can I freeze the mashed potatoes?
Yes, but note that they might lose some texture upon thawing. It’s best to consume within 1 month of freezing.
3. How can I make this dish spicy?
Add a pinch of cayenne pepper or chili flakes to the chicken seasoning. It’ll kick things up a notch.
4. Can I make these potatoes vegan?
Certainly! Use vegetable broth for the sauce, and substitute potatoes with almond milk or a similar product for a creamy texture.
5. What if I don’t have fresh herbs?
Dried herbs work too. Use half the amount when substituting since dried herbs are more concentrated.
6. Is this dish gluten-free?
You can make it gluten-free by using cornstarch instead of flour in the sauce.
Conclusion
Pollo Tropical mashed potatoes are not just a stylish side dish; they are a celebration of flavor! With their creamy texture and spices that tickle the taste buds, they have the potential to be the star of any meal.
This recipe reflects my journey as a food enthusiast and a registered dietitian, merging nutrition with deliciousness. And when you have a dish that pairs beautifully with so many flavors, you know you’ve hit the jackpot.
So grab your ingredients, roll up your sleeves, and start cooking. Your family and friends will appreciate the effort.
This creamy, tropical mash is bound to take its rightful place at your dinner table. Happy cooking!