Spinach artichoke dip is the life of the party, but it deserves a dance partner. Whether you’re hosting a spirited gathering or just enjoying a cozy movie night at home, knowing what to pair with this delicious dip can elevate your experience.
Consider crispy tortilla chips, warm slices of crusty bread, or fresh pita triangles as your foundational elements. For a more substantial bite, try fresh vegetables like carrot sticks, cucumber slices, or bell pepper strips. Those not looking to dip can enjoy it as a spread atop a toasted crostini or even in a warm tortilla wrap.
Trust me; once you’re knee-deep in this creamy goodness, you’ll be grateful for those crunchy vehicles that deliver every last bite.

Every dip has a story, and spinach artichoke dip is no exception. This creamy, cheesy delight often whispers “party time.” Families gather, friends laugh, and good times are shared over a warm, bubbly bowl of this classic appetizer.
As someone who thrives on healthy eating while embracing flavorful dishes, I can assure you that this spinach artichoke dip is a game-changer. Not only is it delicious, but it combines ingredients that can offer you some nutrition alongside all that indulgence. So, if you’ve ever wondered what makes the best spinach artichoke dip or how to create it, stick around.
What is the Best Spinach Artichoke Dip?
To answer the burning question: the best spinach artichoke dip is a harmonious blend of creamy, cheesy goodness, with a hint of garlicky flavor that keeps you coming back for more. It strikes the perfect balance between richness and texture.
The dip’s creamy consistency, thanks to cream cheese and sour cream, melds beautifully with the earthy notes of spinach and the savory undertones of artichokes. Parmesan adds a savory depth, while a touch of red pepper flakes delivers that unexpected kick.
When warmed, this dip becomes a bubbling masterpiece that draws people in, creating a necessity for more chips and breadth of the mixture.
You will also like the following Appetizer And Side Dish recipes!
How Does It Taste Like?
Imagine diving into a sea of cream and warmth, sprinkled with savory artichoke heart pieces. There’s a rich creaminess from the cream cheese and sour cream, blended seamlessly with the nutty flavor of Parmesan, all punctuated by fresh garlic.
The spinach offers a pleasant earthiness, while the artichoke hearts contribute a subtle tang. And if you’re adventurous enough to add crushed red pepper flakes, you’ll experience a gentle warmth that rounds out the dish perfectly. One bite becomes irresistible, and before you know it, the whole bowl is gone!
Why You’ll Love This?
Not only is this spinach artichoke dip undeniably tasty, but it also stands out for its versatility. It appeals to varied palates — both the gourmet enthusiasts and the pickiest eaters. Plus, it comes together quickly, making it an ideal choice for busy schedules.
Regardless of your culinary background, this dip empowers you to impress your friends and family without spending hours in the kitchen. And let’s be honest, who doesn’t love a dish where everyone is talking about how delectable it is?
Ingredients
Now that I’ve whetted your appetite, let’s dive into the ingredients you’ll need for the best spinach artichoke dip:
- 8 ounces of softened cream cheese, brought to room temperature
- ½ cup frozen spinach, thawed with excess moisture squeezed out
- 1 cup loosely packed freshly shredded Parmesan cheese
- 14-ounce can of artichoke hearts, well-drained and finely chopped
- 1 clove of garlic, freshly minced for a punch of flavor
- ¼ teaspoon crushed red pepper flakes – for a subtle spicy kick
- ½ cup real mayonnaise for richness and depth
- 2 tablespoons chopped green onions – adds brightness and a mild onion flavor
- ½ cup full-fat sour cream for a creamy tang

Step-by-Step Directions
Step 1: Prepare Your Spinach
Begin by grabbing your frozen spinach. Thaw it either in the microwave or by leaving it in your fridge overnight. After it’s defrosted, squeeze out any excess moisture. Trust me; nobody wants a watery dip. Set it aside for later.
Step 2: Cream Cheese Mixing
In a mixing bowl, combine your softened cream cheese and mayonnaise. Use a hand mixer or a spatula to blend until it’s smooth. This step is crucial as it creates the creamy base for your dip.
Step 3: Throw in the Good Stuff
Add in the thawed spinach, chopped artichoke hearts, and freshly minced garlic. Stir well to ensure all ingredients are evenly distributed. At this point, the aroma starts to come alive!
Step 4: Cheese, Please!
Now, it’s time for the cheese. Incorporate the shredded Parmesan and sour cream into the mixture. This is your moment to get cheesy. Fold until everything combines thoroughly.
Step 5: Spice Things Up
Sprinkle the crushed red pepper flakes and green onions into the mix. Stir and taste. Adjust accordingly. If you crave a little extra heat, feel free to add more red pepper flakes.
Step 6: Baking Time
Transfer the mixture into a baking dish. Preheat your oven to 350°F (175°C) and bake for about 20-25 minutes. You want it to be bubbling and slightly golden on top. When ready, remove from the oven and allow it to cool slightly before serving.
Tips on Making the Best Spinach Artichoke Dip
Making the best spinach artichoke dip doesn’t come just from the ingredients. Here are some tips:
- Use Fresh Ingredients: Whenever possible, use fresh spinach and freshly minced garlic. The flavors can be vastly different, with fresh adding a brighter taste.
- Experiment with Cheese: While Parmesan is excellent, you can also experiment with mozzarella or a hint of cheddar for a different flavor profile.
- Watch the Baking Time: Everyone’s oven is different. Keep an eye on your dip; it’s done when it’s bubbling and the top is a nice light golden brown.
- Serve with Variety: Offer an array of dips like tortilla chips, toasted baguette slices, and fresh veggie sticks to accommodate all tastes.
- Double the Recipe: This dip has a habit of disappearing quickly. If you’re preparing for a crowd, don’t hesitate to double the recipe.
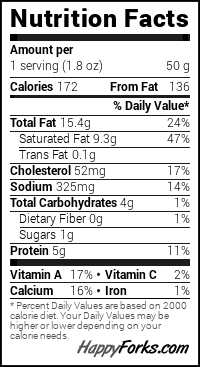
Nutrition Information
Curious about what you’re noshing on? Here’s a rough estimate for a serving size of about 1/4 cup of spinach artichoke dip:
- Calories: Approximately 150
- Protein: 4g
- Carbohydrates: 5g
- Dietary Fiber: 1g
- Sugars: 1g
- Total Fat: 13g
- Saturated Fat: 7g
Note: Nutritional values may vary based on brands and ingredients used.
How Do You Store This Spinach Artichoke Dip?
Leftovers? You might be lucky to have any, but if you do, here’s how to store it. Place the dip in an airtight container. It will stay fresh in the refrigerator for about 3-5 days. When you’re ready to enjoy it again, simply reheat it in the oven or microwave until warmed through. Avoid freezing; dairy-filled dips don’t typically fare well in the freezer.

What Other Substitutes Can You Use in the Best Spinach Artichoke Dip?
- Greek Yogurt instead of Sour Cream: This offers a healthier twist while maintaining creaminess.
- Cottage Cheese for More Protein: Blend it until creamy to keep a smooth texture.
- Sun-Dried Tomatoes for an Italian Twist: If you love a bit of tang, they’ll add a unique flavor dimension.
- Nutritional Yeast instead of Cheese: This is excellent for a dairy-free version, adding a cheesy flavor without the calories.
- Chopped Olives for a Mediterranean Flair: They add a briny taste that enhances the overall flavor profile.

Spinach Artichoke Dip
Equipment
- Oven
- Bowl
Ingredients
- 8 ounces of softened cream cheese brought to room temperature
- ½ cup frozen spinach thawed with excess moisture squeezed out
- 1 cup loosely packed freshly shredded Parmesan cheese
- 14- ounce can of artichoke hearts well-drained and finely chopped
- 1 clove of garlic freshly minced for a punch of flavor
- ¼ teaspoon crushed red pepper flakes – for a subtle spicy kick
- ½ cup real mayonnaise for richness and depth
- 2 tablespoons chopped green onions – adds brightness and a mild onion flavor
- ½ cup full-fat sour cream for a creamy tang
Instructions
Step 1: Prepare Your Spinach
- Begin by grabbing your frozen spinach. Thaw it either in the microwave or by leaving it in your fridge overnight. After it’s defrosted, squeeze out any excess moisture. Trust me; nobody wants a watery dip. Set it aside for later.
Step 2: Cream Cheese Mixing
- In a mixing bowl, combine your softened cream cheese and mayonnaise. Use a hand mixer or a spatula to blend until it’s smooth. This step is crucial as it creates the creamy base for your dip.
Step 3: Throw in the Good Stuff
- Add in the thawed spinach, chopped artichoke hearts, and freshly minced garlic. Stir well to ensure all ingredients are evenly distributed. At this point, the aroma starts to come alive!
Step 4: Cheese, Please!
- Now, it’s time for the cheese. Incorporate the shredded Parmesan and sour cream into the mixture. This is your moment to get cheesy. Fold until everything combines thoroughly.
Step 5: Spice Things Up
- Sprinkle the crushed red pepper flakes and green onions into the mix. Stir and taste. Adjust accordingly. If you crave a little extra heat, feel free to add more red pepper flakes.
Step 6: Baking Time
- Transfer the mixture into a baking dish. Preheat your oven to 350°F (175°C) and bake for about 20-25 minutes. You want it to be bubbling and slightly golden on top. When ready, remove from the oven and allow it to cool slightly before serving.
Notes
- Use Fresh Ingredients: Whenever possible, use fresh spinach and freshly minced garlic. The flavors can be vastly different, with fresh adding a brighter taste.
- Experiment with Cheese: While Parmesan is excellent, you can also experiment with mozzarella or a hint of cheddar for a different flavor profile.
- Watch the Baking Time: Everyone’s oven is different. Keep an eye on your dip; it’s done when it’s bubbling and the top is a nice light golden brown.
- Serve with Variety: Offer an array of dips like tortilla chips, toasted baguette slices, and fresh veggie sticks to accommodate all tastes.
- Double the Recipe: This dip has a habit of disappearing quickly. If you’re preparing for a crowd, don’t hesitate to double the recipe.
Nutrition
FAQs About Spinach Artichoke Dip
1. Can I prepare this dip in advance?
Absolutely! You can assemble the dip ahead of time and store it in the refrigerator until you’re ready to bake it.
2. Can I make this dip without mayonnaise?
Yes! You can substitute with Greek yogurt or sour cream for a lighter version while retaining creaminess.
3. Is there a vegan option available?
Certainly! Use dairy-free cream cheese, almond or coconut yogurt, and nutritional yeast for a vegan-friendly approach.
4. What can I use if I don’t have artichoke hearts?
If you can’t find artichoke hearts, consider using chopped cooked mushrooms or even diced roasted red peppers as an alternative.
5. Can I use fresh spinach instead of frozen?
Yes! Fresh spinach can be sautéed in a pan with a little olive oil until wilted, then mixed in instead of frozen.
6. How spicy is this dip?
The heat from the crushed red pepper flakes is mild. Feel free to adjust the amount to cater to your spice preference!
Conclusion
Sharing a recipe is like passing on a family secret. The best spinach artichoke dip does more than satiate your taste buds; it serves as a connector of people, bringing together friends and family.
With its creamy texture and savory flavor, it’s impossible not to love! You can whip it up for any gathering, movie night, or simply as a treat for yourself. Whether you go classic or explore unique twists, don’t forget to pair it with versatile accompaniments. So, let’s get those ingredients out, roll up your sleeves, and whip up a batch of this divine dip. Happy dipping!