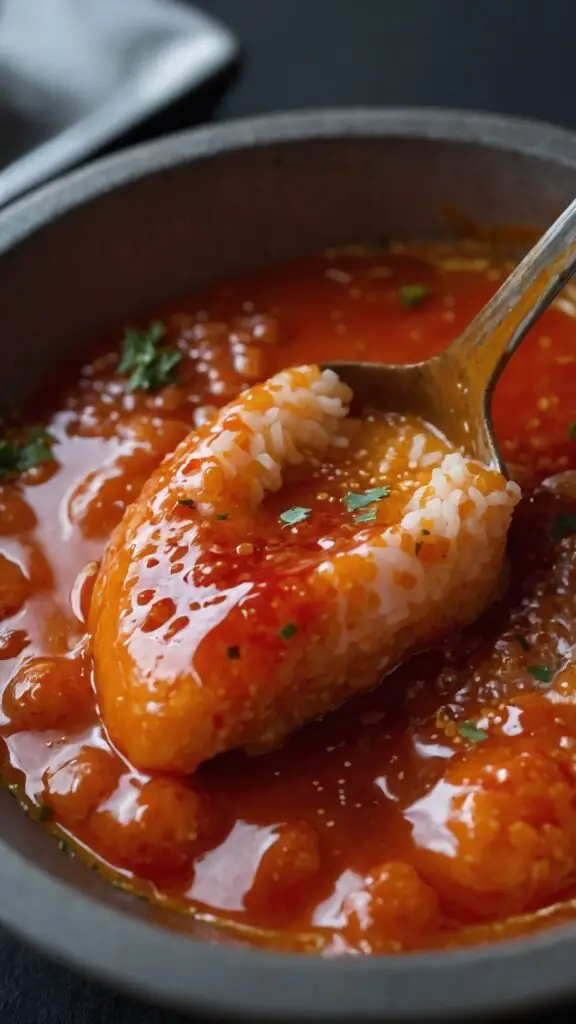
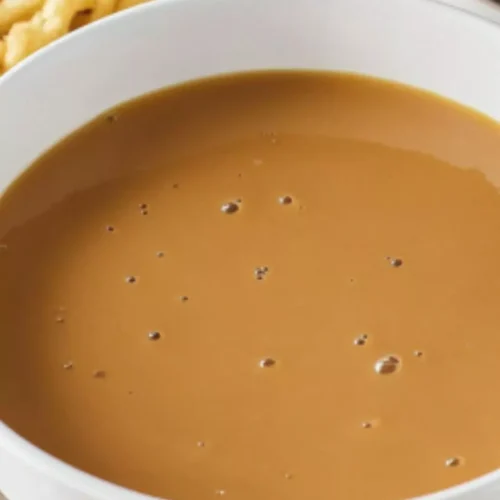
Pollo Tropical Pineapple Rum Sauce Recipe – Yum Yarns

Best Pollo Tropical Pineapple Rum Sauce Recipe

As a food enthusiast with a love for vibrant flavors and fun culinary adventures, I’ve spent countless weekends searching for the perfect sauce. When I stumbled upon the famed Pollo Tropical Pineapple Rum Sauce, it felt like striking gold at the end of a rainbow. This sauce pairs beautifully with grilled chicken, but it doesn’t stop there! I’ve concocted some delightful ideas about what to pair it with, all while experimenting in my kitchen.

Best Pollo Tropical Pineapple Rum Sauce Recipe

What is Pollo Tropical Pineapple Rum Sauce?

Pollo Tropical is known for its tropical-inspired flavors influenced by Caribbean cuisine. This sauce adds a punch of sweetness, warmth, and zest to any dish it graces. Made from juicy pineapple, vibrant citrus, and a splash of light rum, it transforms ordinary meals into extraordinary experiences. This sauce easily elevates grilled meats and seafood. What I adore most is how easy it is to whip up!

You will also like the following Side Dish recipes!

The Ingredients

To get this tropical delight on your table, gather the following ingredients:

  • 3/4 cup water
  • 1/2 cup granulated sugar
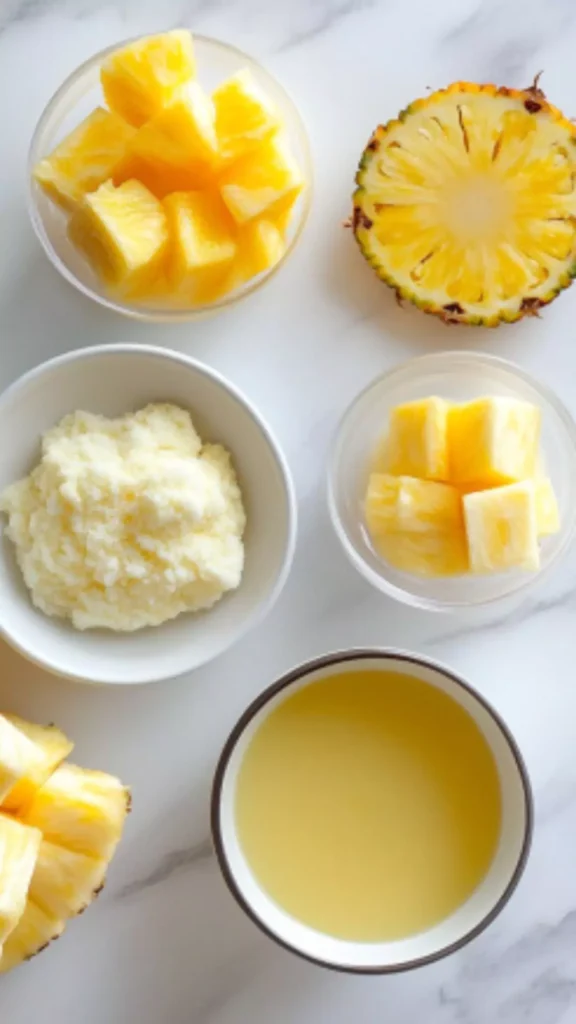
  • 3 cups diced fresh pineapple (1/2-inch chunks)
  • 1 teaspoon freshly grated orange zest
  • 1 tablespoon fresh lime juice
  • 2 tablespoons light rum
  • 1 teaspoon vanilla extract

It looks simple, right? But wait until you unleash the flavor!

Pollo Tropical Pineapple Rum Sauce Recipe

How to Make Pollo Tropical Pineapple Rum Sauce

Before we delve into the hands-on steps, here’s a friendly reminder that making sauce is a blend of art and science. Get your measuring cups and spoons ready! Each ingredient brings something special to the table.

Step 1: Prepare the Pineapple

Start by taking fresh pineapple. I always find the sweet aroma irresistible!

  • Chop the pineapple into 1/2-inch chunks. You want them manageable but still noticeable in your sauce. Feel free to snack on a few pieces. They will make your heart smile.

Step 2: Build the Base

In a saucepan, mix the water and granulated sugar.

  • Heat it on medium until the sugar dissolves completely. You’ll know it’s ready when it looks smooth and clear. It’s similar to a chemistry experiment—watch the transformation!

Step 3: Add Pineapple

Once the sugar has melted into the water, toss in all those brilliant pineapple chunks.

  • Stir them gently to coat. Let this mixture simmer! It’s about to get juicy, literally! Keep it bubbling for about 10 minutes.

Step 4: Citrus Kick

Now, it’s time to ramp up those flavors. Add the freshly grated orange zest and lime juice.

  • Stir again. You’ll feel that summer vibe as the citrus scents waft through your kitchen.

Step 5: Rum and Vanilla

It’s party time! Add the light rum and vanilla extract to the pan.

  • Watch the magic happen! For a few moments, the sizzling will slow, and the sauce will thicken a bit more.

Step 6: Cool and Store

Finally, remove your sauce from the heat and allow it to cool.

This sauce can be stored in an airtight container for up to a week in the fridge. It’s the kind of treasure you’ll want to keep on hand!

Notes

Here are some quick tips to enhance your cooking experience:

  • Choose Fresh Pineapple: Fresh is key for flavor. Canned pineapple lacks the zest you want.
  • Use Adjusted Sweetness: If pineapple is naturally sweet, reduce granulated sugar accordingly.
  • Experiment with Rum: Different types of rum can bring unique variations. Try dark rum for a deeper flavor.
  • Make it Spicy: Add a pinch of crushed red pepper flakes for a heat factor.
  • Blend for Smoothness: If you prefer a less chunky sauce, blend after cooking to create a smoother consistency.

Storage Tips

  • Refrigerate Properly: This sauce lives its best life in the fridge. Keep it in an airtight container.
  • Freeze for Later: You can freeze it in ice cube trays. It’s convenient when you just need a small amount.
  • Serve Cold or Warm: The sauce can be enjoyed chilled or gently warmed. Both work great!
Easy Pollo Tropical Pineapple Rum Sauce Recipe

Nutrition Information (Per Serving)

pollo tropical pineapple rum sauce recipe nutrition facts

Serving Suggestions

Here are five fantastic ways to serve your Pollo Tropical Pineapple Rum Sauce:

  • Grilled Chicken: Drizzle the sauce over grilled chicken breasts for a sweet and tangy kick. It’s a classic pair—like peanut butter and jelly.
  • Fish Tacos: Top your fish tacos with this sauce for a tropical twist. The combination of flavors complements the fish perfectly, creating a meal to remember.
  • Shrimp Skewers: Baste shrimp skewers with this sauce during grilling. It creates a caramelized crust that is nothing short of divine!
  • Pork Chops: Serve it with juicy pork chops. The sweetness of the sauce elevates the savory notes.
  • Vegetable Stir-Fry: Toss it into a vegetable stir-fry. It adds a fresh zest that brightens the dish, making even broccoli taste delightful!

What Other Substitutes Can I Use in Pollo Tropical Pineapple Rum Sauce?

Sometimes, life calls for substitutions. Here are five alternatives that work wonderfully in this recipe:

  • Mango: Swap out pineapple for ripe mango. The sweetness level is similar, but the flavor changes, offering a new tropical note.
  • Honey: Use honey in place of sugar. It adds a lovely depth of sweetness while maintaining that tropical essence.
  • Coconut Extract: For a coconut twist, add coconut extract instead of vanilla. This will lend your sauce an even more exotic, island feel.
  • Lime Zest: If you don’t have orange zest, use lime zest. It’s bright and citrusy and works brilliantly!
  • Bourbon: Try bourbon instead of rum. It will infuse a warm, rich flavor unique to this sauce.
Pollo Tropical Pineapple Rum Sauce Recipe

Pollo Tropical Pineapple Rum Sauce Recipe

Tina Cooper
As a food enthusiast with a love for vibrant flavors and fun culinary adventures, I’ve spent countless weekends searching for the perfect sauce.
Prep Time 5 minutes
Cook Time 30 minutes
Total Time 35 minutes
Course Sauces
Cuisine American
Servings 2 Servings
Calories 330 kcal

Equipment

  • Saucepan
  • Measuring cups

Ingredients
  

  • 3/4 cup water
  • 1/2 cup granulated sugar
  • 3 cups diced fresh pineapple 1/2-inch chunks
  • 1 teaspoon freshly grated orange zest
  • 1 tablespoon fresh lime juice
  • 2 tablespoons light rum
  • 1 teaspoon vanilla extract

Instructions
 

Step 1: Prepare the Pineapple

  • Start by taking fresh pineapple. I always find the sweet aroma irresistible!
  • Chop the pineapple into 1/2-inch chunks. You want them manageable but still noticeable in your sauce. Feel free to snack on a few pieces. They will make your heart smile.

Step 2: Build the Base

  • In a saucepan, mix the water and granulated sugar.
  • Heat it on medium until the sugar dissolves completely. You’ll know it’s ready when it looks smooth and clear. It’s similar to a chemistry experiment—watch the transformation!

Step 3: Add Pineapple

  • Once the sugar has melted into the water, toss in all those brilliant pineapple chunks.
  • Stir them gently to coat. Let this mixture simmer! It’s about to get juicy, literally! Keep it bubbling for about 10 minutes.

Step 4: Citrus Kick

  • Now, it’s time to ramp up those flavors. Add the freshly grated orange zest and lime juice.
  • Stir again. You’ll feel that summer vibe as the citrus scents waft through your kitchen.

Step 5: Rum and Vanilla

  • It’s party time! Add the light rum and vanilla extract to the pan.
  • Watch the magic happen! For a few moments, the sizzling will slow, and the sauce will thicken a bit more.

Step 6: Cool and Store

  • Finally, remove your sauce from the heat and allow it to cool.
  • This sauce can be stored in an airtight container for up to a week in the fridge. It’s the kind of treasure you’ll want to keep on hand!

Notes

Here are some quick tips to enhance your cooking experience:
  • Choose Fresh Pineapple: Fresh is key for flavor. Canned pineapple lacks the zest you want.
  • Use Adjusted Sweetness: If pineapple is naturally sweet, reduce granulated sugar accordingly.
  • Experiment with Rum: Different types of rum can bring unique variations. Try dark rum for a deeper flavor.
  • Make it Spicy: Add a pinch of crushed red pepper flakes for a heat factor.
  • Blend for Smoothness: If you prefer a less chunky sauce, blend after cooking to create a smoother consistency.

Nutrition

Calories: 330kcal
Keyword Pollo Tropical Pineapple Rum Sauce Recipe
Tried this recipe?Let us know how it was!

Frequently Asked Questions

1. Can I use canned pineapple instead of fresh?

While canned pineapple is convenient, it often lacks the bright flavor of fresh. If you’re in a pinch, use it, but drain it well.

2. How long does this sauce last?

Stored properly, it can last about a week in an airtight container in the fridge.

3. Can I use dark rum?

Absolutely! Dark rum adds a deeper, richer flavor that may complement the sauce differently.

4. Is it kid-friendly?

Yes! The alcohol cooks off, leaving just the delightful flavors, making it safe for kids to enjoy.

5. Can I make this sauce in advance?

Yes! You can prepare it ahead of time and store it. Just reheat before serving if you’re using it warm.

Conclusion

Creating this Pollo Tropical Pineapple Rum Sauce has been an exciting culinary journey. Each step brings the kitchen to life, filling it with tropical notes that transport you somewhere sunny. With just a handful of ingredients and a little time, you’ve made something special that can elevate any meal. 

Whether you’re grilling up chicken or drizzling it on tacos, this sauce will become a staple in your kitchen. Trust me, it’s worth the effort! Remember to enjoy the process, and happy cooking!

You’ll also like these latest recipes!

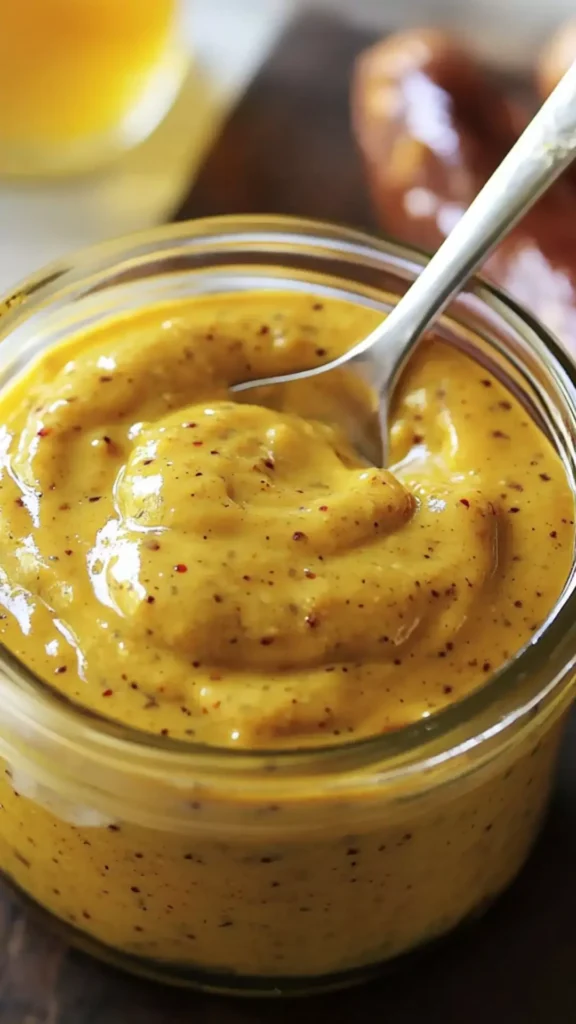
Pollo Tropical Curry Mustard Sauce Recipe – Yum Yarns

Best Pollo Tropical Curry Mustard Sauce Recipe

Before diving into the captivating world of the pollo tropical curry mustard sauce, let’s talk about what makes a meal shine. The right sides can elevate your dish to new heights. Picture this: you have the sauce, rich and zingy, and now, what complements it perfectly?

First up, consider grilled chicken or tofu. The sauce adds a flavorful kick to any protein, making it versatile. Next, steamed rice, whether jasmine or brown, provides a base that soaks up all that zesty goodness. Don’t forget about vegetable skewers; a mix of bell peppers and zucchini brings a fresh crunch that contrasts beautifully with the creamy sauce. 

Lastly, you could serve it with a crisp green salad. Tossed greens drizzled with olive oil and lemon will cut through the richness, keeping your meal balanced and exciting.

Now that you can picture a delightful meal let’s dive in!

Best Pollo Tropical Curry Mustard Sauce Recipe

Ah, the joy of cooking! There’s nothing like whipping up a sauce that can transform an ordinary dish into something extraordinary. If you’ve ever tasted a sauce that dances on your palate, then you know what I’m talking about. Today, I can’t wait to share my pollo tropical curry mustard sauce recipe with you. It’s a unique blend that offers tang, heat, and creaminess all in one bite.

This sauce brings together the warmth of curry, the sharpness of mustard, and a touch of sweetness. If you think mustard is only for hot dogs, think again! This sauce opens up new avenues for flavor. Let’s unveil this dynamic recipe together.

You will also like the following Side Dish recipes!

What is Pollo Tropical Curry Mustard Sauce?

Simply put, this sauce is a vibrant concoction made primarily of mustard, curry powder, honey, and mayonnaise. These ingredients, when mixed, create a creamy and tangy sauce that pairs beautifully with chicken, seafood, or even vegetables. The beauty of this recipe lies in its simplicity. It’s quick to prepare and can easily become a star in your culinary repertoire.

What Does It Taste Like?

Imagine a burst of flavor. This sauce starts with the bold tang of yellow mustard. It then unfolds into the complex notes of curry. The honey adds a subtle sweetness that balances the tang and spice. It’s rich, creamy, and tinged with warmth, making each bite an experience. It’s not just a dressing; it’s a celebration of flavor.

Why This Recipe Works?

Now, let’s break down why this recipe is destined to win hearts.

1. Effortless Preparation
The beauty of this sauce is how easy it is to make. Within minutes, you’ll have a delightful topping that can turn plain grilled chicken into a dish worthy of a food blog feature.

2. Versatile Use
You can use this sauce on more than just chicken. It pairs wonderfully with fish, roasted veggies, or even as a sandwich spread. Think outside the box!

3. Unique Flavor Profile
This isn’t your average mustard sauce. The curry and honey combination adds layers to what could be a simple condiment. It has a zing that will surprise your taste buds.

4. Nutrient-Rich Ingredients
Made with mayonnaise for creaminess and honey as a natural sweetener, this sauce packs flavor without the heavy additives often found in processed sauces.

Ingredients For Pollo Tropical Curry Mustard Sauce 

To embark on this delicious journey, gather the following ingredients:

  • 1 tablespoon honey
  • 1 teaspoon garlic powder
  • 1 tablespoon curry powder
  • 1/4 cup tangy yellow mustard
  • 1 cup creamy light mayonnaise

These simple items are likely already in your kitchen, which is half the battle won!

Pollo Tropical Curry Mustard Sauce Recipe

Step-by-Step Instructions

Let’s get cooking, shall we? Follow these detailed steps to create your pollo tropical curry mustard sauce.

Step 1: Gather Your Ingredients

Before diving in, ensure you have everything at hand. Measure out the honey, garlic powder, curry powder, mustard, and mayonnaise. You want to make it as easy as possible, right?

Step 2: Mix the Base

In a medium-sized bowl, add the mayonnaise first. It’s the creamy base for your sauce. Now, stir in the yellow mustard. You want a smooth blend right from the get-go. This is where the zing starts!

Step 3: Add Flavors

Now, sprinkle in the curry powder and garlic powder. Here’s where your sauce starts to get legs. It transforms from a simple condiment into a flavor powerhouse. Mix thoroughly until all ingredients are well combined. Don’t be shy—get in there!

Step 4: Incorporate Sweetness

Drizzle in the honey. Stir again. As you mix, taste it. You should feel the interplay between tangy, savory, and sweet. Adjust the seasoning to your liking. If you prefer more heat, consider adding a dash of cayenne pepper!

Step 5: Chill and Serve

Once your sauce is ready, let it sit for about 15 minutes. This resting time allows the flavors to meld beautifully. Serve it with your chosen main dish or use it as a dip for fresh veggies. Voila! You have a sauce that’s truly special.

Notes

Here are some handy tips for making the most of this sauce:

  • Adjust Curry Level: If you want a more pronounced curry taste, don’t hesitate to add another half tablespoon.
  • Mix Variety: Use Dijon mustard for a twist. It will bring a different flavor depth.
  • Texture Control: If you prefer a thinner sauce, mix in a tablespoon of water until you achieve your desired consistency.
  • Storage: Keep any leftovers in an airtight jar in the fridge. It can last up to a week.
  • Make It Vegan: Consider using a vegan mayonnaise alternative to make this sauce plant-based friendly.
Easy Pollo Tropical Curry Mustard Sauce Recipe

Nutrition Information

pollo tropical curry mustard sauce recipe nutrition facts

How to Store the Leftovers?

Storing leftovers is straightforward. Use a clean airtight container and refrigerate. The sauce will last for about a week. If you plan to serve it later, give it a good stir before using again. The flavors will deepen as it sits, making it even more delightful.

Sides for Pollo Tropical Curry Mustard Sauce Recipe

You want to wow your guests? Here are some fantastic sides that elevate your dish:

1. Coconut Rice
This delicacy pairs perfectly. The mild sweetness of coconut rice balances the tangy sauce beautifully, creating a tropical vibe. It’s easy to prepare and just scrumptious!

2. Grilled Corn on the Cob
Charred corn adds a lovely crunch. Brush it lightly with butter and sprinkle some salt before grilling. The rustic flavor complements the sauce’s zing.

3. Quinoa Salad
A cool quinoa salad filled with veggies will add freshness. Toss in cucumbers, cherry tomatoes, and a light dressing. It’s nourishing and delightful.

4. Roasted Sweet Potatoes
These caramelized bites bring a comforting sweetness that contrasts nicely with the bold flavors of the sauce. Sweet and savory, it’s a match made in heaven.

Alternative Choices for Ingredients

Sometimes, you may not have every ingredient on hand. No worries! Here are alternatives:

1. Mayo Substitutes
Greek yogurt can replace mayonnaise. This swaps out some calories and adds extra protein.

2. Honey Alternatives
If you’re out of honey, maple syrup works in a pinch. It will create a delightful, slightly different sweetness.

3. Curry Alternatives
In case you don’t have curry powder, garam masala or even turmeric can offer unique flavor notes. Experiment a bit and let your palate guide you.

4. Garlic Powder Swap
If you’re fresh out, minced garlic or even shallots can bring a lovely kick. Use what you have available.

Pollo Tropical Curry Mustard Sauce Recipe

Pollo Tropical Curry Mustard Sauce Recipe

Tina Cooper
Ah, the joy of cooking! There’s nothing like whipping up a sauce that can transform an ordinary dish into something extraordinary. 
Prep Time 5 minutes
Cook Time 0 minutes
Total Time 5 minutes
Course Condiment
Cuisine Caribbean
Servings 2 Servings
Calories 50 kcal

Equipment

  • Medium-sized bowl

Ingredients
  

  • 1 tablespoon honey
  • 1 teaspoon garlic powder
  • 1 tablespoon curry powder
  • 1/4 cup tangy yellow mustard
  • 1 cup creamy light mayonnaise

Instructions
 

Step 1: Gather Your Ingredients

  • Before diving in, ensure you have everything at hand. Measure out the honey, garlic powder, curry powder, mustard, and mayonnaise. You want to make it as easy as possible, right?

Step 2: Mix the Base

  • In a medium-sized bowl, add the mayonnaise first. It’s the creamy base for your sauce. Now, stir in the yellow mustard. You want a smooth blend right from the get-go. This is where the zing starts!

Step 3: Add Flavors

  • Now, sprinkle in the curry powder and garlic powder. Here’s where your sauce starts to get legs. It transforms from a simple condiment into a flavor powerhouse. Mix thoroughly until all ingredients are well combined. Don’t be shy—get in there!

Step 4: Incorporate Sweetness

  • Drizzle in the honey. Stir again. As you mix, taste it. You should feel the interplay between tangy, savory, and sweet. Adjust the seasoning to your liking. If you prefer more heat, consider adding a dash of cayenne pepper!

Step 5: Chill and Serve

  • Once your sauce is ready, let it sit for about 15 minutes. This resting time allows the flavors to meld beautifully. Serve it with your chosen main dish or use it as a dip for fresh veggies. Voila! You have a sauce that’s truly special.

Notes

Here are some handy tips for making the most of this sauce:
  • Adjust Curry Level: If you want a more pronounced curry taste, don’t hesitate to add another half tablespoon.
  • Mix Variety: Use Dijon mustard for a twist. It will bring a different flavor depth.
  • Texture Control: If you prefer a thinner sauce, mix in a tablespoon of water until you achieve your desired consistency.
  • Storage: Keep any leftovers in an airtight jar in the fridge. It can last up to a week.
  • Make It Vegan: Consider using a vegan mayonnaise alternative to make this sauce plant-based friendly.

Nutrition

Calories: 50kcal
Keyword Pollo Tropical Curry Mustard Sauce Recipe
Tried this recipe?Let us know how it was!

Frequently Asked Questions

1. How can I make this sauce spicier?

For those who love a kick, feel free to mix in cayenne pepper or add some chopped jalapeños. Spice it up according to your taste!

2. Can I use this sauce for meal prep?

Absolutely! Make it ahead of time for your lunches throughout the week. Just store it in the fridge, and you’re good to go.

3. Is this sauce gluten-free?

Yes, provided you use gluten-free mayonnaise. Check labels if that’s a concern, but this sauce is naturally gluten-free.

4. Can I freeze this sauce?

Freezing isn’t recommended for this creamy mixture. It may separate upon thawing but feel free to create smaller batches to keep it fresh.

Conclusion

As we wrap this up, I hope you are as excited as I am about trying the pollo tropical curry mustard sauce recipe. It’s not just a sauce; it’s an invitation to savor flavors and bring joy to your plate. With a few simple ingredients and minimal prep time, you can create something truly delightful. This sauce will have your friends and family raving.

Remember, cooking is about exploration. It’s about experimenting with flavors and finding what delights your palate. So grab those ingredients, roll up your sleeves, and let’s cook! Enjoy every moment in the kitchen. Your taste buds will thank you!

You’ll also like these latest recipes!

Pollo Tropical Cilantro Garlic Sauce Recipe – Yum Yarns

Best Pollo Tropical Cilantro Garlic Sauce Recipe

When I think about elevating my dining experience at home, one dish pops to mind: Pollo Tropical with that addictive cilantro garlic sauce. Pair it with black beans, fried plantains, or a bright, colorful salad, and you’ve got yourself a dinner that transports you straight to the tropics. In this guide, I’ll share a detailed recipe that gives you the essence of this sauce while allowing you to recreate that signature taste.

Best Pollo Tropical Cilantro Garlic Sauce Recipe

Why This Recipe Works

1. Simple Ingredients: Most people already have these ingredients lying around. You don’t have to hunt down exotic items. This makes the sauce accessible to anyone.

2. Flavors that Sing: The combination of garlic, cilantro, and lime creates a fresh flavor profile that dances on your tongue. It’s bright without being overwhelming.

3. Versatile Uses: This sauce isn’t just for chicken. Think of it on tacos, as a dip for vegetables, or drizzled over roasted veggies. Its versatility is astounding.

4. Health Conscious: Made with fresh ingredients and no preservatives, this sauce aligns perfectly with a healthy lifestyle. It allows you to indulge without the guilt.

You will also like the following Side Dish recipes!

How Does It Taste?

Imagine biting into a juicy piece of grilled chicken dressed with a sauce that sings of fresh herbs and zesty lime. The creaminess from the sour cream balances out the sharpness of garlic, while the cilantro adds a refreshing finish. Each spoonful provides a burst of flavor, making it hard to resist returning for more.

What Sets This Recipe Apart?

Many recipes for cilantro garlic sauce often pour in endless amounts of oil or mayo, diluting the flavor. This version keeps the proportions balanced. The creamy texture is present without overpowering the fresh ingredients. Additionally, the use of Dijon mustard brings a subtle hint of tang instead of just relying on lime juice. This sauce maintains the essence of Pollo Tropical, providing that signature taste, but uses fewer processed ingredients.

The Ingredients

Let’s break down what you need. Here’s a simple shopping list:

  • 1 tablespoon Dijon mustard
  • 1/4 teaspoon smoked paprika
  • 1 cup rich, creamy sour cream
  • 1/2 cup smooth mayonnaise
  • 1/3 cup roughly chopped fresh cilantro leaves and tender stems
  • 2-3 medium garlic cloves
  • 2 tablespoons freshly squeezed lime juice
  • 1/4 teaspoon fine sea salt
Pollo Tropical Cilantro Garlic Sauce Recipe

Instructions

Step 1: Prepare the Ingredients

Start by gathering all your ingredients. Chop the cilantro finely to release its fresh oils. Mince or crush the garlic. Having everything prepped makes the next steps speedy.

Step 2: Combine the Base

In a mixing bowl, add the sour cream and mayonnaise. These two create the creamy base. Use a whisk to blend them until smooth; no one wants lumps in their sauce.

Step 3: Add Flavor

Next, mix in the Dijon mustard and smoked paprika. Whisk to incorporate. The mustard gives it a nice kick, while paprika adds a subtle smokiness.

Step 4: Infuse Freshness

Stir in the chopped cilantro and minced garlic. Make sure these are well-distributed throughout the creamy base. The garlic should be prominent but not overpowering.

Step 5: Season to Perfection

Squeeze in the lime juice and sprinkle the salt into the mix. Give it a final stir, ensuring every element is combined well. Taste it—if it needs something more, a touch of salt or an extra squeeze of lime can make it shine.

Step 6: Chill Out

Let the sauce sit in the fridge for at least 30 minutes. This allows the flavors to meld beautifully.

Notes

Here are some tips to ensure success:

  • Fresh Herbs: Always opt for fresh cilantro if you can. The flavor difference is notable.
  • Adjust Garlic: Depending on your palate, you can increase or decrease the garlic. More garlic means more flavor, but it can be strong.
  • Lime Zest: Adding a pinch of lime zest can enhance the tartness and aroma.
  • Consistency: If you prefer a thinner sauce, a little bit of water or extra lime juice can help.
  • Storage: Keep it in an airtight container in the fridge. Use it within a week.
Easy Pollo Tropical Cilantro Garlic Sauce Recipe

Nutrition Information

pollo tropical cilantro garlic sauce recipe nutrition facts

How Do You Store This Sauce?

After whipping up your cilantro garlic sauce, store it in an airtight container. It can last in the refrigerator for about a week. Just make sure to give it a good stir before drizzling on your favorite dishes.

Sides for Pollo Tropical Cilantro Garlic Sauce

Here are a few sides that complement this sauce beautifully:

1. Black Beans: A simple, protein-packed side that adds depth. Cook some black beans with garlic, onion, and cumin for extra flavor.

2. Fried Plantains: Their sweetness contrasts wonderfully with the tang of cilantro garlic sauce. Simply slice the plantains and fry until golden.

3. Mango Salad: Toss fresh mango cubes with diced bell pepper, red onion, and a splash of lime. The sweetness and acidity pair perfectly with your sauce.

What Alternatives Can You Use for the Ingredients?

If you’re missing any ingredients, here are some alternatives:

1. Greek Yogurt: Swap sour cream with Greek yogurt for a tangy twist and added protein.

2. Vegetable Oil: If you’re out of mayonnaise, you can use olive oil instead, though the result will be less creamy.

3. Fresh Lime Juice: In a pinch, use vinegar (like apple cider vinegar) to retain acidity and tanginess.

4. Spinach or Parsley: If cilantro doesn’t appeal to you, chopped spinach or parsley can stand in.

Pollo Tropical Cilantro Garlic Sauce Recipe

Pollo Tropical Cilantro Garlic Sauce Recipe

Tina Cooper
When I think about elevating my dining experience at home, one dish pops to mind: Pollo Tropical with that addictive cilantro garlic sauce.
Prep Time 5 minutes
Cook Time 0 minutes
Total Time 5 minutes
Course Dip
Cuisine Caribbean
Servings 2 Servings
Calories 39 kcal

Equipment

  • Mixing bowl

Ingredients
  

  • 1 tablespoon Dijon mustard
  • 1/4 teaspoon smoked paprika
  • 1 cup rich creamy sour cream
  • 1/2 cup smooth mayonnaise
  • 1/3 cup roughly chopped fresh cilantro leaves and tender stems
  • 2-3 medium garlic cloves
  • 2 tablespoons freshly squeezed lime juice
  • 1/4 teaspoon fine sea salt

Instructions
 

Step 1: Prepare the Ingredients

  • Start by gathering all your ingredients. Chop the cilantro finely to release its fresh oils. Mince or crush the garlic. Having everything prepped makes the next steps speedy.

Step 2: Combine the Base

  • In a mixing bowl, add the sour cream and mayonnaise. These two create the creamy base. Use a whisk to blend them until smooth; no one wants lumps in their sauce.

Step 3: Add Flavor

  • Next, mix in the Dijon mustard and smoked paprika. Whisk to incorporate. The mustard gives it a nice kick, while paprika adds a subtle smokiness.

Step 4: Infuse Freshness

  • Stir in the chopped cilantro and minced garlic. Make sure these are well-distributed throughout the creamy base. The garlic should be prominent but not overpowering.

Step 5: Season to Perfection

  • Squeeze in the lime juice and sprinkle the salt into the mix. Give it a final stir, ensuring every element is combined well. Taste it—if it needs something more, a touch of salt or an extra squeeze of lime can make it shine.

Step 6: Chill Out

  • Let the sauce sit in the fridge for at least 30 minutes. This allows the flavors to meld beautifully.

Notes

Here are some tips to ensure success:
  • Fresh Herbs: Always opt for fresh cilantro if you can. The flavor difference is notable.
  • Adjust Garlic: Depending on your palate, you can increase or decrease the garlic. More garlic means more flavor, but it can be strong.
  • Lime Zest: Adding a pinch of lime zest can enhance the tartness and aroma.
  • Consistency: If you prefer a thinner sauce, a little bit of water or extra lime juice can help.
  • Storage: Keep it in an airtight container in the fridge. Use it within a week.

Nutrition

Calories: 39kcal
Keyword Pollo Tropical Cilantro Garlic Sauce Recipe
Tried this recipe?Let us know how it was!

Frequently Asked Questions

1. Can I use this sauce for other meats?

Absolutely! This sauce works well with grilled shrimp, beef, or even as a topping for tacos.

2. Is this sauce vegan-friendly?

Unfortunately, the recipe as written isn’t vegan due to the sour cream and mayo. However, you can substitute with plant-based versions to make it vegan.

3. Can this sauce be frozen?

It’s not advisable to freeze this sauce. Creamy sauces can change texture when thawed. It’s best enjoyed fresh.

4. What dishes would this be good with besides chicken?

Use it with salads for a dressing, on baked potatoes, or as a dipping sauce for fresh veggies. It’s incredibly versatile!

Conclusion

The Pollo Tropical cilantro garlic sauce is not just a condiment; it’s a flavor experience waiting to happen in your kitchen. With straightforward ingredients and an easy process, this sauce can elevate your meals and surprise your taste buds. Whether you’re dipping, drizzling, or mixing, you’re in for a treat! So gather your ingredients and get ready to taste the vibrant blend of flavors that this sauce brings to your plate. Bon appétit!

You’ll also like these latest recipes!

Abuelo’s Tomatillo Pineapple Salsa Recipe – Yum Yarns

Best Abuelo’s Tomatillo Pineapple Salsa Recipe

When it comes to pairing with Abuelo’s Tomatillo Pineapple Salsa, you have a fantastic array of options. Picture this: you’re having a summer barbecue. Chicken skewers sizzle on the grill, and you can almost taste the juicy delight they’ll bring. Now, imagine a dollop of this salsa over those grilled chicken pieces. Instant flavor explosion!

Fish tacos are another perfect match. The fresh and zesty notes of the salsa balance beautifully with the savory fish. Or, if you’re looking for a lighter option, serve it with tortilla chips. The crunch of the chips combined with the vibrant salsa makes for an irresistible snack during game day or movie night.

Don’t skip the chance to mix this salsa into your favorite salads, too. The cooling effect it provides complements a variety of greens and proteins, creating a burst of taste with each bite.

Best Abuelo’s Tomatillo Pineapple Salsa Recipe

If you’ve ever found yourself at an outdoor gathering, surrounded by laughter and the tantalizing smell of grilled meats, you know how essential a good salsa is to complete that scene. That’s where Abuelo’s Tomatillo Pineapple Salsa steps in.

This isn’t just any salsa; it’s a bright, refreshing combination of sweet and savory that dances on your taste buds. What makes this particular salsa special is its ability to transform anything it touches. Let’s dive deep into this standout recipe that became a summertime staple at our family gatherings.

You will also like the following Delicious recipes!

What is Abuelo’s Tomatillo Pineapple Salsa?

Abuelo’s Tomatillo Pineapple Salsa is a vibrant blend of tomatillos and ripe pineapple, accented by a few staple ingredients. It’s a sweet and tangy salsa that highlights the zesty, slightly tart flavor of tomatillos while the pineapple adds a delightful sweetness.

With a medley of chopped vegetables, including fresh cilantro, onion, and jalapeños, this recipe takes advantage of fresh ingredients and simple steps. Abuelo, or grandfather in Spanish, inspired this dish, reflecting warmth and family tradition through vibrant flavors.

What is the Flavor Profile of This Dish?

Imagine tasting the sunshine wrapped in greens and fruits. The tomatillos provide a pleasantly tart and slightly grassy flavor. Pineapple, on the other hand, brings a burst of sweetness, creating a harmonious contrast.

Cilantro adds a fresh, herbaceous note, while the jalapeños introduce just the right level of heat. The combination of lime juice and honey enhances this dish, offering a perfect balance of acidity and sweetness. Overall, it’s a salsa that awakens your senses and keeps you coming back for more.

Why You’ll Love This

You’ll love this salsa for several reasons. First and foremost, it brings bright flavors to the table. The freshness of the ingredients shines through, making this salsa the ultimate crowd-pleaser.

It’s also incredibly versatile. Serve it with meat, grilled veggies, or as a condiment for tacos, and you’ll be surprised at how it elevates a simple dish.

What’s more, it’s easy to prepare. In less than 20 minutes, you will create a fresh salsa bursting with flavor and color. Don’t forget; it’s healthy! Packed with vitamins and nutrients from fruits and veggies, what’s not to love?

Ingredients

Let’s gather what you need for this salsa. Here’s your shopping list:

  • 1 garlic clove
  • 1 generous handful of fresh cilantro leaves
  • 4-6 oz ripe pineapple, peeled and chopped into bite-sized pieces
  • 1 medium sweet onion, finely diced
  • 8-9 tomatillos, husked, rinsed, and coarsely chopped
  • 1-2 fresh jalapeños, deseeded
  • 1/2 cup diced red bell pepper
  • 2 Tbsp freshly squeezed lime juice
  • 1 tsp sea salt (or more, to taste)
  • 1 tsp raw honey
  • 1/4 tsp smoked paprika
Abuelo’s Tomatillo Pineapple Salsa Recipe

Step-by-Step Instructions

Step 1: Prepare the Ingredients

Start by peeling and dicing the pineapple into bite-sized pieces. Make sure you have fresh ingredients for the best taste. Husk the tomatillos and rinse them under cool water to remove the sticky residue. Chop them coarsely after draining.

Step 2: Chop the Vegetables

Next, finely dice the sweet onion and the red bell pepper. For the jalapeños, you’ll want to remove the seeds to control the heat levels. If you prefer a spicier salsa, feel free to keep them in!

Step 3: Mince the Garlic

Take your garlic clove and mince it finely. This step is crucial, as it helps to distribute the garlic flavor evenly throughout the salsa.

Step 4: Combine the Ingredients

In a large mixing bowl, combine all the chopped ingredients: pineapple, tomatillos, onion, red bell pepper, jalapeños, and minced garlic.

Step 5: Add the Flavorings

Now, add the freshly chopped cilantro, lime juice, sea salt, raw honey, and smoked paprika to the mixture. These elements play a critical role in developing the overall profile.

Step 6: Mix It Up

Using a spoon, gently fold all the ingredients together. Be careful not to mash the pineapple or tomatillos too much—let them keep their shape!

Step 7: Taste and Adjust

Give the salsa a taste. Need a little more sweetness? Add another drizzle of honey. Too tangy? A pinch of salt might do the trick. Adjust according to your preferences.

Step 8: Chill and Enjoy

Let the salsa sit in the refrigerator for at least 30 minutes. This allows the flavors to blend beautifully. Serve chilled, and watch it disappear!

Tips & Tricks

  • Use Fresh Ingredients: The fresher your ingredients, the better the flavor. Visit a local farmer’s market if possible.
  • Adjust the Heat: If you love spice, consider adding diced habaneros instead of jalapeños for more kick.
  • Experiment with Fruits: Don’t be afraid to swap out the pineapple with mango or peach for a fun twist!
  • Blend the Salsa: If you prefer a smoother consistency, pulse all the ingredients in a food processor.
  • Add More Herbs: Fresh mint could add an exciting layer to the flavor. Don’t hesitate to experiment!
Easy Abuelo’s Tomatillo Pineapple Salsa Recipe

Nutrition Information

How Can You Store This Abuelo’s Tomatillo Pineapple Salsa?

Store your salsa in an airtight container in the refrigerator. It’ll last for about 3 to 5 days. As time passes, flavors will deepen, making it even more delicious! If you want to keep it longer, consider freezing it. Just remember to use a freezer-safe container.

What If Some Ingredients Are Not Available?

Don’t worry! Here are some alternatives you can consider:

  • If Tomatillos Are Unavailable: Green tomatoes can serve as a substitute. They won’t provide the same tartness but can contribute a similar texture.
  • In Place of Pineapple: Mango is an excellent alternative if you’re craving sweetness. It adds a tropical flair and exciting texture.
  • No Fresh Cilantro?: Fresh parsley can be used, although its flavor is different. It will still add herbaceous notes to your salsa.
Abuelo’s Tomatillo Pineapple Salsa Recipe

Abuelo’s Tomatillo Pineapple Salsa Recipe

Tina Cooper
If you’ve ever found yourself at an outdoor gathering, surrounded by laughter and the tantalizing smell of grilled meats, you know how essential a good salsa is to complete that scene. That’s where Abuelo’s Tomatillo Pineapple Salsa steps in.
Prep Time 5 minutes
Cook Time 0 minutes
Total Time 5 minutes
Course Salsa
Cuisine American
Servings 8 Servings
Calories 20 kcal

Equipment

  • Large mixing bowl

Ingredients
  

  • 1 garlic clove
  • 1 generous handful of fresh cilantro leaves
  • 4-6 oz ripe pineapple peeled and chopped into bite-sized pieces
  • 1 medium sweet onion finely diced
  • 8-9 tomatillos husked, rinsed, and coarsely chopped
  • 1-2 fresh jalapeños deseeded
  • 1/2 cup diced red bell pepper
  • 2 Tbsp freshly squeezed lime juice
  • 1 tsp sea salt or more, to taste
  • 1 tsp raw honey
  • 1/4 tsp smoked paprika

Instructions
 

Step 1: Prepare the Ingredients

  • Start by peeling and dicing the pineapple into bite-sized pieces. Make sure you have fresh ingredients for the best taste. Husk the tomatillos and rinse them under cool water to remove the sticky residue. Chop them coarsely after draining.

Step 2: Chop the Vegetables

  • Next, finely dice the sweet onion and the red bell pepper. For the jalapeños, you’ll want to remove the seeds to control the heat levels. If you prefer a spicier salsa, feel free to keep them in!

Step 3: Mince the Garlic

  • Take your garlic clove and mince it finely. This step is crucial, as it helps to distribute the garlic flavor evenly throughout the salsa.

Step 4: Combine the Ingredients

  • In a large mixing bowl, combine all the chopped ingredients: pineapple, tomatillos, onion, red bell pepper, jalapeños, and minced garlic.

Step 5: Add the Flavorings

  • Now, add the freshly chopped cilantro, lime juice, sea salt, raw honey, and smoked paprika to the mixture. These elements play a critical role in developing the overall profile.

Step 6: Mix It Up

  • Using a spoon, gently fold all the ingredients together. Be careful not to mash the pineapple or tomatillos too much—let them keep their shape!

Step 7: Taste and Adjust

  • Give the salsa a taste. Need a little more sweetness? Add another drizzle of honey. Too tangy? A pinch of salt might do the trick. Adjust according to your preferences.

Step 8: Chill and Enjoy

  • Let the salsa sit in the refrigerator for at least 30 minutes. This allows the flavors to blend beautifully. Serve chilled, and watch it disappear!

Notes

  • Use Fresh Ingredients: The fresher your ingredients, the better the flavor. Visit a local farmer’s market if possible.
  • Adjust the Heat: If you love spice, consider adding diced habaneros instead of jalapeños for more kick.
  • Experiment with Fruits: Don’t be afraid to swap out the pineapple with mango or peach for a fun twist!
  • Blend the Salsa: If you prefer a smoother consistency, pulse all the ingredients in a food processor.
  • Add More Herbs: Fresh mint could add an exciting layer to the flavor. Don’t hesitate to experiment!

Nutrition

Calories: 20kcal
Keyword Abuelo’s Tomatillo Pineapple Salsa Recipe
Tried this recipe?Let us know how it was!

Frequently Asked Questions

Can I make Abuelo’s Tomatillo Pineapple Salsa in advance?

Absolutely! Making it a day ahead allows the flavors to meld beautifully. Just store it in the refrigerator.

Is this salsa spicy?

It’s relatively mild, especially if you remove the jalapeño seeds. However, you can always adjust the heat by adding more peppers.

What are some good pairing options for this salsa?

Try it on grilled chicken, fish tacos, or fresh tortilla chips. It also works well on top of salads for added flavor.

Can this salsa be canned for longer storage?

While this salsa is fresh and typically not intended for canning due to the raw ingredients, you can adopt proper canning procedures for longer-term preservation. Just remember to check acidity levels!

What if I have leftovers?

Leftovers can be stored in an airtight container once the salsa has sat out. Consume within five days for optimal flavor.

Conclusion

Abuelo’s Tomatillo Pineapple Salsa is more than just a condiment; it’s a celebration of flavors and family traditions. With its balance of sweet and tangy notes, this salsa is perfect for various dishes, making it a versatile addition to your kitchen.

Ready to impress your friends and family? Be prepared for people to ask for this recipe time and again! As you savor each bite, let it whisk you back to joyful gatherings, reminding you that great food and good company go hand in hand.

So fire up the grill, grab your chips, and get ready to dig in! This salsa is made for sharing, and trust me, it won’t last long once you introduce it to your table.

You’ll also like these latest recipes!

Chuy’s Jalapeno Ranch Recipe – Yum Yarns

Best Chuy’s Jalapeno Ranch Recipe

Let me tell you a little story. Several summers ago, I was at a close friend’s BBQ, and there it was: a bowl of the infamous Chuy’s Jalapeño Ranch. Sitting on the table, it was the star of the show. Dipping crunchy tortilla chips felt like indulging in a divine experience. It was tangy, zesty, and just spicy enough to get my taste buds dancing! I knew I had to replicate that experience at home.

What I discovered in the process was more than just a simple recipe; it was an invitation to create something that brings people together. So, grab your apron and let’s dive deep into the culinary world of Chuy’s Jalapeño Ranch—there’s much to explore!

Best Chuy’s Jalapeno Ranch Recipe

What is Chuy’s Jalapeño Ranch?

Chuy’s Jalapeño Ranch is a creamy, zesty dip that originates from the popular Tex-Mex restaurant chain, Chuy’s. It’s a tantalizing blend of ranch dressing and the fiery kick of jalapeños, perfect for spicing up your salads, tacos, or even chips. It’s not just a dip; it’s a gathering point. People will huddle around it at parties, all eager to load up their plates. The combination of ranch dressing with the kick of jalapeño creates an irresistible flavor that you’ll want to drizzle over everything.

You will also like the following Appetizer recipes!

Why You’ll Love This Chuy’s Jalapeño Ranch Recipe

If you’re questioning whether to invest time in this recipe, let me assure you: it’s a game changer. Here’s why:

  • Easy to Make: With just a handful of ingredients, you can whip this up in no time.
  • Versatile Use: Use it as a salad dressing, a dip for your snacks, or a sauce for grilled meats.
  • Customizable Spice Levels: If you prefer mild flavors, you can adjust the spice to suit your palate.
  • Crowd-Pleasing Flavor: This dip is always a hit at gatherings. Nothing sparks joy quite like food people love!
  • Great for Meal Prep: You can make it ahead of time and store it for later use, which is a win for busy folks.

By now, you might be feeling your interest piqued. Let’s take a closer look at the ingredients that make this recipe a standout.

The Ingredients

For this delectable dip, you’ll need:

  • 1 cup creamy sour cream – This adds the perfect texture and tanginess.
  • 1 cup creamy mayonnaise – The base that provides richness.
  • 5 tablespoons ranch seasoning blend (dry mix) – Essential for that classic ranch flavor.
  • 2 tablespoons freshly squeezed lime juice – Adds a refreshing zesty note.
  • ½ cup freshly chopped cilantro leaves – A burst of freshness and color.
  • 3 fire-roasted jalapeños, deseeded (optional) – For those who crave a little heat.
  • 1 teaspoon smoked paprika – Gives a subtle smokiness.
  • 1 tablespoon pickled jalapeño brine – Extra flavor without additional heat.
  • 1 teaspoon garlic fine powder – A flavor enhancer that’s hard to resist.
  • 1 teaspoon onion granules – Complementing the ranch taste.
  • 1 teaspoon Slap Ya Mama Cajun seasoning – For a little extra kick.
  • ½ teaspoon freshly ground black pepper – The finishing touch for seasoning.

With everything ready, we can roll up our sleeves and get into the fun part—the preparation!

Chuy’s Jalapeno Ranch Recipe

Step by Step Instructions

Step 1: Gather Your Ingredients

Before cooking begins, gather all of your components. This sets the stage and makes the process smooth. You’ll need a mixing bowl, a whisk, and a spatula.

Step 2: Mix the Creamy Base

Start by adding the sour cream and mayonnaise to your mixing bowl. I usually grab my whisk and whip them together until these two are perfectly blended. You should see a smooth, creamy mixture that’s begging for the good stuff to come next.

Step 3: Incorporate the Seasonings

Next, it’s time to bring in the flavors. Add in the ranch seasoning blend, smoked paprika, garlic powder, onion granules, Slap Ya Mama seasoning, and freshly ground black pepper. This step is crucial, as these spices create the flavor foundation.

Step 4: Add the Zest

Pour in the freshly squeezed lime juice. The acidity brightens up the ranch dressing, adding a lovely zest that complements the creamy ingredients.

Step 5: Bring on the Heat

If you’re adventurous and want that fiery kick, chop up the fire-roasted jalapeños and toss them into the mix. If you aim for a milder dip, feel free to skip this step. Trust me, it’ll still be amazing!

Step 6: Stir in the Freshness

Chop up the cilantro leaves and fold them in gently. This gives your dip a fresh, herby quality that makes it pop.

Step 7: Adjust to Taste

Now it’s time for a taste test! Give the dip a little stir and see if you want to add more lime juice or seasoning. This is your chance to be the maestro and balance the flavors to your liking.

Step 8: Chill Out

Cover the mixing bowl with plastic wrap or transfer your dip to an airtight container. It’s best to let it chill in the fridge for at least an hour. This allows the flavors to meld together and brings out the best in every ingredient.

Step 9: Serve!

Finally, it’s time to unveil your creation! Serve your Chuy’s Jalapeño Ranch with chips, fresh veggies, or use it as a dressing over salads or grilled meats.

Tips & Tricks

While the recipe is pretty foolproof, here are some extra bits of advice to elevate your dip-making game:

  • Fresh Ingredients: Use fresh herbs whenever possible. It makes a significant difference in flavor.
  • Chill Time: Don’t rush the chilling process. Letting the dip sit enhances the flavor.
  • Customize Consistency: If you prefer a thinner dip, mix in a splash of buttermilk or milk until you reach your desired creaminess.
  • Storage Tips: Keep it in an airtight container to maintain freshness. It will last about 4 to 5 days.
  • Use Leftovers Creatively: If you have leftovers, think about drizzling it on burgers or using it as a salad dressing.
Easy Chuy’s Jalapeno Ranch Recipe

Nutrition Information

Can I Store Chuy’s Jalapeño Ranch?

Absolutely! This dip is perfect for making in advance. Just store it in an airtight container in the refrigerator. It can last about four to five days, but trust me, it won’t last that long once friends and family get involved!

What Can I Serve with Chuy’s Jalapeño Ranch Recipe?

The options here are vast! Here are a few delicious ideas:

  • Crunchy Tortilla Chips: The classic companion for a reason!
  • Fresh Veggies: Carrot sticks, bell pepper strips, or cucumber slices for those who prefer a healthier approach.
  • Salads: Drizzle it over any salad for that extra kick.
  • Grilled Meats: Perfect as a sauce for chicken or steak.
  • Sandwiches or Wraps: Add a generous layer to elevate your lunch game!

Variations

Feeling adventurous? Here are some creative variations to consider:

  • Avocado Jalapeño Ranch: Add ripe avocados for a creamy twist and even more depth of flavor.
  • Spicy Chipotle Ranch: Incorporate chipotle peppers in adobo sauce for that smoky heat.
  • Vegan Version: Substitute the sour cream and mayonnaise with dairy-free alternatives for a plant-based treat.
  • Herbed Jalapeño Ranch: Toss in a mix of other herbs like dill and parsley for additional freshness.
  • Greek Yogurt Jalapeño Ranch: Swap out sour cream for Greek yogurt to add protein and a bit of tartness.
Chuy’s Jalapeno Ranch Recipe

Chuy’s Jalapeno Ranch Recipe

Tina Cooper
Let me tell you a little story. Several summers ago, I was at a close friend’s BBQ, and there it was: a bowl of the infamous Chuy’s Jalapeño Ranch. 
Prep Time 20 minutes
Cook Time 10 minutes
Total Time 30 minutes
Course Appetizer
Cuisine Mexican
Servings 8 Servings
Calories 279 kcal

Equipment

  • Mixing bowl
  • Whisk
  • Spatula

Ingredients
  

  • 1 cup creamy sour cream
  • 1 cup creamy mayonnaise
  • 5 tablespoons ranch seasoning blend dry mix
  • 2 tablespoons freshly squeezed lime juice
  • ½ cup freshly chopped cilantro leaves
  • 3 fire-roasted jalapeños deseeded (optional)
  • 1 teaspoon smoked paprika
  • 1 tablespoon pickled jalapeño brine
  • 1 teaspoon garlic fined powder
  • 1 teaspoon onion granules
  • 1 teaspoon Slap Ya Mama Cajun seasoning
  • ½ teaspoon freshly ground black pepper

Instructions
 

Step 1: Gather Your Ingredients

  • Before cooking begins, gather all of your components. This sets the stage and makes the process smooth. You’ll need a mixing bowl, a whisk, and a spatula.

Step 2: Mix the Creamy Base

  • Start by adding the sour cream and mayonnaise to your mixing bowl. I usually grab my whisk and whip them together until these two are perfectly blended. You should see a smooth, creamy mixture that’s begging for the good stuff to come next.

Step 3: Incorporate the Seasonings

  • Next, it’s time to bring in the flavors. Add in the ranch seasoning blend, smoked paprika, garlic powder, onion granules, Slap Ya Mama seasoning, and freshly ground black pepper. This step is crucial, as these spices create the flavor foundation.

Step 4: Add the Zest

  • Pour in the freshly squeezed lime juice. The acidity brightens up the ranch dressing, adding a lovely zest that complements the creamy ingredients.

Step 5: Bring on the Heat

  • If you’re adventurous and want that fiery kick, chop up the fire-roasted jalapeños and toss them into the mix. If you aim for a milder dip, feel free to skip this step. Trust me, it’ll still be amazing!

Step 6: Stir in the Freshness

  • Chop up the cilantro leaves and fold them in gently. This gives your dip a fresh, herby quality that makes it pop.

Step 7: Adjust to Taste

  • Now it’s time for a taste test! Give the dip a little stir and see if you want to add more lime juice or seasoning. This is your chance to be the maestro and balance the flavors to your liking.

Step 8: Chill Out

  • Cover the mixing bowl with plastic wrap or transfer your dip to an airtight container. It’s best to let it chill in the fridge for at least an hour. This allows the flavors to meld together and brings out the best in every ingredient.

Step 9: Serve!

  • Finally, it’s time to unveil your creation! Serve your Chuy’s Jalapeño Ranch with chips, fresh veggies, or use it as a dressing over salads or grilled meats.

Notes

While the recipe is pretty foolproof, here are some extra bits of advice to elevate your dip-making game:
  • Fresh Ingredients: Use fresh herbs whenever possible. It makes a significant difference in flavor.
  • Chill Time: Don’t rush the chilling process. Letting the dip sit enhances the flavor.
  • Customize Consistency: If you prefer a thinner dip, mix in a splash of buttermilk or milk until you reach your desired creaminess.
  • Storage Tips: Keep it in an airtight container to maintain freshness. It will last about 4 to 5 days.
  • Use Leftovers Creatively: If you have leftovers, think about drizzling it on burgers or using it as a salad dressing.

Nutrition

Calories: 279kcal
Keyword Chuy’s Jalapeno Ranch Recipe
Tried this recipe?Let us know how it was!

Frequently Asked Questions

Can I use fresh jalapeños instead of roasted ones?

Yes, you can! Fresh jalapeños will add a different kind of heat and flavor. Just be sure to adjust the quantity to suit your taste.

What is Slap Ya Mama seasoning?

Slap Ya Mama is a Cajun seasoning brand that packs a punch of flavor. If you don’t have it, any Cajun or Creole seasoning will work just fine.

Can I make this recipe ahead of time?

Definitely! This dip is perfect for preparing in advance. Making it a day ahead allows the flavors to meld beautifully.

Is this dip gluten-free?

Yes, all of the ingredients listed are gluten-free, making it a safe choice for those with gluten sensitivities.

How spicy is this ranch dip?

The heat level can vary based on how many jalapeños you use and whether you include the seeds. For a milder option, deseed the jalapeños and reduce their quantity.

Conclusion

Creating Chuy’s Jalapeño Ranch at home is not just about crafting a tasty dip. It’s about bringing people together, sharing moments, and enjoying good food with great company. The recipe is simple, versatile, and delightful—perfect for any event or just a cozy night in. So, what are you waiting for? Head to the kitchen and let the flavors of Chuy’s Jalapeño Ranch ignite your culinary creativity!

You’ll also like these latest recipes!

Original texas roadhouse blue cheese dressing recipe – Yum Yarns

Best Original texas roadhouse blue cheese dressing recipe

Before diving into our blue cheese dressing adventure, let’s explore some delicious pairings. Imagine crisp, cool veggies dipped in a creamy, tangy dressing. Or, how about a juicy steak dressed to the nines with this blue cheese masterpiece? Chicken wings? Check. Cobb salad? Absolutely. Even delightful pasta salads can get a flavor boost with this dressing. It’s versatile and works wonders across the board.

Best Original texas roadhouse blue cheese dressing recipe

Today, we’re unraveling a culinary delight—Texas Roadhouse Blue Cheese Dressing. This isn’t just any ordinary recipe. It’s a special treat that brings a restaurant-quality flavor right to your kitchen. Ready to roll up your sleeves and create something unforgettable? Of course, you are!

What is Original Texas Roadhouse Blue Cheese Dressing?

This recipe is your ticket to creamy heaven. Texas Roadhouse is renowned for its blue cheese dressing, and with good reason. It’s flavorful, rich, and adds that perfect touch to so many dishes. We’re about to dig into the secrets that make this dressing oh-so-delicious. Stick around!

What is the Flavor Profile of This Dish?

Oh, where to start? The moment this dressing hits your palate, expect a burst of bold flavors. The strong, tangy, and somewhat salty taste of the Roquefort cheese pairs beautifully with the creamy base. A touch of garlic and onion powder adds depth, while fresh chives and lemon juice brighten up the flavor. It’s a balance of creaminess, tanginess, and a hint of spice.

You will also like the following Side Dish recipes!

Why You’ll Love This?

Why stick with ordinary when you can have extraordinary? This dressing is:

  • Versatile: Slather it on steaks, drizzle it on salads, or use it as a dip.
  • Homemade Goodness: No preservatives, just pure flavors.
  • Easy to Prepare: Even kitchen novices can whip this up effortlessly.
  • Showstopper: For get-togethers, this dressing will have guests licking their plates.

Ingredients

Here’s what you need to create this crowd-pleaser:

  • 8 ounces of crumbled Roquefort cheese
  • 1 teaspoon of finely milled onion powder
  • 1 teaspoon of aromatic garlic powder
  • 3 tablespoons of creamy mayonnaise
  • 3 tablespoons of tangy sour cream
  • 1 tablespoon of granulated sugar
  • 1 tablespoon of finely chopped fresh chives
  • 1 teaspoon of fresh lemon juice
  • White wine vinegar to taste
  • Buttermilk as needed to adjust consistency
  • A pinch of coarse kosher salt
  • A pinch of freshly ground black pepper
Original texas roadhouse blue cheese dressing recipe

Step-by-Step Instructions

Let’s get started!

Step 1: Combine the Basics

In a medium bowl, mix the mayonnaise, sour cream, and lemon juice together. This will be our creamy base.

Step 2: Add the Powders

Stir in the onion powder, garlic powder, and sugar. These elements add essential flavor notes that balance the dressing.

Step 3: Cheese Time

Fold in the crumbled Roquefort cheese. Make sure it’s evenly distributed for maximum flavor in every bite.

Step 4: Herbs and Spices

Sprinkle in the chopped fresh chives, coarse kosher salt, and black pepper. Stir again to combine all ingredients thoroughly.

Step 5: Adjust the Tang

Add white wine vinegar to taste. This will enhance the tanginess, bringing out the blue cheese’s character.

Step 6: Perfect Consistency

Finally, pour in buttermilk bit by bit, stirring constantly. You want a thick but pourable consistency. Adjust until you reach the desired texture.

Tips & Tricks

Here are some pointers to make sure your blue cheese dressing is the best in town:

  • Use Fresh Ingredients: Fresh lemon juice and chives make a world of difference.
  • Quality Cheese: The better the blue cheese, the richer the flavor.
  • Consistency Check: A little buttermilk goes a long way. Don’t overdo it!
  • Balance the Flavors: Taste as you go. Make sure the tanginess, saltiness, and creaminess are balanced.
  • Chill Time: Let the dressing sit in the fridge for at least an hour before serving. This allows the flavors to meld together beautifully.
Easy Original texas roadhouse blue cheese dressing recipe

Nutrition Information

How Can You Store This Texas Roadhouse Blue Cheese Dressing?

Storing this dressing is a breeze. Pour it into an airtight container and keep it in the fridge. It should stay fresh for about a week. Always give it a quick stir before using, just to mix any settled ingredients.

If Some Ingredients Are Not Available in Your Pantry, What Are Some Alternative Choices You Can Consider?

Whether the stores are out or you’re looking for personal tweaks, here are some handy alternatives:

  • Roquefort Cheese Substitute: Opt for Gorgonzola or Danish Blue if Roquefort isn’t available. Both provide a similar depth of flavor.
  • Buttermilk Substitute: Out of buttermilk? Mix regular milk with a tablespoon of vinegar or lemon juice. Let it sit for 5 minutes and you’re good to go.
  • White Wine Vinegar Substitute: Apple cider vinegar or rice vinegar can work in a pinch. They provide similar acidity and tang.
Original texas roadhouse blue cheese dressing recipe

Original texas roadhouse blue cheese dressing recipe

Tina Cooper
Today, we’re unraveling a culinary delight—Texas Roadhouse Blue Cheese Dressing. This isn’t just any ordinary recipe.
Prep Time 10 minutes
Cook Time 15 minutes
Total Time 25 minutes
Course Side Dish
Cuisine American
Servings 2 Servings
Calories 93 kcal

Equipment

  • Medium bowl
  • Stirring utensil 

Ingredients
  

  • 8 ounces of crumbled Roquefort cheese
  • 1 teaspoon of finely milled onion powder
  • 1 teaspoon of aromatic garlic powder
  • 3 tablespoons of creamy mayonnaise
  • 3 tablespoons of tangy sour cream
  • 1 tablespoon of granulated sugar
  • 1 tablespoon of finely chopped fresh chives
  • 1 teaspoon of fresh lemon juice
  • White wine vinegar to taste
  • Buttermilk as needed to adjust consistency
  • A pinch of coarse kosher salt
  • A pinch of freshly ground black pepper

Instructions
 

Step 1: Combine the Basics

  • In a medium bowl, mix the mayonnaise, sour cream, and lemon juice together. This will be our creamy base.

Step 2: Add the Powders

  • Stir in the onion powder, garlic powder, and sugar. These elements add essential flavor notes that balance the dressing.

Step 3: Cheese Time

  • Fold in the crumbled Roquefort cheese. Make sure it’s evenly distributed for maximum flavor in every bite.

Step 4: Herbs and Spices

  • Sprinkle in the chopped fresh chives, coarse kosher salt, and black pepper. Stir again to combine all ingredients thoroughly.

Step 5: Adjust the Tang

  • Add white wine vinegar to taste. This will enhance the tanginess, bringing out the blue cheese’s character.

Step 6: Perfect Consistency

  • Finally, pour in buttermilk bit by bit, stirring constantly. You want a thick but pourable consistency. Adjust until you reach the desired texture.

Notes

Here are some pointers to make sure your blue cheese dressing is the best in town:
  • Use Fresh Ingredients: Fresh lemon juice and chives make a world of difference.
  • Quality Cheese: The better the blue cheese, the richer the flavor.
  • Consistency Check: A little buttermilk goes a long way. Don’t overdo it!
  • Balance the Flavors: Taste as you go. Make sure the tanginess, saltiness, and creaminess are balanced.
  • Chill Time: Let the dressing sit in the fridge for at least an hour before serving. This allows the flavors to meld together beautifully.

Nutrition

Calories: 93kcal
Keyword Original texas roadhouse blue cheese dressing recipe
Tried this recipe?Let us know how it was!

Frequently Asked Questions

1. Can I make this dressing vegan?

Yes, you can. Use vegan mayo and sour cream. Swap out the blue cheese for a vegan cheese that has a similar flavor profile.

2. How long does this dressing last?

In the fridge, it can last up to a week in an airtight container. Always check for any changes in smell or consistency before using it.

3. Is it gluten-free?

Yes, all the ingredients listed are naturally gluten-free. Just make sure any substitutes you use are also gluten-free.

4. Can I freeze the dressing?

It’s not recommended. Freezing can alter the texture and flavor. Stick to refrigeration for the best results.

5. Can I use this as a marinade?

Absolutely! It adds a flavorful punch to chicken or steak. Just coat and let it sit in the fridge for a couple of hours before cooking.

Conclusion

There you have it, folks! You’re now equipped with everything you need to create the famous Texas Roadhouse Blue Cheese Dressing at home. This recipe adds a gourmet touch to countless dishes, and trust me, you’ll want to put it on everything. So, grab those ingredients and get mixing. Your taste buds are in for a treat!

Now, I’d love to hear from you. Have you tried making this recipe? What did you pair it with? Drop your comments below and let’s get chatting!

You’ll also like these latest recipes!

Harold’s mild sauce recipe – Yum Yarns

Best Harold’s mild sauce recipe

Ah, Harold’s mild sauce. The very name invokes images of sticky-fingered joy and deliciously messy tables. It’s a versatile condiment, a crowd-pleaser, if you will. You can slather it on grilled chicken, drizzle it over pulled pork, or even use it as a dipping sauce for crispy fried shrimp. 

This flavor-bomber can also elevate your veggie game—think roasted cauliflower or sweet potato wedges. In our household, Sunday BBQs aren’t complete without a generous drenching of this tangy, sweet nectar.

Best Harold’s mild sauce recipe

Why do I adore Harold’s mild sauce? Let me count the ways. For one, it has that quintessential “come-back-for-more” quality. It dances between sweet, tangy, and just a hint of spicy, creating an irresistible flavor profile. Plus, it’s surprisingly easy to whip up. You don’t need to be a culinary wizard to get this right—you just need a bit of patience and the right ingredients.

I first stumbled upon this gem during a family BBQ. My uncle, the family’s BBQ maestro, pulled out a mason jar filled with this promisingly amber sauce. Once I dipped a crispy chicken wing into it, I was hooked. Over the years, I’ve tinkered with the recipe, adding a dash of this and a pinch of that until it became something truly special. Now, I want you to experience the joy of Harold’s mild sauce in your own kitchen.

Ingredients: The Backbone of Great Sauce

When crafting any recipe, what goes into your pot is just as crucial as how you put it all together. So let’s chat about the stars of this show—each ingredient has its own part to play.

  • 1 Cup BBQ Sauce: This forms the base, providing the smoky, tangy foundation.
  • 1 Cup Water: Helps to thin the sauce to the perfect consistency.
  • 1/2 Cup Dark Brown Sugar: Adds that deep, molasses-like sweetness.
  • 1/2 Cup Tomato Ketchup: Offers tanginess and a vibrant red color.
  • 1 Tbsp Dijon Mustard: Inserts a subtle, sharp zing.
  • 1 Tbsp Worcestershire Sauce: Delivers umami richness.
  • 1/2 Tbsp Apple Cider Vinegar: Provides a refreshing tartness.
  • 1 Tbsp Onion Powder: Infuses savory depth.
  • 1 Tbsp Garlic Powder: Enhances the aromatics.
  • 1 Tsp Smoked Paprika: Grants a smoky, earthy layer.
  • 1 Tsp White Pepper: Just a whisper of heat.
  • 3 Tbsp Spicy Hot Sauce: Adds the final, fiery kick.
  • Salt to Taste: Balances and enhances all the flavors.
Harold’s mild sauce recipe

How to Make Harold’s Mild Sauce 

Putting this sauce together is like conducting a symphony (there’s that metaphor creeping in), where each ingredient plays its unique note. Let’s break it down step by step.

Step 1: Combine Liquid Ingredients

Start with a medium saucepan over medium heat. Pour in the BBQ sauce and water, stirring until well combined. The liquid base needs to meld together for a smooth consistency.

Step 2: Mix in the Sweetness and Tang

Next, add the dark brown sugar and tomato ketchup. Keep stirring until the sugar is fully dissolved. This melting pot of flavors starts to shape the sauce’s core.

Step 3: Introduce the Zing and Umami

Add the Dijon mustard and Worcestershire sauce. These two ingredients will give the sauce its characteristic tang and umami richness. Stir continuously.

Step 4: Infuse the Aromatics

Toss in the onion powder, garlic powder, and smoked paprika. These spices will permeate the sauce, offering layers of depth. Make sure every bit dissolves, leaving no clumps.

Step 5: Final Seasoning and Heat Level

Gradually mix in the spicy hot sauce and white pepper. For those who prefer more heat, feel free to experiment with this step. Don’t forget the salt—add it in small increments, tasting as you go until it’s just right.

Step 6: Simmer to Perfection

Lower the heat and let the sauce simmer for about 20 minutes, stirring occasionally. This allows all the ingredients to fully meld, resulting in a well-rounded, flavorful sauce. Once it’s done, let it cool before storing it in an airtight jar.

Recipe Notes

Each ingredient in Harold’s mild sauce brings a specific note to the melody of flavors.

  • BBQ Sauce: Acts as the foundational base, offering a balanced mix of tangy and smoky notes.
  • Water: Essential for achieving the right consistency, preventing the sauce from being too thick or too runny.
  • Dark Brown Sugar: Adds a molasses-like sweetness that offsets the tanginess.
  • Tomato Ketchup: Introduces a rich tang and vibrant color.
  • Dijon Mustard: Provides a sharp, piquant zing that cuts through the sweetness.
  • Worcestershire Sauce: Adds a depth of umami, enhancing the overall flavor.
  • Apple Cider Vinegar: Balances the scales with its refreshing acidity.
  • Onion and Garlic Powder: Infuse savory, aromatic undertones.
  • Smoked Paprika: Grants an earthy, smoky depth.
  • White Pepper: Offers a subtler heat compared to black pepper.
  • Spicy Hot Sauce: Finalizes the sauce with a kick of heat.
  • Salt: Sharpens and heightens all the flavors without overpowering.
Easy Harold’s mild sauce recipe

Recipe Variations

Experimenting with Harold’s mild sauce can be quite rewarding. Here are some tweaks you can try:

  • Citrusy Twist: Swap apple cider vinegar with lemon juice for a citrusy tang.
  • Sweeter Note: Add a tablespoon of honey for a unique sweet overlay.
  • Extra Spice: Toss in an additional teaspoon of cayenne pepper if you crave more heat.
  • Smokier Depth: Use liquid smoke instead of smoked paprika for an intense smoky flavor.

Nutrition Information

Harold’s mild sauce recipe

Harold’s mild sauce recipe

Tina Cooper
Why do I adore Harold’s mild sauce? Let me count the ways. For one, it has that quintessential “come-back-for-more” quality.
Prep Time 5 minutes
Cook Time 10 minutes
Total Time 15 minutes
Course Sauce
Cuisine American
Servings 6 Servings
Calories 65 kcal

Equipment

  • Medium saucepan

Ingredients
  

  • 1 Cup BBQ Sauce
  • 1 Cup Water
  • 1/2 Cup Dark Brown Sugar
  • 1/2 Cup Tomato Ketchup
  • 1 Tbsp Dijon Mustard
  • 1 Tbsp Worcestershire Sauce
  • 1/2 Tbsp Apple Cider Vinegar
  • 1 Tbsp Onion Powder
  • 1 Tbsp Garlic Powder
  • 1 Tsp Smoked Paprika
  • 1 Tsp White Pepper
  • 3 Tbsp Spicy Hot Sauce
  • Salt to Taste

Instructions
 

  • Putting this sauce together is like conducting a symphony (there’s that metaphor creeping in), where each ingredient plays its unique note. Let’s break it down step by step.

Step 1: Combine Liquid Ingredients

  • Start with a medium saucepan over medium heat. Pour in the BBQ sauce and water, stirring until well combined. The liquid base needs to meld together for a smooth consistency.

Step 2: Mix in the Sweetness and Tang

  • Next, add the dark brown sugar and tomato ketchup. Keep stirring until the sugar is fully dissolved. This melting pot of flavors starts to shape the sauce’s core.

Step 3: Introduce the Zing and Umami

  • Add the Dijon mustard and Worcestershire sauce. These two ingredients will give the sauce its characteristic tang and umami richness. Stir continuously.

Step 4: Infuse the Aromatics

  • Toss in the onion powder, garlic powder, and smoked paprika. These spices will permeate the sauce, offering layers of depth. Make sure every bit dissolves, leaving no clumps.

Step 5: Final Seasoning and Heat Level

  • Gradually mix in the spicy hot sauce and white pepper. For those who prefer more heat, feel free to experiment with this step. Don’t forget the salt—add it in small increments, tasting as you go until it’s just right.

Step 6: Simmer to Perfection

  • Lower the heat and let the sauce simmer for about 20 minutes, stirring occasionally. This allows all the ingredients to fully meld, resulting in a well-rounded, flavorful sauce. Once it’s done, let it cool before storing it in an airtight jar.

Notes

Each ingredient in Harold’s mild sauce brings a specific note to the melody of flavors.
  • BBQ Sauce: Acts as the foundational base, offering a balanced mix of tangy and smoky notes.
  • Water: Essential for achieving the right consistency, preventing the sauce from being too thick or too runny.
  • Dark Brown Sugar: Adds a molasses-like sweetness that offsets the tanginess.
  • Tomato Ketchup: Introduces a rich tang and vibrant color.
  • Dijon Mustard: Provides a sharp, piquant zing that cuts through the sweetness.
  • Worcestershire Sauce: Adds a depth of umami, enhancing the overall flavor.
  • Apple Cider Vinegar: Balances the scales with its refreshing acidity.
  • Onion and Garlic Powder: Infuse savory, aromatic undertones.
  • Smoked Paprika: Grants an earthy, smoky depth.
  • White Pepper: Offers a subtler heat compared to black pepper.
  • Spicy Hot Sauce: Finalizes the sauce with a kick of heat.
  • Salt: Sharpens and heightens all the flavors without overpowering.

Nutrition

Calories: 65kcal
Keyword Harold’s mild sauce recipe
Tried this recipe?Let us know how it was!

Frequently Asked Questions

Can I store Harold’s mild sauce?

Absolutely. Once the sauce has cooled, transfer it to an airtight jar. It can be refrigerated for up to two weeks.

How can I make the sauce less spicy?

To tone down the heat, reduce the amount of spicy hot sauce and white pepper. You can even omit them altogether if you prefer a purely sweet and tangy profile.

Can I use this sauce as a marinade?

Certainly! Harold’s mild sauce works wonderfully as a marinade for chicken, ribs, and even tofu. Just let your proteins soak in the sauce for a few hours before cooking.

Is there a vegan version of this sauce?

Yes! Substitute Worcestershire sauce with a vegan alternative. Most other ingredients are already plant-based.

Can I freeze the sauce?

Yes, you can. Pour the completely cooled sauce into freezer-safe containers, leaving some space for expansion. It keeps well for up to three months.

What if my sauce turns out too thick?

If your sauce is too thick, simply add a bit more water, a tablespoon at a time, until you reach the desired consistency.

Conclusion

Now you have a full-proof guide to creating Harold’s mild sauce. This recipe is more than just a set of instructions; it’s a gateway to culinary delight. Whether you’re hosting a big family BBQ or simply looking to elevate your mid-week dinner, this sauce is a must-try. Remember, cooking is an adventure. Feel free to tweak, experiment, and most importantly, enjoy the process and the delicious rewards that come with it.

You’ll also like these latest recipes!

Copycat texas roadhouse caesar dressing – Yum Yarns

Best texas roadhouse caesar dressing

Now, before we dive into the nitty-gritty, let’s talk about pairings. This thick, creamy Caesar dressing is the perfect match for crispy Romaine lettuce, croutons, and freshly shaved Parmesan. 

But don’t stop there! Think grilled chicken strips, crispy bacon bits, or even a blackened salmon filet. It’s versatile enough for pasta salads or as a dip for veggies and breadsticks.

Best texas roadhouse caesar dressing

Would you believe I wrote this piece while craving something tangy, creamy, and downright irresistible? I bet you’re here because you’ve also had that mouthwatering Caesar dressing from Texas Roadhouse. Well, you’re in luck, because today we’re tackling the art of recreating it at home.

What is Copycat Texas Roadhouse Caesar Dressing?

Simply put, it’s our home-chef attempt at cloning that velvety, savory Caesar dressing we all have come to adore. Think of it as giving you that restaurant-quality flavor, but with the ease and convenience of your own kitchen.

What is the Flavor Profile of This Dish?

Let’s talk about flavors. This Caesar dressing balances creamy mayonnaise with a subtle tang from the buttermilk and a zing from freshly squeezed lemon juice. 

Garlic offers a punch, while the Parmesan brings that umami depth. The smoked paprika and ranch seasoning add layers that make each bite a little symphony of deliciousness.

What Makes This Recipe Different From Other Copycat Texas Roadhouse Caesar Dressings?

What sets this recipe apart is its authenticity. While other recipes might take shortcuts or skip key ingredients, our ingredients list brings you as close to the original as you can get without hopping in your car and heading to the restaurant.

Ingredients You’ll Need

  • 1/4 cup tangy buttermilk
  • 1/4 cup strong Italian dressing
  • 1 tablespoon fresh lemon juice
  • 1/2 cup finely shredded Parmesan cheese
  • 1 teaspoon garlic pepper blend
  • 1/2 cup creamy mayonnaise
  • 1 packet (2 tablespoons) of zesty Ranch seasoning mix
  • 1/2 teaspoon smoked paprika
  • 1 clove minced fresh garlic (or 1/8 teaspoon garlic powder)
Copycat texas roadhouse caesar dressing

Step-by-Step Directions

Step 1: Gather Your Ingredients

First, make sure you have everything on hand. Gather all the ingredients on your countertop for easy access. Trust me, it makes a difference.

Step 2: Blend the Base Ingredients

In a medium-sized bowl, combine the mayonnaise, buttermilk, and Italian dressing. Whisk until well integrated and smooth.

Step 3: Add the Seasonings

Throw in the ranch seasoning mix, fresh lemon juice, smoked paprika, and minced garlic. Stir until the mix is even, ensuring each spoonful gets an equal share of flavor.

Step 4: Incorporate the Parmesan Cheese

Gradually fold in the finely shredded Parmesan cheese. Mix until the cheese is fully absorbed into the creamy base.

Step 5: Season to Taste

Taste-test your dressing. If it needs more kick, add a touch more garlic pepper blend. Adjust the seasoning until it hits just right.

Step 6: Chill and Serve

Transfer your dressing to a jar or an airtight container and let it chill in the fridge for at least 30 minutes. This step is crucial as it lets the flavors meld together beautifully.

Tips on Making Copycat Texas Roadhouse Caesar Dressing

  • Use Fresh Ingredients: Fresh lemon juice and minced garlic make a substantial difference.
  • Quality Parmesan: Go for high-quality Parmesan cheese for that authentic bite.
  • Consistent Mixing: Whisk consistently for a smooth, homogenized dressing.
  • Refrigerate Before Serving: Letting it sit in the fridge enhances the flavor, making each bite perfection.
  • Adjust the Seasonings: Make it your own by tweaking the garlic or paprika according to your taste.
Easy texas roadhouse caesar dressing

Nutrition Information

How Can I Store This Copycat Texas Roadhouse Caesar Dressing?

Storage is easy-peasy. Pour your dressing into a tightly sealed jar and pop it in the fridge. It’ll stay good for up to a week. Perfect for making ahead of time!

Substitute Options for Ingredients

In case you’re missing something from the ingredient list, here are some swaps:

  • Buttermilk: Greek yogurt mixed with a splash of milk can mimic the tang and creaminess.
  • Italian dressing: Balsamic vinegar mixed with olive oil can offer a robust punch.
  • Parmesan cheese: Grana Padano or Pecorino Romano will bring similar umami flavors.
  • Garlic pepper blend: Plain garlic powder with a pinch of black pepper will do the trick.
Copycat texas roadhouse caesar dressing

Copycat texas roadhouse caesar dressing

Tina Cooper
Would you believe I wrote this piece while craving something tangy, creamy, and downright irresistible? I bet you’re here because you’ve also had that mouthwatering Caesar dressing from Texas Roadhouse. 
Prep Time 5 minutes
Cook Time 0 minutes
Total Time 5 minutes
Course Salad
Cuisine American
Servings 4 Servings
Calories 440 kcal

Equipment

  • Medium-sized bowl
  • Whisk
  • Jar or airtight container

Ingredients
  

  • 1/4 cup tangy buttermilk
  • 1/4 cup strong Italian dressing
  • 1 tablespoon fresh lemon juice
  • 1/2 cup finely shredded Parmesan cheese
  • 1 teaspoon garlic pepper blend
  • 1/2 cup creamy mayonnaise
  • 1 packet 2 tablespoons of zesty Ranch seasoning mix

Instructions
 

Step 1: Gather Your Ingredients

  • First, make sure you have everything on hand. Gather all the ingredients on your countertop for easy access. Trust me, it makes a difference.

Step 2: Blend the Base Ingredients

  • In a medium-sized bowl, combine the mayonnaise, buttermilk, and Italian dressing. Whisk until well integrated and smooth.

Step 3: Add the Seasonings

  • Throw in the ranch seasoning mix, fresh lemon juice, smoked paprika, and minced garlic. Stir until the mix is even, ensuring each spoonful gets an equal share of flavor.

Step 4: Incorporate the Parmesan Cheese

  • Gradually fold in the finely shredded Parmesan cheese. Mix until the cheese is fully absorbed into the creamy base.

Step 5: Season to Taste

  • Taste-test your dressing. If it needs more kick, add a touch more garlic pepper blend. Adjust the seasoning until it hits just right.

Step 6: Chill and Serve

  • Transfer your dressing to a jar or an airtight container and let it chill in the fridge for at least 30 minutes. This step is crucial as it lets the flavors meld together beautifully.

Notes

  • Use Fresh Ingredients: Fresh lemon juice and minced garlic make a substantial difference.
  • Quality Parmesan: Go for high-quality Parmesan cheese for that authentic bite.
  • Consistent Mixing: Whisk consistently for a smooth, homogenized dressing.
  • Refrigerate Before Serving: Letting it sit in the fridge enhances the flavor, making each bite perfection.
  • Adjust the Seasonings: Make it your own by tweaking the garlic or paprika according to your taste.

Nutrition

Calories: 440kcal
Keyword Copycat texas roadhouse caesar dressing
Tried this recipe?Let us know how it was!

Frequently Asked Questions (FAQs)

Q1: Can I use low-fat mayo?

Yes, you can. However, the texture and flavor might be slightly altered compared to full-fat mayonnaise.

Q2: Does this recipe cater to vegetarians?

It largely does, but ensure any cheese used is vegetarian-friendly as some Parmesan contains animal rennet.

Q3: Can I make this dressing vegan?

Sure can! Use vegan mayonnaise, vegan Parmesan, and a plant-based milk for the buttermilk.

Q4: How long will the dressing last?

Stored properly in the refrigerator, it should last up to one week.

Q5: Can I freeze this dressing?

Freezing isn’t recommended as it could alter the texture and consistency. Stick to the fridge storage.

Conclusion

There you have it, folks. This Copycat Texas Roadhouse Caesar Dressing is a culinary triumph. Whether drizzled over a crisp salad or used as a dip, it’s sure to elevate your meals. 

Now, go forth and impress your taste buds! Remember to share your culinary creations and feedback. I can’t wait to hear your stories and see your own twists on this creamy, delicious dressing. Enjoy your meal!

You’ll also like these latest recipes!

Primanti brothers coleslaw copycat recipe – Yum Yarns

Best Primanti brothers coleslaw copycat recipe

Nothing beats a juicy burger with a tangy, crunchy coleslaw. It’s like they were made for each other. The acidity in the coleslaw beautifully complements the smoky flavors of grilled chicken. Coleslaw adds the perfect crunch to balance the tenderness of the pork.

Best Primanti brothers coleslaw copycat recipe

Have you ever wondered what makes Primanti Brothers’ coleslaw so uniquely delicious? If you’ve ever sunk your teeth into one of their legendary sandwiches, you already know it’s that magical coleslaw that ties it all together. Today, I’m sharing a copycat recipe that captures the essence of their coleslaw – without needing a ticket to Pittsburgh!

Why Does This Recipe Work?

Balanced Flavor Profile

The combination of apple cider vinegar and sugar creates a sweet and tangy base that makes your taste buds dance. This isn’t your average coleslaw; this is a flavor explosion.

Texture Harmony

Using finely shredded cabbage, grated carrots, and sliced onions results in a delightful crunch with every bite. It’s not mushy like some coleslaws can be.

No Mayonnaise

This dressing uses sunflower oil, which gives it a light, refreshing taste. It’s perfect for those seeking a dairy-free or lighter option without compromising on flavor.

Minimal Ingredients

With only a handful of basic ingredients, this recipe is easy to whip up. No fancy or hard-to-find items here. Just straightforward, tasty goodness.

How Does It Taste Like?

Imagine a bite that’s refreshing, tangy, and a little sweet, perfectly balanced with a satisfying crunch. The vinegar provides a sharpness that awakens your senses, while the sugar adds just enough sweetness to mellow it out. 

The sunflower oil ties everything together with a light, smooth finish. It’s the ideal coleslaw to add that needed zip to your meal.

What Sets This Recipe Apart from Other Primanti Brothers Coleslaw Copycat Variations?

Several copycat recipes are floating around, but what makes this one stand out is its simplicity and authenticity. We avoid using olive oil to ensure the flavor isn’t overpowering. The addition of both celery seeds and mustard seeds brings out more complexity and makes each bite uniquely flavorful.

The Ingredients

  • Finely shredded 1 medium green cabbage
  • Grated 1 large carrot
  • Thinly sliced 1 red onion
  • 1⁄2 cup apple cider vinegar
  • 6 tablespoons granulated sugar
  • 6 tablespoons sunflower oil (avoid olive oil for a milder flavor)
  • 1 teaspoon celery seeds
  • 1 teaspoon mustard seeds
  • Salt and freshly ground black pepper, to taste
Primanti brothers coleslaw copycat recipe

Instructions

Step 1: Prepare Your Veggies

Start by finely shredding the green cabbage. Use a food processor if you like to save time. Next, grate the carrot using a box grater, and slice the red onion thinly. Place all the vegetables into a large mixing bowl.

Step 2: Make the Dressing

In a separate bowl, whisk together the apple cider vinegar, sugar, sunflower oil, celery seeds, and mustard seeds. Add salt and freshly ground black pepper to taste. Whisk until the sugar is fully dissolved and everything is well combined.

Step 3: Combine Everything

Pour the dressing over the shredded veggies. Toss everything thoroughly until the cabbage, carrot, and onions are well-coated with the dressing.

Step 4: Chill and Serve

Cover the bowl and refrigerate for at least 1 hour before serving. This allows the flavors to meld together. Feel free to let it sit overnight if you want an even richer taste.

Notes

Here are some tips to ensure you get it right every time:

  • Use Fresh Ingredients: Fresh cabbage and carrots make all the difference.
  • Adjust Sweetness and Tanginess: Feel free to tweak the vinegar and sugar amounts to suit your taste preference.
  • Let It Sit: Allowing the coleslaw to chill for several hours enhances the flavors.
  • Serve Cold: This coleslaw tastes best when served cold.
  • Mix Well: Thoroughly mixing the coleslaw ensures even flavor distribution.
Easy Primanti brothers coleslaw copycat recipe

Nutrition Information

How Do You Store This Primanti Brothers Coleslaw?

Store any leftovers in an airtight container in the refrigerator. It will last for 3 to 5 days. It’s actually one of those dishes that tastes even better the next day as the flavors meld further.

Sides For Primanti Brothers Coleslaw 

Grilled Corn on the Cob

The sweetness of grilled corn complements the tangy coleslaw perfectly. Plus, it adds a summery touch to your meal.

Baked Beans

The rich, savory flavor of baked beans pairs well with the crisp, refreshing coleslaw. It’s a classic combination worth trying.

Potato Wedges

Crispy on the outside, fluffy on the inside, potato wedges add that comfort food feel when paired with this coleslaw. They provide a nice balance of textures.

What Alternatives Can You Use for the Ingredients If They Are Not Present in Your Kitchen?

White Vinegar Instead of Apple Cider Vinegar

If you don’t have apple cider vinegar, white vinegar is a good substitute. It offers a similar tang but may be slightly sharper.

Olive Oil Substitute for Sunflower Oil

In case you’re out of sunflower oil, you can use canola oil or vegetable oil. These oils won’t overpower the flavor like olive oil sometimes can.

Brown Sugar Instead of Granulated Sugar

If you prefer a deeper sweetness, brown sugar is an excellent alternative to granulated sugar. It adds a molasses-like flavor.

Yellow Onion for Red Onion

If you don’t have red onion, yellow onion can be used. It offers a milder, sweeter flavor once combined with the dressing.

Primanti brothers coleslaw copycat recipe

Primanti brothers coleslaw copycat recipe

Tina Cooper
Have you ever wondered what makes Primanti Brothers’ coleslaw so uniquely delicious? If you’ve ever sunk your teeth into one of their legendary sandwiches, you already know it’s that magical coleslaw that ties it all together.
Prep Time 10 minutes
Cook Time 0 minutes
Total Time 10 minutes
Course Side Dish
Cuisine American
Servings 10 Servings
Calories 133.5 kcal

Equipment

  • Food processor
  • Box grater 

Ingredients
  

  • Finely shredded 1 medium green cabbage
  • Grated 1 large carrot
  • Thinly sliced 1 red onion
  • 1/2 cup apple cider vinegar
  • 6 tablespoons granulated sugar
  • 6 tablespoons sunflower oil avoid olive oil for a milder flavor
  • 1 teaspoon celery seeds
  • 1 teaspoon mustard seeds
  • Salt and freshly ground black pepper to taste

Instructions
 

Step 1: Prepare Your Veggies

  • Start by finely shredding the green cabbage. Use a food processor if you like to save time. Next, grate the carrot using a box grater, and slice the red onion thinly. Place all the vegetables into a large mixing bowl.

Step 2: Make the Dressing

  • In a separate bowl, whisk together the apple cider vinegar, sugar, sunflower oil, celery seeds, and mustard seeds. Add salt and freshly ground black pepper to taste. Whisk until the sugar is fully dissolved and everything is well combined.

Step 3: Combine Everything

  • Pour the dressing over the shredded veggies. Toss everything thoroughly until the cabbage, carrot, and onions are well-coated with the dressing.

Step 4: Chill and Serve

  • Cover the bowl and refrigerate for at least 1 hour before serving. This allows the flavors to meld together. Feel free to let it sit overnight if you want an even richer taste.

Notes

Here are some tips to ensure you get it right every time:
  • Use Fresh Ingredients: Fresh cabbage and carrots make all the difference.
  • Adjust Sweetness and Tanginess: Feel free to tweak the vinegar and sugar amounts to suit your taste preference.
  • Let It Sit: Allowing the coleslaw to chill for several hours enhances the flavors.
  • Serve Cold: This coleslaw tastes best when served cold.
  • Mix Well: Thoroughly mixing the coleslaw ensures even flavor distribution.

Nutrition

Calories: 133.5kcal
Keyword Primanti brothers coleslaw copycat recipe
Tried this recipe?Let us know how it was!

Frequently Asked Questions (FAQs)

1. Can I make this coleslaw vegan?

Absolutely! This coleslaw is already vegan. Just make sure the sugar you use is vegan-friendly if that’s a concern for you.

2. Can I use pre-shredded cabbage and carrots?

Yes, you can use pre-shredded cabbage and carrots to save time. However, the texture might vary slightly due to the handling during packaging.

3. How can I make this coleslaw spicier?

To add a spicy kick, consider incorporating some crushed red pepper flakes or a dash of hot sauce into the dressing.

4. What if my dressing is too tangy?

If your dressing turns out too tangy, balance it out by adding a bit more sugar. Add it gradually until you reach your desired flavor.

Conclusion

There you have it – a recipe that brings Primanti Brothers’ legendary coleslaw right into your kitchen. Whether it’s paired with burgers, grilled chicken, or pulled pork sandwiches, this coleslaw is bound to be a crowd-pleaser. Plus, with its minimal ingredients and straightforward instructions, you’ll be able to whip this up in no time. 

Don’t forget to share your creations and let me know how this recipe worked out for you. Happy cooking! 

You’ll also like these latest recipes!

Maryland chicken recipe – Yum Yarns

Best Maryland chicken recipe

Today, I’m really excited to share something special from my kitchen to yours. Before diving into the details, let’s talk about the perfect pairing for this dish. The tantalizing, crispy Maryland Chicken goes incredibly well with some creamy mashed potatoes, buttered white bread, and, my favorite side – corn on the cob. I can personally vouch that these sides pair incredibly well with Maryland Chicken, making for an unforgettable meal.

Best Maryland chicken recipe

Now, let’s dive into the heart of the matter – the Maryland Chicken Recipe. This dish, with its deep roots in American cooking, brings a bit of history and a lot of flavor to your table. As a food enthusiast and a lover of all things fried, sharing this recipe feels almost like passing down a treasured heirloom.

What is Maryland Chicken?

Maryland Chicken is not your typical fried chicken. This recipe adds a twist by incorporating a delectable cream sauce, giving you chicken that is not only crispy but also bursting with rich, comforting flavors.

The Ingredients

Here’s what you’ll need:

  • A few sprigs fresh thyme leaves
  • 2 tablespoons unsalted butter
  • 3 to 4 pounds whole chicken, cut into 8 pieces with the backbone kept 
  • Oil or lard for frying
  • 1 tablespoon lemon juice
  • 1 cup all-purpose flour
  • A pinch kosher salt and freshly cracked black pepper
  • 1 1/2 cups whole milk

For serving:

  • Corn on the cob
  • Buttered white bread
  • Creamy mashed potatoes
Maryland chicken recipe

How to Make Maryland Chicken?

Making Maryland Chicken involves a few steps, but don’t worry – I’ll walk you through every detail to ensure your meal turns out just right.

Step 1: Prep the Chicken

First things first, let’s get our chicken ready. Cut your whole chicken into 8 pieces. Don’t forget to keep the backbone – you’ll see why later.

Step 2: Season the Chicken

Rub the chicken pieces with a mix of kosher salt and freshly cracked black pepper. Make sure to get all the nooks and crannies.

Step 3: Coat the Chicken

In a shallow dish, mix flour with a pinch more salt. Dredge the chicken pieces in the flour mixture. Shake off any excess.

Step 4: Fry the Chicken

Heat oil or lard in a heavy skillet over medium-high heat. Fry the chicken pieces until golden brown and crisp. This usually takes about 10-15 minutes per side. Use a thermometer to ensure the internal temperature reaches 165°F.

Step 5: Make the Sauce

Remove the chicken and set it aside on a paper towel to drain. In the same skillet, melt butter, then add thyme leaves. Pour in the milk, stirring constantly, and bring it to a simmer. Add lemon juice. Let it cook until it thickens into a luscious sauce.

Step 6: Combine and Serve

Place the fried chicken back into the skillet with the sauce. Let the flavors meld for a few minutes before serving.

Notes

Here are some tips to perfect your Maryland Chicken:

  • Quality Chicken: Use a free-range chicken for better texture and flavor.
  • Milk Temperature: Ensure the milk is at room temperature to avoid curdling.
  • Oil or Lard: Use a deep skillet and enough oil for even frying.
  • Herbs: Fresh thyme works best but dried thyme can be substituted.
  • Simmer Gently: Cook the sauce on low to prevent burning and achieve the right consistency.

Storage Tips

Maryland Chicken can be stored in an airtight container in the refrigerator for up to 3 days. Reheat in an oven at 350°F to maintain its crispiness.

Easy Maryland chicken recipe

Nutrition Information

Serving Suggestions

Here are some ideas to make your meal even more delightful:

  1. Creamy Coleslaw: The tanginess complements the rich chicken.
  2. Garlic Green Beans: Adds a crunch and a fresh note.
  3. Macaroni and Cheese: Because who doesn’t love mac and cheese?
  4. Sweet Potato Fries: A healthier, sweet twist.
  5. Pickled Vegetables: Add some zing to your plate.

What Other Substitutes Can I Use in Maryland Chicken Recipe?

Here are some substitutions if you’re short on ingredients:

  • Thyme: Swap with rosemary or sage for a different herbal note.
  • Butter: Substitute with ghee for a nutty flavor.
  • Whole Milk: You can use heavy cream for a richer sauce.
  • Lemon Juice: White wine vinegar can be a good alternative.
  • All-purpose Flour: Gluten-free flour mix works great.
Maryland chicken recipe

Maryland chicken recipe

Tina Cooper
Now, let’s dive into the heart of the matter – the Maryland Chicken Recipe. This dish, with its deep roots in American cooking, brings a bit of history and a lot of flavor to your table. 
Prep Time 10 minutes
Cook Time 30 minutes
Total Time 40 minutes
Course Snacks
Cuisine American
Servings 4 Servings
Calories 828 kcal

Equipment

  • Heavy skillet
  • Paper towel
  • Thermometer

Ingredients
  

Fresh thyme leaves, a few sprigs

  • 2 tablespoons unsalted butter
  • 1 whole chicken 3 to 4 pounds, cut into 8 pieces, with the backbone kept (see note)
  • Oil or lard for frying
  • 1 tablespoon lemon juice
  • 1 cup all-purpose flour
  • A pinch of kosher salt and freshly cracked black pepper
  • 1 1/2 cups whole milk

For serving:

  • Corn on the cob
  • Buttered white bread
  • Creamy mashed potatoes

Instructions
 

  • Making Maryland Chicken involves a few steps, but don’t worry – I’ll walk you through every detail to ensure your meal turns out just right.

Step 1: Prep the Chicken

  • First things first, let’s get our chicken ready. Cut your whole chicken into 8 pieces. Don’t forget to keep the backbone – you’ll see why later.

Step 2: Season the Chicken

  • Rub the chicken pieces with a mix of kosher salt and freshly cracked black pepper. Make sure to get all the nooks and crannies.

Step 3: Coat the Chicken

  • In a shallow dish, mix flour with a pinch more salt. Dredge the chicken pieces in the flour mixture. Shake off any excess.

Step 4: Fry the Chicken

  • Heat oil or lard in a heavy skillet over medium-high heat. Fry the chicken pieces until golden brown and crisp. This usually takes about 10-15 minutes per side. Use a thermometer to ensure the internal temperature reaches 165°F.

Step 5: Make the Sauce

  • Remove the chicken and set it aside on a paper towel to drain. In the same skillet, melt butter, then add thyme leaves. Pour in the milk, stirring constantly, and bring it to a simmer. Add lemon juice. Let it cook until it thickens into a luscious sauce.

Step 6: Combine and Serve

  • Place the fried chicken back into the skillet with the sauce. Let the flavors meld for a few minutes before serving.

Notes

Here are some tips to perfect your Maryland Chicken:
  • Quality Chicken: Use a free-range chicken for better texture and flavor.
  • Milk Temperature: Ensure the milk is at room temperature to avoid curdling.
  • Oil or Lard: Use a deep skillet and enough oil for even frying.
  • Herbs: Fresh thyme works best but dried thyme can be substituted.
  • Simmer Gently: Cook the sauce on low to prevent burning and achieve the right consistency.

Nutrition

Calories: 828kcal
Keyword Maryland chicken recipe
Tried this recipe?Let us know how it was!

Frequently Asked Questions

Can I use chicken breasts instead of a whole chicken?

Absolutely! Chicken breasts work perfectly. Just adjust your cooking times as they might cook faster.

How do I ensure the chicken is cooked through?

Use a meat thermometer. The internal temperature should reach 165°F.

How can I make the dish less oily?

Drain the chicken thoroughly on paper towels after frying and use a wire rack in the oven.

Can I prepare the dish ahead of time?

Yes, you can fry the chicken a few hours earlier and then finish it in the sauce just before serving.

What’s the best type of oil for frying?

Peanut oil or canola oil works best as they can withstand high temperatures and impart a nice flavor.

Conclusion

There you have it, folks! A savory, comforting Maryland Chicken recipe that’s sure to become a family favorite. Share this meal with loved ones, and it’s guaranteed to disappear before your eyes! Whether you’re an experienced home cook or just starting out, this recipe offers the perfect blend of simplicity and delicious flavor. Happy cooking!

You’ll also like these latest recipes!