Before diving into the delicious details of schnitzel over buttered spätzle with sweet and sour cabbage, let’s consider what to enjoy alongside this dish. A classic German lager pairs beautifully, enhancing the flavors without overpowering them. A light white wine, like a Pinot Grigio, can also complement the dish’s richness.
Don’t forget a simple side salad. A fresh green salad with a tangy vinaigrette can cleanse the palate between bites. For dessert, a light fruit sorbet or a slice of apple strudel can round out the meal nicely. Now, let’s get into why this dish is a must-try!

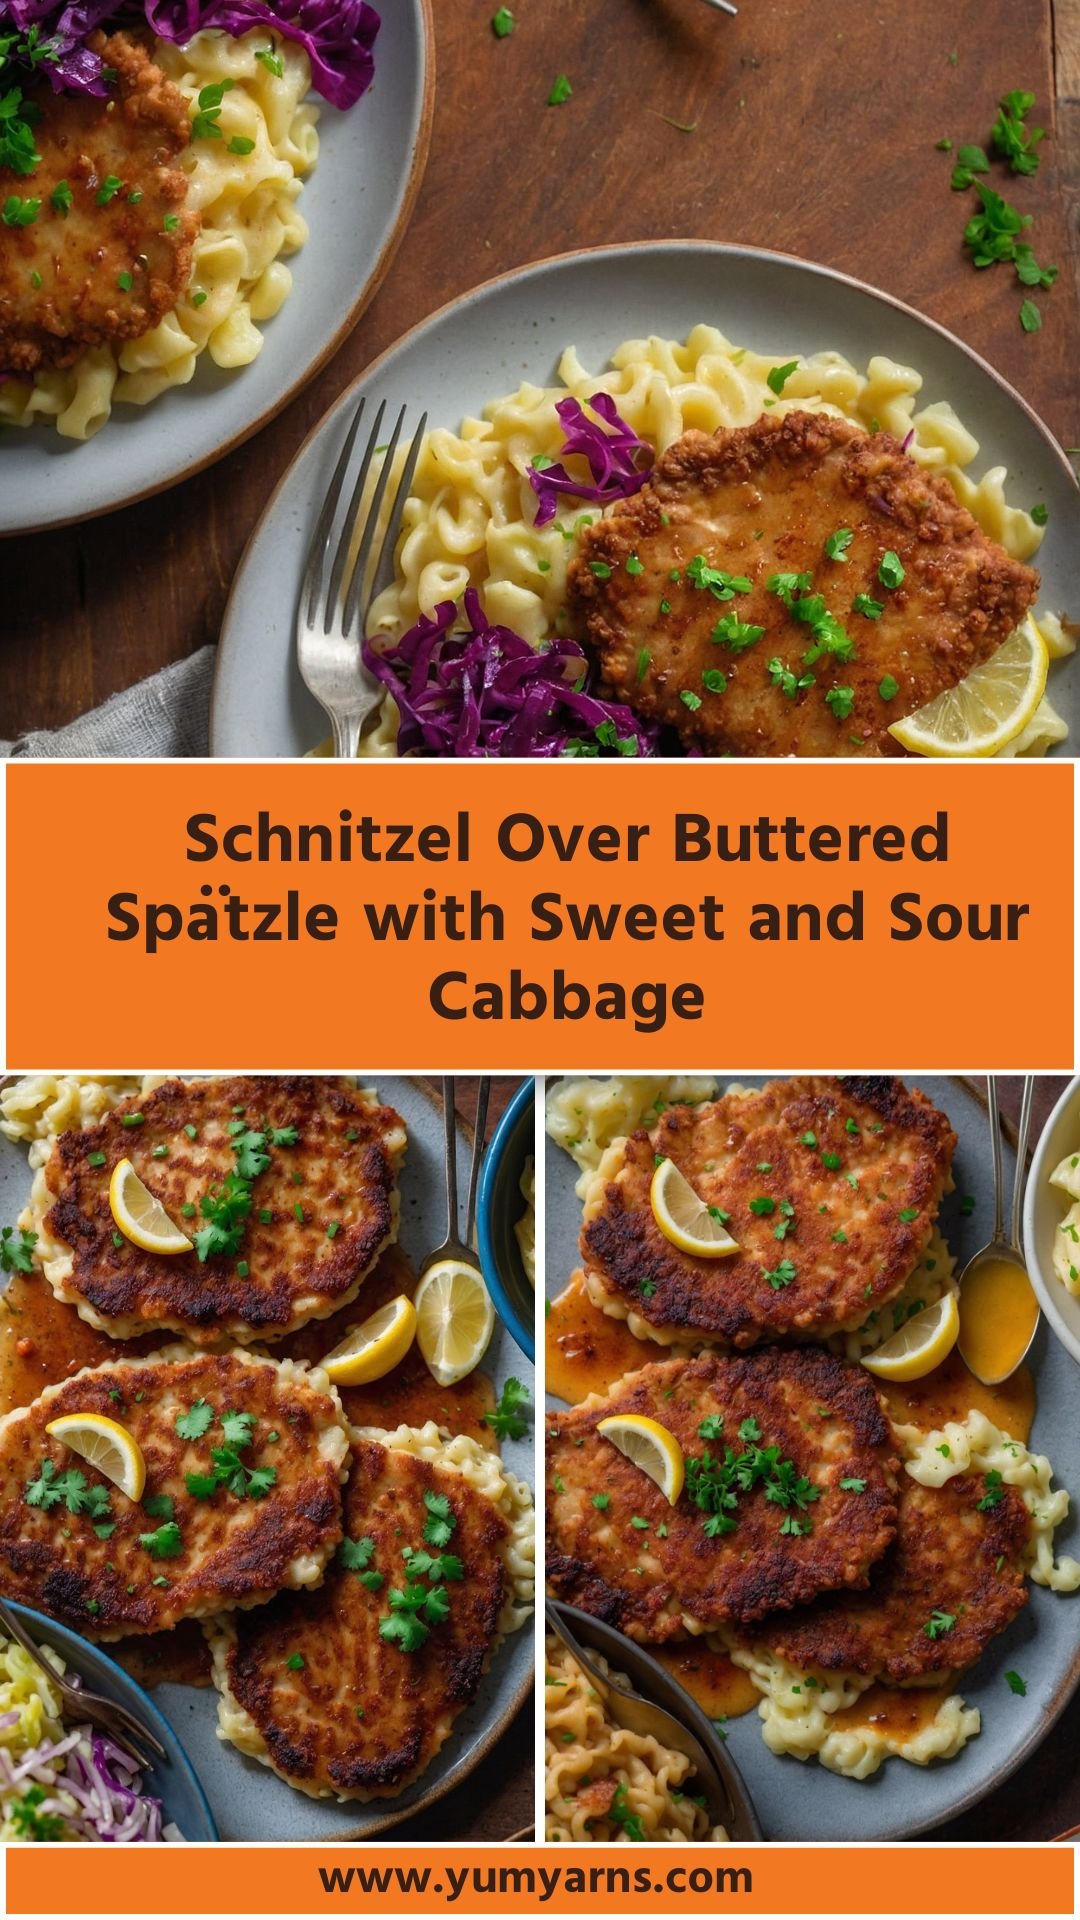
Hey there, fellow food enthusiasts! Today, I’m excited to share a recipe that holds a special place in my heart (and stomach!). We’re talking schnitzel over buttered spätzle with sweet and sour cabbage. This dish brings together tender pork, fluffy spätzle, and zesty cabbage in a way that screams comfort food.
Whether you’re cooking for family, hosting a gathering, or just treating yourself, this meal has you covered. Let me guide you through the process, share valuable tips, and hopefully inspire you to step into the kitchen.
What Is Schnitzel Over Buttered Spätzle With Sweet and Sour Cabbage?
At its essence, schnitzel is a breaded and fried meat cutlet. In this case, we’re using pork. Spätzle, a type of egg noodle, brings a delightful chewiness. And sweet and sour cabbage adds a beautiful contrast with its tangy sweetness. Together, these components create a symphony of flavors and textures. It’s not just a meal but an experience that brings people together.
You will also like the following Lunch and Dinner recipes!
Why This Recipe Works?
This recipe is a celebration of simple ingredients transformed into comfort food. Let’s break it down. First, the schnitzel is seasoned and pounded thin, allowing for tender, juiciness wrapped in a crispy exterior.
The spätzle absorbs the accompanying flavors beautifully while providing a fluffy bite. And the sweet and sour cabbage? Well, it’s a refreshing balance to the richness of the meat and noodles. This dish checks all the boxes: savory, sweet, tangy, and comforting!
What You’ll Need to Make This Dish?
Let’s gather our ingredients. Here’s a list:
For Sweet and Sour Cabbage:
- 4 heaping cups shredded red cabbage
- ½ green apple, peeled and grated
- 2 tablespoons unsalted butter
- ⅓ cup apple cider vinegar
- ¼ cup granulated sugar
- 2 ½ tablespoons water
- 2 teaspoons kosher salt
- ¼ teaspoon freshly ground black pepper
- Pinch of ground cloves
- ½ teaspoon ground ginger
For Pork Schnitzel:
- 2 (6-ounce) boneless pork chops, pounded to ¼-inch thickness
- 1 cup all-purpose flour
- 3 large eggs, lightly beaten
- 2 cups panko breadcrumbs
- Salt and pepper to taste
- 2 tablespoons extra virgin olive oil
- 1 tablespoon unsalted butter
- 1 teaspoon smoked paprika
For Buttered Spätzle:
- 1 ½ cups all-purpose flour
- ½ teaspoon kosher salt
- 2 large eggs
- ⅔ cup whole milk
- 1 tablespoon unsalted butter, plus 2 tablespoons
- 1 teaspoon freshly grated nutmeg
For Roasted Garlic Gravy:
- ½ head roasted garlic, mashed
- 2 tablespoons minced shallots
- 1 teaspoon extra virgin olive oil
- 2 tablespoons unsalted butter
- 2 tablespoons all-purpose flour
- 12 ounces unsalted chicken or vegetable stock
- Salt and pepper to taste
- 1 teaspoon fresh thyme leaves
Garnish:
- Chopped flat-leaf parsley
- Pickled capers
- Lemon wedges
- 1 teaspoon toasted breadcrumbs

How to Make Schnitzel Over Buttered Spätzle with Sweet and Sour Cabbage?
Ready to dive into the process? Buckle up, because we’re about to cook something magical! Let’s take it step by step.
Step 1: Prepare Sweet and Sour Cabbage
- Melt the Butter: In a large pan over medium heat, melt the butter. You want it bubbly and ready.
- Add the Cabbage and Apple: Toss in the shredded cabbage and grated apple. Stir this mixture as it wilts down, getting those marvelous flavors mingling.
- Season the Cabbage: Add apple cider vinegar, sugar, water, salt, pepper, ground cloves, and ginger. Mix well. Let it simmer for about 15-20 minutes, or until the cabbage is tender but still vibrant in color.
Step 2: Make the Spätzle
- Combine Ingredients: In a bowl, mix the flour and salt. In another bowl, whisk together the eggs and milk. Gradually combine wet into dry, stirring until a thick batter forms.
- Boil Water: Bring a large pot of salted water to a boil.
- Create Spätzle: Use a spätzle maker, colander, or a large spoon to drop the batter into the boiling water. Cook for about 2-3 minutes or until they float.
- Butter It Up: Drain the spätzle and toss with melted butter and freshly grated nutmeg. Set it aside.
Step 3: Fry the Schnitzel
- Prep the Pork: Season the pork with salt and pepper. Prepare three bowls: one with flour, one with beaten eggs, and one with panko breadcrumbs mixed with smoked paprika.
- Coat the Pork: Dredge each pork chop in flour, dip in egg, and coat with breadcrumbs, pressing to stick.
- Heat the Oil: In a frying pan, heat olive oil and butter over medium-high heat.
- Fry the Schnitzel: Fry the pork chops for about 3-4 minutes per side, until golden brown. Drain on paper towels.
Step 4: Make the Gravy
- Sauté Shallots: In the same pan, sauté shallots in olive oil until soft.
- Create Roux: Add butter and flour, stirring to create a roux. Cook for about a minute to remove the raw flour taste.
- Add Stock and Garlic: Gradually whisk in the stock and mashed garlic. Season with salt, pepper, and thyme. Let it simmer until slightly thickened.
Tips for Perfecting This Dish
Pound Evenly: Ensure the pork is pounded evenly for consistent cooking.
Season Generously: Don’t skimp on seasoning at each stage, from the schnitzel to the spätzle.
Use Fresh Ingredients: Fresh cabbage and apples will elevate the flavor.
Don’t Rush the Cabbage: Allow enough time for the cabbage to cook down and soften.
Make Ahead: You can prepare components in advance and heat them up when ready to serve.
How to Store Leftovers?
Store any leftovers in an airtight container in the refrigerator. The sweet and sour cabbage may lose some crunch but will still be delicious. Try to consume within 3 days for optimal flavor. Reheat gently on the stove or in the microwave.
Nutrition Information
While specific values will vary based on ingredient choices, here’s a rough breakdown per serving:
Calories: 600-800 (varies based on portions)
Protein: 35g
Carbohydrates: 60g
Fats: 30g
Fiber: 5g

How to Serve Schnitzel Over Buttered Spätzle with Sweet and Sour Cabbage?
Classic Style: Serve schnitzel atop a bed of buttery spätzle, drizzled with roasted garlic gravy. This gives a hearty and satisfying plate.
Garnish and Go: Top with freshly chopped parsley, capers, and a squeeze of lemon. This adds brightness to the dish.
Family Style: Present everything on a large platter, letting everyone scoop their portions. This encourages sharing and warmth at the dinner table.
Make It a Combo: Pair it with a side salad or some roasted vegetables. The added crunch from the veggies balances the meal perfectly.
What Alternatives Can You Use for the Ingredients If Not Available?
Pork Substitute: Chicken or Turkey Cutlets can replace pork easily. The cooking time will be similar.
Breadcrumbs: Crushed crackers or cornflakes can be used in place of panko for a different texture.
Vinegar: Lemon juice or rice vinegar can substitute apple cider vinegar, although the flavor will shift slightly.
Seasonings: If you don’t have ginger or cloves, cinnamon or allspice can add an interesting twist to the cabbage.

Schnitzel Over Buttered Spätzle with Sweet and Sour Cabbage
Equipment
- Bowl
- pan
Ingredients
For Sweet and Sour Cabbage:
- 4 heaping cups shredded red cabbage
- ½ green apple peeled and grated
- 2 tablespoons unsalted butter
- ⅓ cup apple cider vinegar
- ¼ cup granulated sugar
- 2 ½ tablespoons water
- 2 teaspoons kosher salt
- ¼ teaspoon freshly ground black pepper
- Pinch of ground cloves
- ½ teaspoon ground ginger
For Pork Schnitzel:
- 2 6-ounce boneless pork chops, pounded to ¼-inch thickness
- 1 cup all-purpose flour
- 3 large eggs lightly beaten
- 2 cups panko breadcrumbs
- Salt and pepper to taste
- 2 tablespoons extra virgin olive oil
- 1 tablespoon unsalted butter
- 1 teaspoon smoked paprika
- For Buttered Spätzle:
- 1 ½ cups all-purpose flour
- ½ teaspoon kosher salt
- 2 large eggs
- ⅔ cup whole milk
- 1 tablespoon unsalted butter plus 2 tablespoons
- 1 teaspoon freshly grated nutmeg
For Roasted Garlic Gravy:
- ½ head roasted garlic mashed
- 2 tablespoons minced shallots
- 1 teaspoon extra virgin olive oil
- 2 tablespoons unsalted butter
- 2 tablespoons all-purpose flour
- 12 ounces unsalted chicken or vegetable stock
- Salt and pepper to taste
- 1 teaspoon fresh thyme leaves
Garnish:
- Chopped flat-leaf parsley
- Pickled capers
- Lemon wedges
- 1 teaspoon toasted breadcrumbs
Instructions
Step 1: Prepare Sweet and Sour Cabbage
- Melt the Butter: In a large pan over medium heat, melt the butter. You want it bubbly and ready.
- Add the Cabbage and Apple: Toss in the shredded cabbage and grated apple. Stir this mixture as it wilts down, getting those marvelous flavors mingling.
- Season the Cabbage: Add apple cider vinegar, sugar, water, salt, pepper, ground cloves, and ginger. Mix well. Let it simmer for about 15-20 minutes, or until the cabbage is tender but still vibrant in color.
Step 2: Make the Spätzle
- Combine Ingredients: In a bowl, mix the flour and salt. In another bowl, whisk together the eggs and milk. Gradually combine wet into dry, stirring until a thick batter forms.
- Boil Water: Bring a large pot of salted water to a boil.
- Create Spätzle: Use a spätzle maker, colander, or a large spoon to drop the batter into the boiling water. Cook for about 2-3 minutes or until they float.
- Butter It Up: Drain the spätzle and toss with melted butter and freshly grated nutmeg. Set it aside.
Step 3: Fry the Schnitzel
- Prep the Pork: Season the pork with salt and pepper. Prepare three bowls: one with flour, one with beaten eggs, and one with panko breadcrumbs mixed with smoked paprika.
- Coat the Pork: Dredge each pork chop in flour, dip in egg, and coat with breadcrumbs, pressing to stick.
- Heat the Oil: In a frying pan, heat olive oil and butter over medium-high heat.
- Fry the Schnitzel: Fry the pork chops for about 3-4 minutes per side, until golden brown. Drain on paper towels.
Step 4: Make the Gravy
- Sauté Shallots: In the same pan, sauté shallots in olive oil until soft.
- Create Roux: Add butter and flour, stirring to create a roux. Cook for about a minute to remove the raw flour taste.
- Add Stock and Garlic: Gradually whisk in the stock and mashed garlic. Season with salt, pepper, and thyme. Let it simmer until slightly thickened.
Notes
- Pound Evenly: Ensure the pork is pounded evenly for consistent cooking.
- Season Generously: Don’t skimp on seasoning at each stage, from the schnitzel to the spätzle.
- Use Fresh Ingredients: Fresh cabbage and apples will elevate the flavor.
- Don’t Rush the Cabbage: Allow enough time for the cabbage to cook down and soften.
- Make Ahead: You can prepare components in advance and heat them up when ready to serve.
Nutrition
Frequently Asked Questions
1. Can I make this dish ahead of time?
Yes, you can prepare the spätzle and sweet and sour cabbage in advance. Just reheat them before serving.
2. Is schnitzel gluten-free?
Traditional schnitzel is not gluten-free, but you can use gluten-free flour and breadcrumbs to adapt the recipe.
3. Can I use other types of cabbage?
While red cabbage is used for its color and flavor in this dish, green cabbage or savoy cabbage can also work well.
4. What wine goes best with this dish?
A crisp white wine like Pinot Grigio or a light red like Pinot Noir complements this meal well.
5. How can I make this recipe vegetarian?
Swap the pork for breaded mushrooms or eggplant slices for a fitting vegetarian alternative.
6. What is the origin of schnitzel?
Schnitzel is traditionally associated with Austrian cuisine but has been adopted and adapted in many cultures, notably in Germany and beyond.
Conclusion
Schnitzel over buttered spätzle with sweet and sour cabbage is not just a dish; it’s an experience. The comfort, the familiarity, and the delightful mix of flavors come together to create something special. Each bite tells a story of tradition and comfort. So whether you’re planning your next family dinner or just hanging out on a cozy weekend, this dish is bound to impress.
The best part? You can personalize it, adapt the flavors, and most importantly, enjoy it with loved ones. So grab your apron, turn on your favorite tunes, and let’s get cooking!