When it comes to roast beef, there are endless options to serve alongside. You might think of classic accompaniments like mashed potatoes or a rich gravy. But let’s spice things up a bit!
Tangy horseradish sauce complements the beef beautifully. You can’t go wrong with fresh vegetables, like sautéed green beans or roasted Brussels sprouts — they provide a pleasant crunch to contrast the tender meat.
Maybe a fresh salad sounds tempting? Mixed greens with a zesty vinaigrette can brighten up the plate. If you want to go a different route, consider loading up on fresh bread.
A thick slice of sourdough or a fluffy dinner roll is perfect for soaking up any leftover juices on your plate. For those in a more celebratory mood, a side of creamy macaroni and cheese is sure to please.
Now that we have the sides covered, let’s dive into the heart of the matter: the recipe itself.

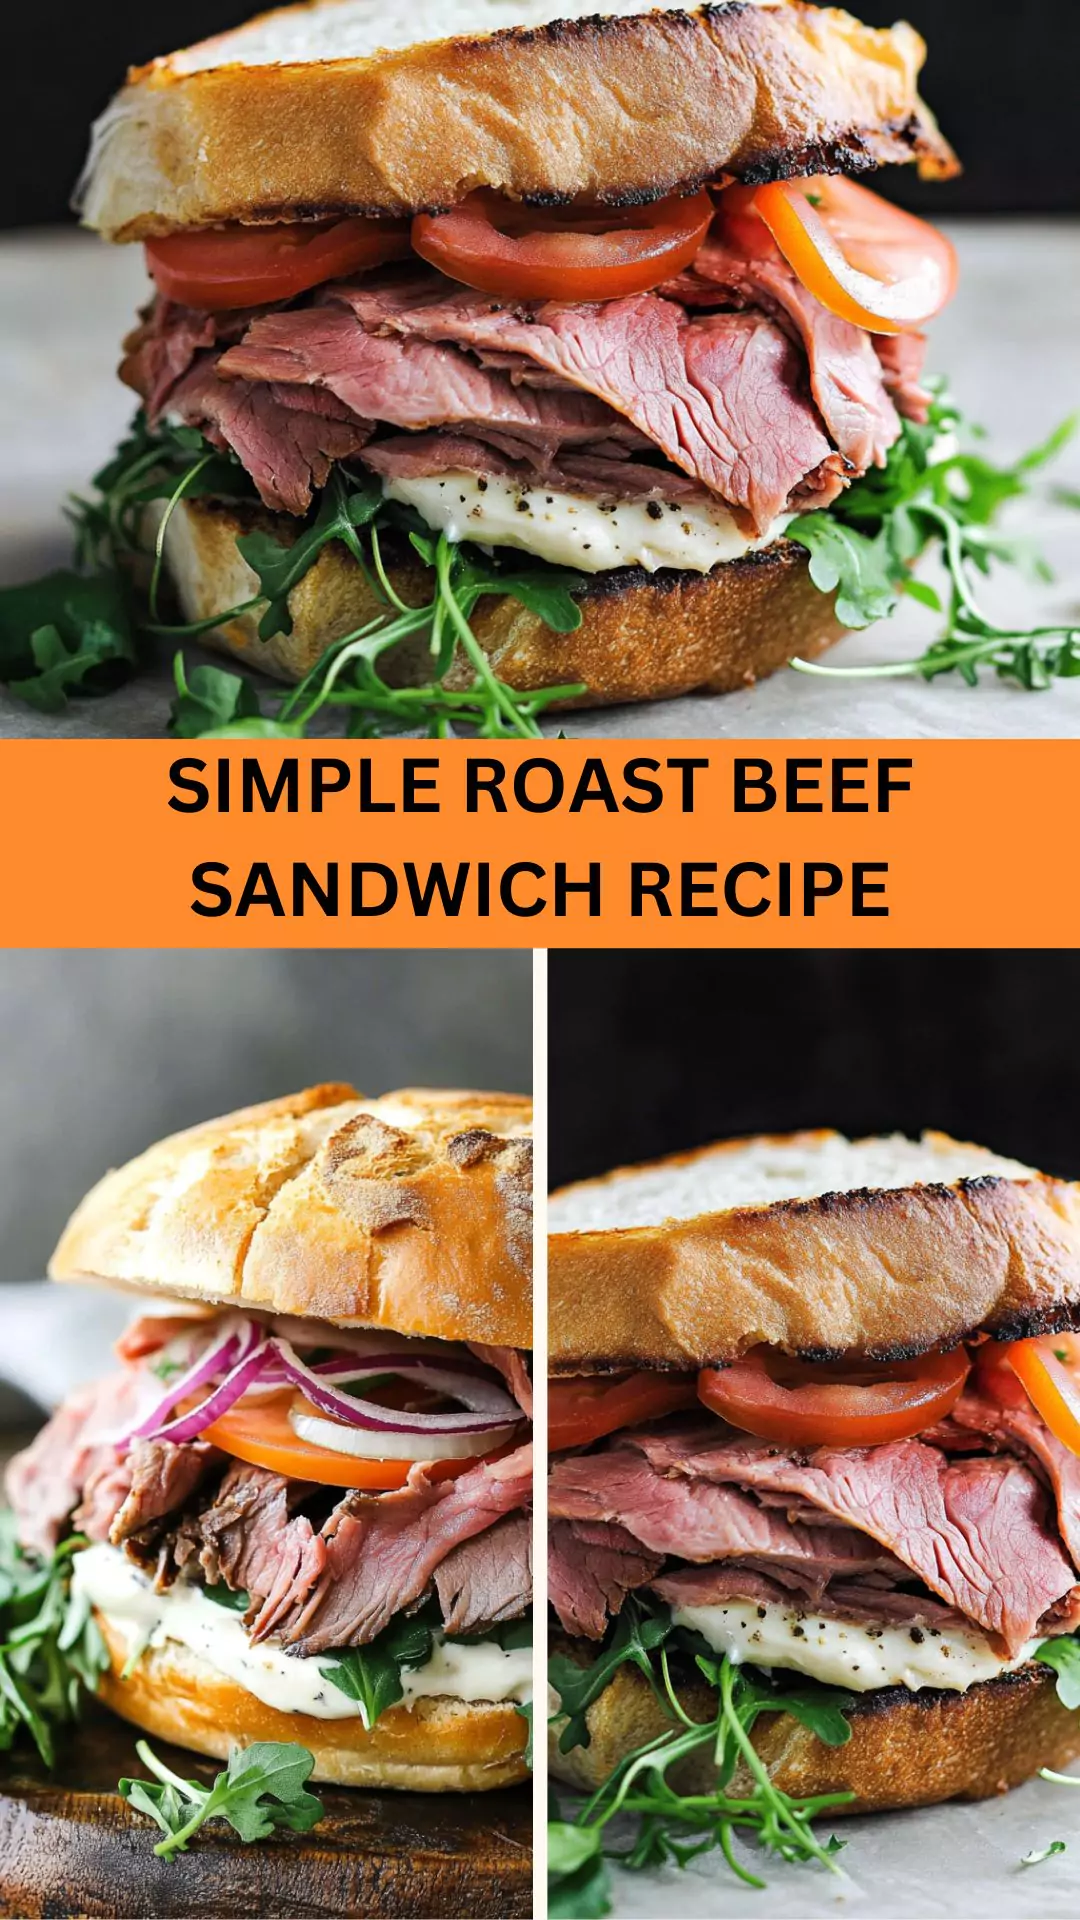
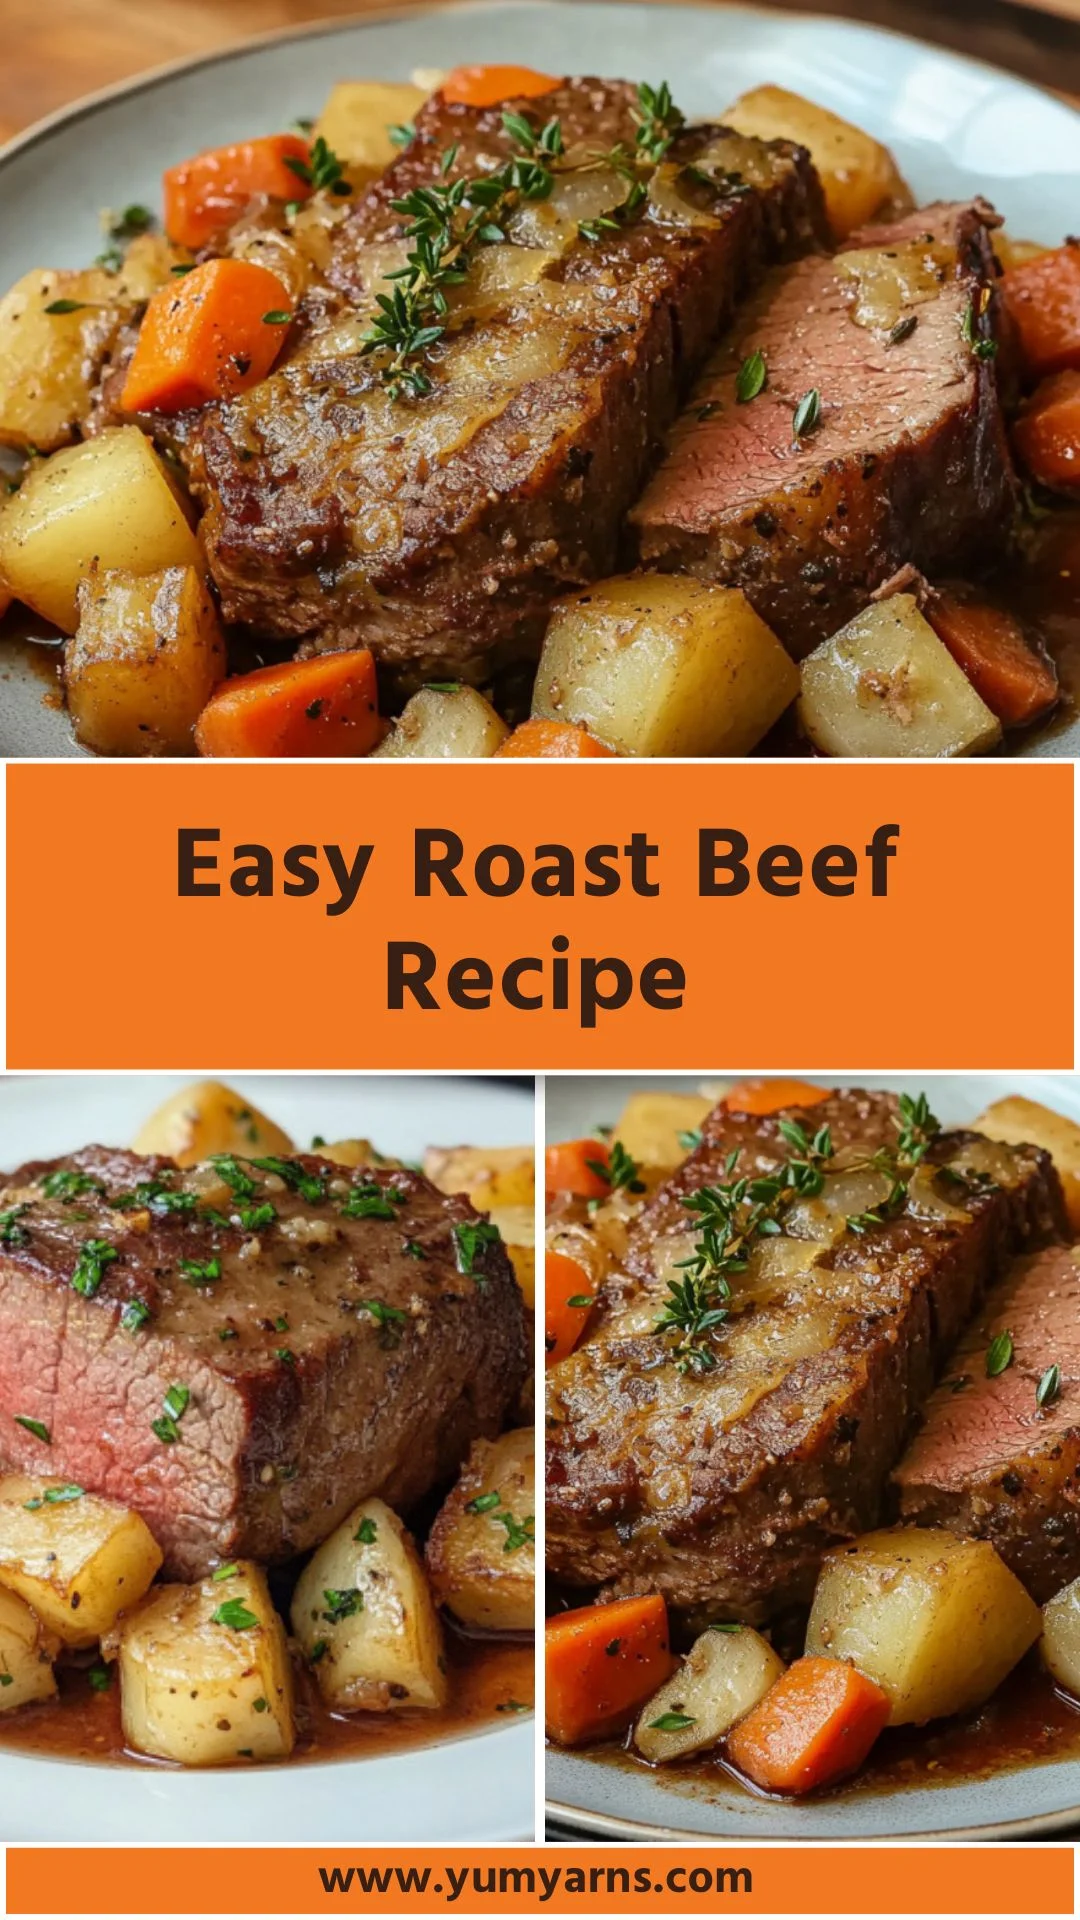
Today we’re embracing the art of great dining with an easy roast beef recipe. I promise you, this isn’t just any roast beef; it’s practically a hug in food form. Whether it’s for Sunday dinner or a special holiday meal, this dish makes an impression and fits into even the busiest of schedules.
You see, roast beef often gets a reputation for being complicated — only reserved for those who have mastered the culinary arts. I’m here to debunk that myth!
Together, we’ll embark on a cooking journey that’s uncomplicated, yet leaves everyone wanting just one more slice. So, grab your apron and let’s get to work.
What is Easy Roast Beef?
Easy roast beef is a straightforward way to prepare a tender, flavorful cut of beef without spending hours slaving over a hot stove. Using a boneless chuck roast, we’ll create a dish that’s both succulent and satisfying. The key lies in simple ingredients and a few methods that yield impressive results.
You won’t need to be a culinary wizard to achieve juicy perfection. Trust me; this is achievable for anyone, even if you burn toast!
You will also like the following Launch and Dinner recipes!
What Makes This Recipe Different from Other Easy Roast Beef Recipes?
You might find a myriad of roast beef recipes available online. What distinguishes this one is its sheer simplicity and flavor. We utilize everyday ingredients that you likely have in your kitchen. There’s no need for exotic spices or fancy techniques. It’s all about letting the beef shine.
The combination of fresh thyme, garlic, and smoked paprika elevates the taste without overwhelming it. It’s all about balance! You’ll savor flavors that feel homemade, while the process remains relaxed. After all, cooking should be a joy, not a chore.
How does it Taste Like?
If I had to describe the taste, I’d say it’s like a festival of flavors dancing on your taste buds. The beef is rich and deeply savory, impossible to resist.
Each bite offers a tender chew, complemented by the aromatic backdrop of garlic and herbs. Let’s not forget the lovely smokiness from the paprika, adding intrigue with each slice. Simply put, it’s comfort food at its finest!
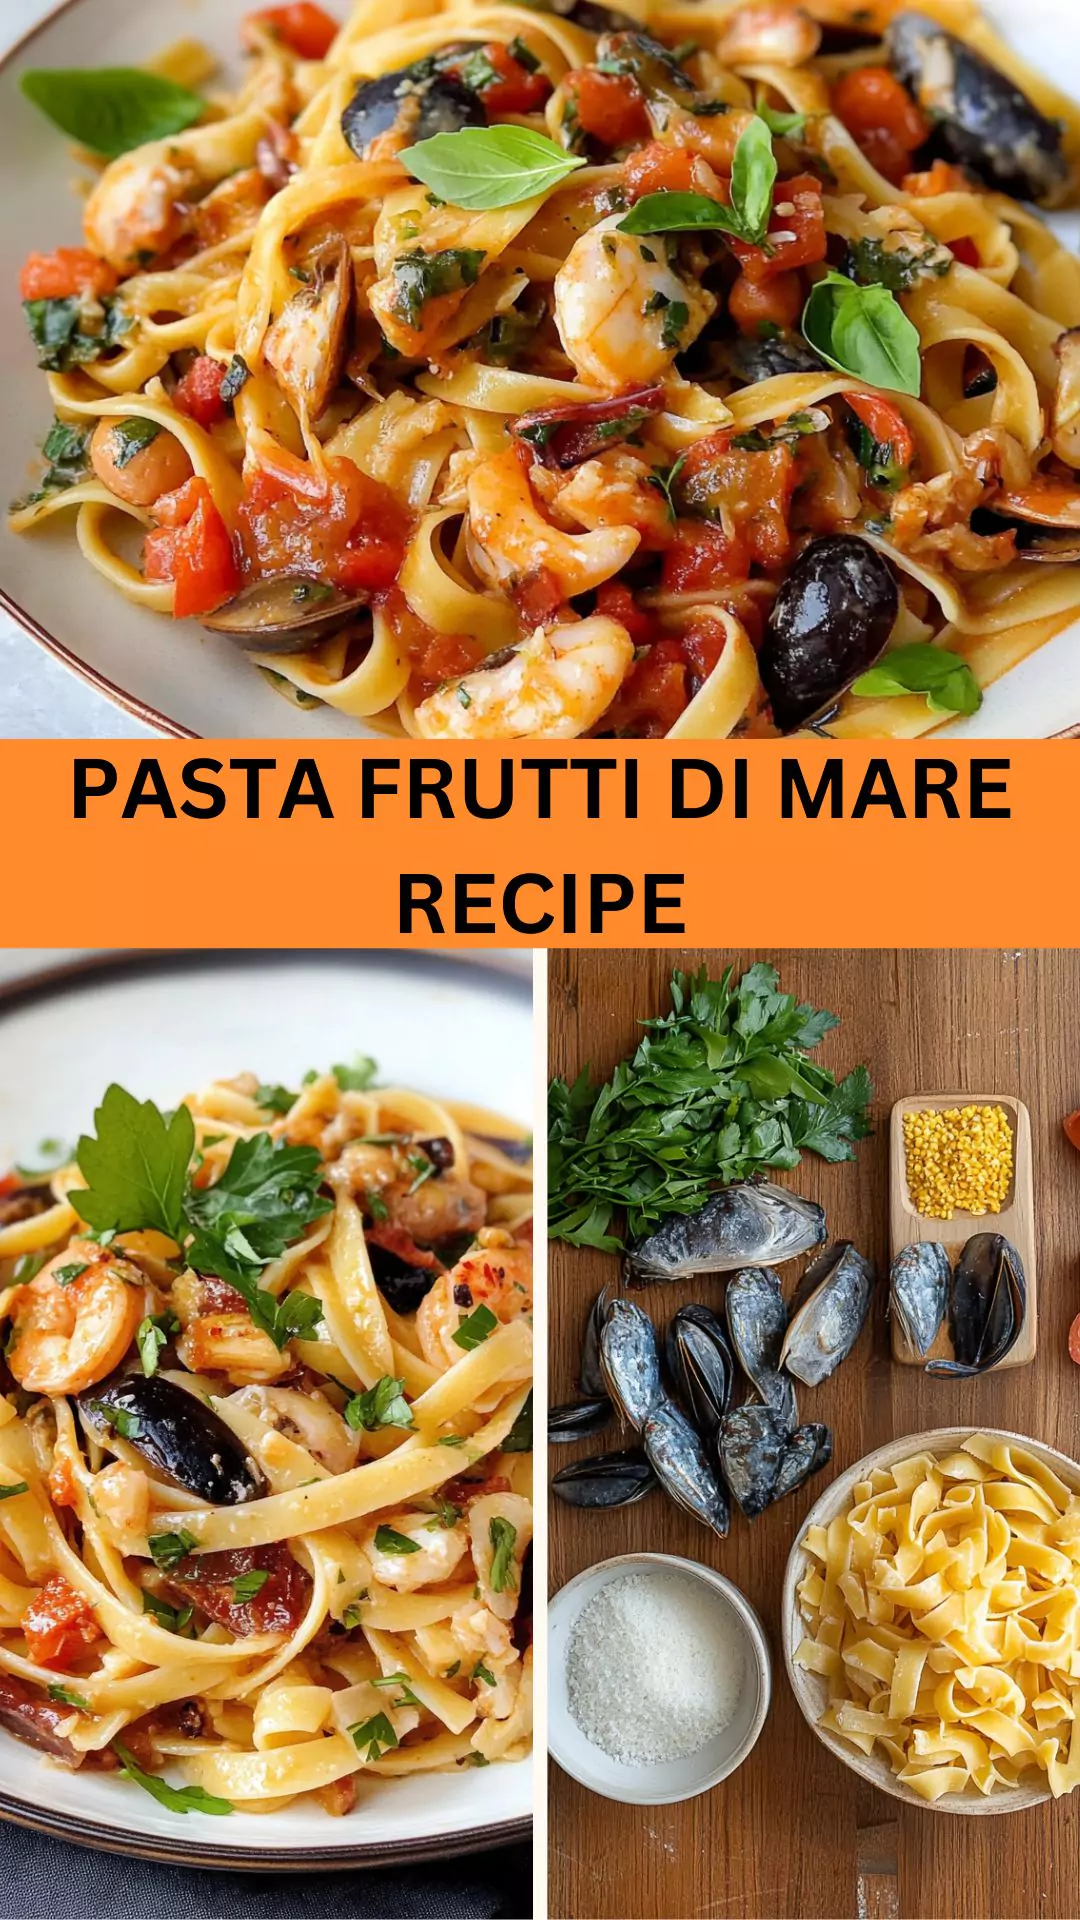
Ingredients You’ll Need to Make This Dish
Let’s gather our ingredients to set the stage for something extraordinary. You’ll need:
- 4 pounds boneless chuck roast
- 1 medium onion, chopped
- 2 garlic cloves, finely minced
- 2 teaspoons extra virgin olive oil
- 2 dried bay leaves
- 1 teaspoon sea salt
- ½ teaspoon freshly cracked black pepper
- 1 teaspoon smoked paprika
- 1 tablespoon fresh thyme leaves
With these ingredients, you’re well on your way to creating a meal that your family will rave about.

Step-by-Step Instructions
Now, let’s break down the preparation process. It’s simple, but each step is essential.
Step 1: Prepare the Roast
Begin by patting the chuck roast dry with paper towels. This helps promote browning. Season generously with salt and pepper on all sides. Let it rest for about 15 minutes to ensure it absorbs the flavors.
Step 2: Heat the Olive Oil
In a large skillet or Dutch oven, heat the extra virgin olive oil over medium-high heat. You want it hot but not smoking. Once ready, carefully place the roast in the pan. Sear it for about 3-4 minutes on each side until it develops a golden-brown crust. This step locks in those delicious juices we want!
Step 3: Add Aromatics
Remove the roast from the skillet and set it aside. In the same pan, add the chopped onion and minced garlic. Sauté for 2-3 minutes until the onions soften and become translucent. This combination forms a flavorful base.
Step 4: Combine Ingredients
Return the roast to the pot. Tuck the bay leaves and thyme around it. Sprinkle the smoked paprika on top. Don’t forget — this is where the magic happens!
Step 5: Add Liquid
Now, pour in enough water to at least cover half of the roast. This moisture creates a savory broth for our beef. Cover the pot with a lid and bring it to a gentle simmer.
Step 6: Roast Away
Lower the heat and let the roast braise. Cook it for about 4 hours or until it becomes fork-tender. The long, slow cooking process ensures all the flavors meld wonderfully.
Step 7: Serve
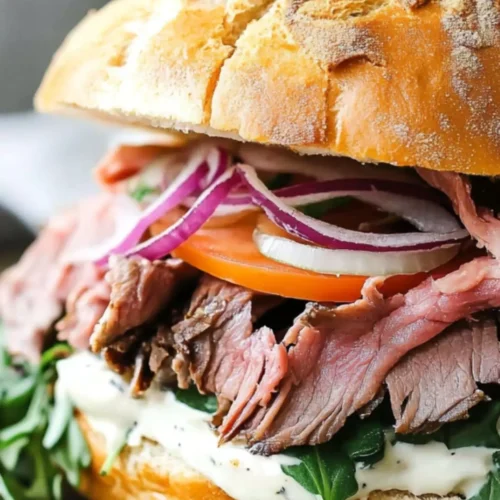
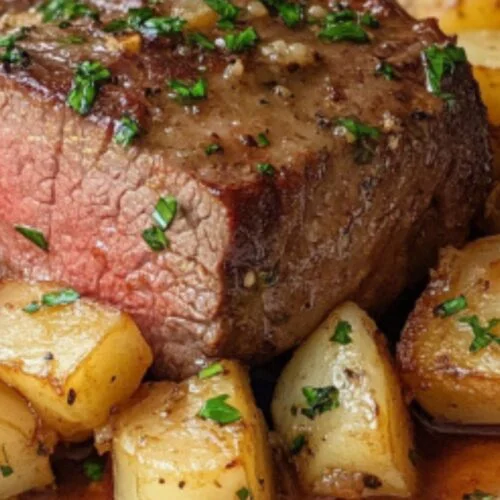
Once done, remove the roast from the pot. Allow resting for a few minutes before slicing. This lets the juices settle back into the meat. Serve with your favorite sides, and enjoy the rave reviews.
Tips & Tricks On Making Easy Roast Beef
- Choose the Right Cut: A boneless chuck roast works beautifully. It’s marbled with just the right amount of fat necessary for flavor and tenderness.
- Searing is Essential: Don’t skip the searing step! It creates a delicious crust that adds to the overall texture and flavor.
- Don’t Rush the Cooking Time: Low and slow is the key to perfect roast beef. Patience is your best friend here.
- Let it Rest: Always allow the beef to rest before slicing. This helps retain moisture, making every bite juicy.
- Use the Leftovers Wisely: If you have leftovers, make beef sandwiches or a hearty beef stew. The possibilities are endless.
Nutrition Information
Each serving of easy roast beef contains approximately:
- Calories: 310
- Protein: 50g
- Fat: 12g
- Carbohydrates: 0g
- Fiber: 0g
This dish can fit well into various diets while providing a hearty dose of protein!

How Do I Store This Dish?
Storing roast beef is straightforward. After serving, let the leftovers cool completely. Transfer to an airtight container and refrigerate. It’ll stay fresh for up to 4 days.
You can also freeze for up to 3 months. Just remember to slice it before freezing for easier reheating.
What Other Substitutes Can You Use in Easy Roast Beef?
If you want to switch things up, consider these options:
- Brisket: A classic alternative, brisket offers a similar rich flavor.
- Round Roast: Leaner than chuck but still tasty. Adjust cooking time for this cut.
- Pork Loin: If you’re feeling adventurous, this provides a different flavor profile.
- Lamb Shoulder: Craving something different? This will give you a unique taste.
- Vegetarian Option: Use a hearty cauliflower roast; season generously to mimic those beefy flavors.
Easy Roast Beef
Equipment
- large skillet
Ingredients
- 4 pounds boneless chuck roast
- 1 medium onion chopped
- 2 garlic cloves finely minced
- 2 teaspoons extra virgin olive oil
- 2 dried bay leaves
- 1 teaspoon sea salt
- ½ teaspoon freshly cracked black pepper
- 1 teaspoon smoked paprika
- 1 tablespoon fresh thyme leaves
Instructions
Step 1: Prepare the Roast
- Begin by patting the chuck roast dry with paper towels. This helps promote browning. Season generously with salt and pepper on all sides. Let it rest for about 15 minutes to ensure it absorbs the flavors.
Step 2: Heat the Olive Oil
- In a large skillet or Dutch oven, heat the extra virgin olive oil over medium-high heat. You want it hot but not smoking. Once ready, carefully place the roast in the pan. Sear it for about 3-4 minutes on each side until it develops a golden-brown crust. This step locks in those delicious juices we want!
Step 3: Add Aromatics
- Remove the roast from the skillet and set it aside. In the same pan, add the chopped onion and minced garlic. Sauté for 2-3 minutes until the onions soften and become translucent. This combination forms a flavorful base.
Step 4: Combine Ingredients
- Return the roast to the pot. Tuck the bay leaves and thyme around it. Sprinkle the smoked paprika on top. Don’t forget — this is where the magic happens!
Step 5: Add Liquid
- Now, pour in enough water to at least cover half of the roast. This moisture creates a savory broth for our beef. Cover the pot with a lid and bring it to a gentle simmer.
Step 6: Roast Away
- Lower the heat and let the roast braise. Cook it for about 4 hours or until it becomes fork-tender. The long, slow cooking process ensures all the flavors meld wonderfully.
Step 7: Serve
- Once done, remove the roast from the pot. Allow resting for a few minutes before slicing. This lets the juices settle back into the meat. Serve with your favorite sides, and enjoy the rave reviews.
Notes
- Choose the Right Cut: A boneless chuck roast works beautifully. It’s marbled with just the right amount of fat necessary for flavor and tenderness.
- Searing is Essential: Don’t skip the searing step! It creates a delicious crust that adds to the overall texture and flavor.
- Don’t Rush the Cooking Time: Low and slow is the key to perfect roast beef. Patience is your best friend here.
- Let it Rest: Always allow the beef to rest before slicing. This helps retain moisture, making every bite juicy.
- Use the Leftovers Wisely: If you have leftovers, make beef sandwiches or a hearty beef stew. The possibilities are endless.
Nutrition
Frequently Asked Questions
Can I make this roast beef recipe in a slow cooker?
Absolutely! Sear the beef first, then add everything to a slow cooker. Cook on low for 6-8 hours until tender
What can I do if my roast is tough?
If it ends up tough, it might not have been cooked long enough. Return it to a pot with a bit of liquid and simmer longer.
Can I cook this roast beef recipe in an oven?
Yes, if you prefer oven-roasting, sear it first, then place in a preheated oven at 325°F (163°C) and roast until tender
What herbs can I substitute for thyme?
Rosemary or oregano would make good replacements. Both add fantastic flavor!
Can I use fresh vegetables in the pot?
Definitely! Carrots, potatoes, or celery can be added for extra flavor and texture.
Conclusion
There you have it! Easy roast beef made enjoyable, straightforward, and delicious. As a registered dietitian with years of culinary exploration, I firmly believe that everyone can create a fantastic meal without losing their sanity in the process.
This dish is perfect for family dinners or festive gatherings. By incorporating simple ingredients and methods, you’ll impress your loved ones without breaking a sweat.
So next Sunday, or perhaps tonight, fire up your stove and give this easy roast beef a try. You just might find it becoming a staple in your household. Happy cooking, friends!