When you think about enjoying a Jollibee chicken sandwich, it’s hard not to consider the sides. An irresistible meal calls for accompaniments that deepen the experience. So, what goes well with this crispy delight? Here are a few suggestions:
This sweet and savory spaghetti is a classic. The sweetness of the sauce complements the savory chicken beautifully.
French Fries are Simple but classic. Their golden crunch adds texture to your meal without overpowering it.
Add a slice of Filipino culture with this flavorful hotdog, topped with cheese and mayo.
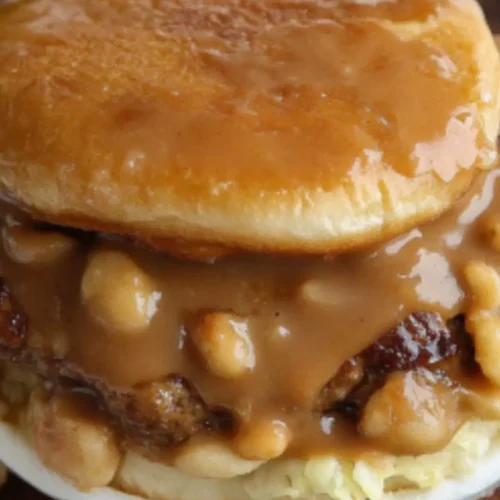
Dipping pieces of your sandwich into rich, creamy gravy takes indulgence to the next level.
Ready for a delicious dive into the world of the Jollibee chicken sandwich? Let’s explore its magic together.

Ah, Jollibee’s chicken sandwich! Just thinking about it makes my taste buds tingle. I remember my first bite—crispy, flavorful, and oh-so-satisfying. It’s the kind of experience that makes you want to savor every second.
This sandwich has a special story. Jollibee, hailing from the Philippines, has won hearts all around the globe, and their chicken sandwich is a prime example of why.
In this blog post, we’ll break down this tantalizing treat. We’ll explore what makes Jollibee’s chicken sandwich unique, share a recipe you can replicate at home, and discuss some essential tips to elevate your meal experience. Let’s dig in!
You will also like the following Dinner recipes!
- Best Jollibee Spaghetti Recipe
- How to make Pollo Tropical Calypso Beef
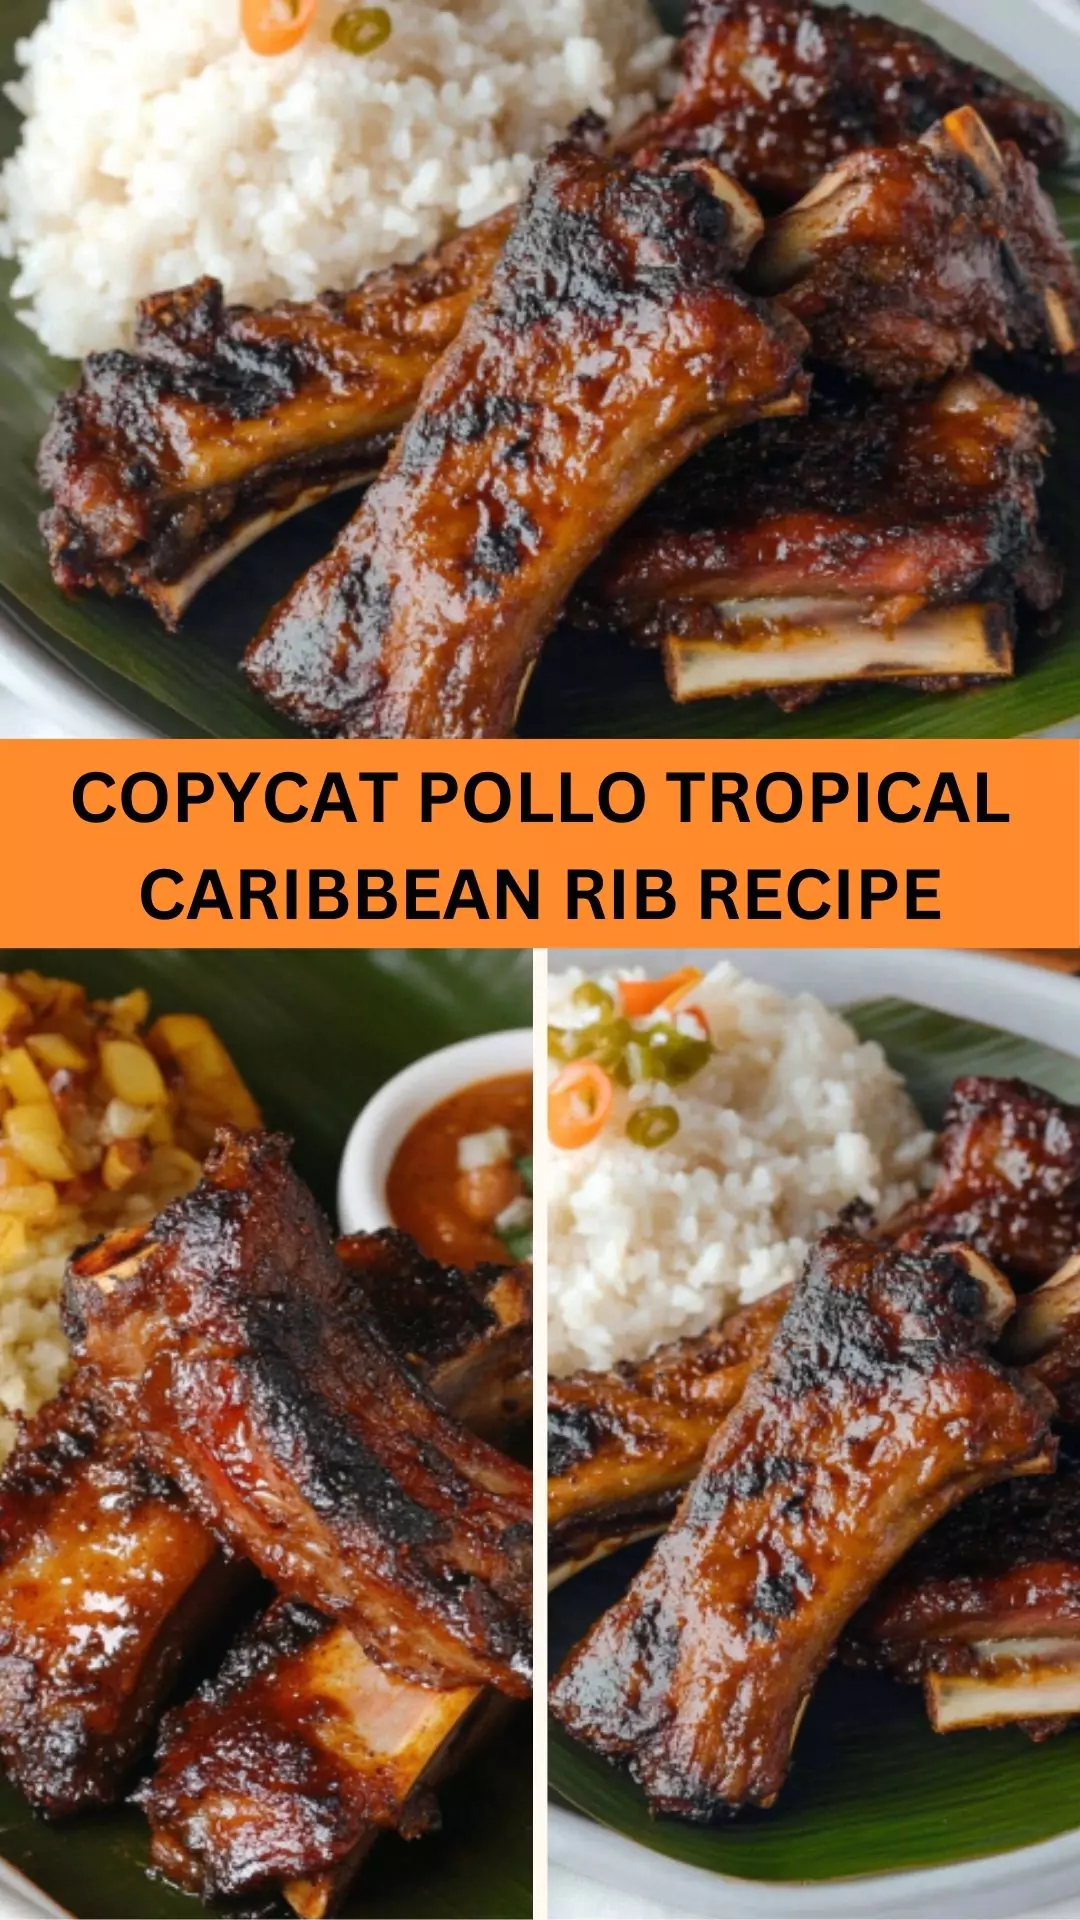
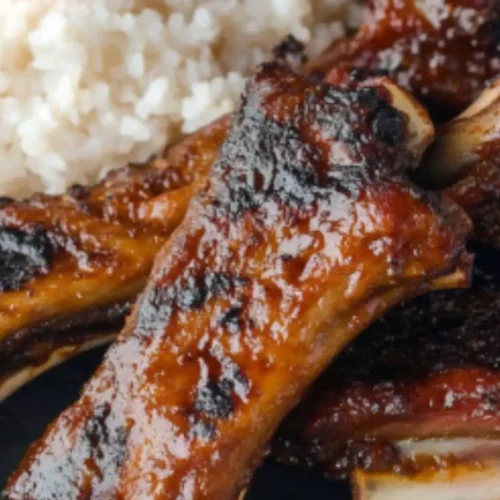
- Easy Pollo Tropical Caribbean Rib Recipe
What is a Jollibee Chicken Sandwich?
A Jollibee chicken sandwich isn’t just a meal; it’s an experience. It features a juicy, marinated chicken thigh, perfectly fried until golden brown. The crispy exterior gives way to tender meat, and it’s usually complimented by a special spicy mayo and topped with fresh lettuce or pickles.
This sandwich encapsulates the fun, vibrant spirit of Filipino cuisine while providing a comforting taste that everyone loves.
Why This Recipe Works
1. Flavor Explosion with Every Bite
This recipe leverages a buttermilk marinade that infuses moisture and flavor deep into the chicken. The addition of spices like smoked paprika and cayenne powder makes the sandwich sing with every crunch.
2. Texture Matters
The combination of flour and cornstarch creates an ultra-crispy coating that’s essential. You’ve experienced it—biting into a sandwich where the crunch hits you first? That’s what we aim for here.
3. Spicy Mayonnaise Adds a Kick
A creamy mayo mixed with Sriracha brings the perfect contrast. The creaminess balances the spice, ensuring your taste buds have a party with each bite.
4. Customizable and Fun
You can tailor the toppings and spiciness to match your preferences. Go wild with toppings like tomatoes, more pickles, or even hot sauce. This sandwich invites creativity.
Ingredients You’ll Need To Make This Jollibee Chicken Sandwich
Let’s assemble our shopping list for this culinary adventure. You’ll need:
For the Buttermilk Marinade
- 4 boneless, skinless chicken thighs (pounded to an even thickness)
- 1 cup buttermilk
- 2 tablespoons Sriracha (or your preferred hot sauce)
- 1 teaspoon each of salt, pepper, and garlic powder
For the Flour Mixture
- 1 cup all-purpose flour
- 3 tablespoons cornstarch
- 1 tablespoon smoked paprika
- 1 teaspoon of salt, pepper, garlic powder, and cayenne powder (reduce cayenne for milder heat)
For the Spicy Mayo
- 1/2 cup mayonnaise
- 2 tablespoons Sriracha (or your favorite hot sauce)
To Assemble
- Cooking oil (such as vegetable or canola)
- 4 burger buns (lightly toasted with butter)
- Lettuce, tomato, and/or pickles (sliced)
- 1 tablespoon honey (optional, for a hint of sweetness in the spicy mayo)

How To Make These?
Now, let’s break down how to whip this up. Follow these steps, and you’ll be enjoying your homemade Jollibee chicken sandwich in no time!
Step 1: Prepare the Marinade
Begin by combining the buttermilk, Sriracha, salt, pepper, and garlic powder in a bowl. Whisk it all together until it’s smooth and well mixed. Add the chicken thighs to the bowl, ensuring they are fully submerged. Let it marinate for at least 30 minutes—this is where the magic happens.
Step 2: Make the Flour Mixture
In a separate bowl, mix together the flour, cornstarch, and all the spices. This mixture is crucial for achieving that glorious crunch once fried.
Step 3: Heat the Oil
In a deep skillet or frying pan, heat about an inch of cooking oil on medium-high heat. You’ll know it’s ready when a drop of the flour mixture bubbles immediately upon contact.
Step 4: Dredge the Chicken
Take the marinated chicken out of the buttermilk, allowing the excess marinade to drip off. Dredge the chicken pieces in the flour mixture, making sure they’re completely coated. Shake off any excess.
Step 5: Fry the Chicken
Gently place the coated chicken into the hot oil. Fry for about 5-7 minutes per side or until golden brown and fully cooked. A thermometer should read 165°F when they’re done.
Step 6: Prepare the Spicy Mayo
While the chicken is frying, mix together the mayonnaise and Sriracha in a small bowl. Adjust the spice level to your liking.
Step 7: Assemble Your Sandwich
Toast your burger buns with butter until golden. On the bottom bun, spread a generous amount of the spicy mayo. Place the fried chicken on top, add your choice of lettuce, tomatoes, and pickles, and finish with the top bun.
Step 8: Enjoy!
Take a moment to admire your creation. Then dive right in!
Tips for a Mouthwatering Experience
- Marinate Longer: If you have the time, marinating the chicken for a few hours or even overnight enhances flavor and tenderness.
- Maintain Oil Temperature: Keep your oil hot enough. If it’s too cool, the chicken will absorb more oil and get soggy.
- Double-Fry for Extra Crispiness: For the ultimate crunch, consider cooking the chicken twice. Just fry until golden once, let it rest, and fry again until extra crispy.
- Season Your Flour: Don’t skimp on seasoning the flour mixture. It’s your chance to add flavor all the way through.
- Toast the Buns: A lightly toasted bun adds a nice crunch and prevents sogginess from the mayo.

How to Store the Leftovers?
If you find yourself with a leftover sandwich or several chicken pieces, don’t fret! Store them properly to maintain their deliciousness.
- Refrigeration: Wrap the chicken tightly in foil or place it in an airtight container. Store it in the refrigerator for up to 3 days.
- Freezing: If longer storage is needed, freeze the fried chicken. Place it in a zip-top freezer bag, removing as much air as possible to prevent freezer burn. It can last for up to 3 months.
- Reheating: To regain that fabulous crunch, reheat in an oven. Preheat to 400°F, place the chicken on a baking sheet, and heat for 10-15 minutes.
Recommended Side Dishes for Jollibee Chicken Sandwich
Often, a meal is only as good as its side dishes. Here are a few to keep in mind:
1. Jolly Spaghetti:
This sweet spaghetti is a crowd-pleaser. The combination of sauce, cheese, and hotdogs is unique. It’s a fun pairing that’s sure to please.
2. French Fries:
Nothing beats classics. French fries add that crispy potato goodness, making sure every bite of your sandwich is balanced.
3. Mango Pie:
If you want a sweet touch, try Jollibee’s mango pie. The flaky crust and luscious filling create a dessert that contrasts nicely with the savory chicken.
4. Coleslaw:
A refreshing coleslaw can provide the perfect crunch, balancing the richness of the chicken sandwich with a cool, tangy twist.
Substitute Options for Ingredients
Sometimes, you might not have everything on hand. Here are some substitute options:
1. Buttermilk Substitutes:
If you don’t have buttermilk, mix one cup of milk with one tablespoon of lemon juice or vinegar. Let it sit for 5 minutes.
2. Chicken Thighs Replacement:
If you prefer white meat, chicken breasts work. Just be mindful—they can dry out faster, so adjust cooking times accordingly.
3. Spices Variations:
Feel free to adjust the spices. If you prefer milder flavors, skip the cayenne and stick with paprika and garlic powder.
4. Whole Wheat Flour:
For a healthier option, you can use whole wheat flour instead of all-purpose. Keep in mind that texture and flavor may vary slightly.

Jollibee Chicken Sandwich Recipe
Equipment
- deep skillet or frying pan
Ingredients
Buttermilk Marinade
- 4 boneless skinless chicken thighs, pounded to an even thickness
- 1 cup buttermilk see notes below for tips
- 2 tablespoons Sriracha or your preferred hot sauce for a spicy kick
- 1 teaspoon each salt pepper, and garlic powder (for basic seasoning)
Flour Mixture
- 1 cup all-purpose flour for dredging
- 3 tablespoons cornstarch to help create a crispy coating
- 1 tablespoon smoked paprika for a smoky depth
- 1 teaspoon each salt pepper, garlic powder, and cayenne powder (reduce cayenne for a milder heat)
Spicy Mayo
- 1/2 cup mayonnaise for a creamy base
- 2 tablespoons Sriracha or your favorite hot sauce for extra heat
- To Assemble
- Cooking oil for frying, such as vegetable or canola oil
- 4 burger buns lightly toasted with butter
- Lettuce tomato, and/or pickles, sliced, or your preferred toppings
- 1 tablespoon honey optional, for a hint of sweetness in the spicy mayo
Instructions
- Now, let’s break down how to whip this up. Follow these steps, and you’ll be enjoying your homemade Jollibee chicken sandwich in no time!
Step 1: Prepare the Marinade
- Begin by combining the buttermilk, Sriracha, salt, pepper, and garlic powder in a bowl. Whisk it all together until it’s smooth and well mixed. Add the chicken thighs to the bowl, ensuring they are fully submerged. Let it marinate for at least 30 minutes—this is where the magic happens.
Step 2: Make the Flour Mixture
- In a separate bowl, mix together the flour, cornstarch, and all the spices. This mixture is crucial for achieving that glorious crunch once fried.
Step 3: Heat the Oil
- In a deep skillet or frying pan, heat about an inch of cooking oil on medium-high heat. You’ll know it’s ready when a drop of the flour mixture bubbles immediately upon contact.
Step 4: Dredge the Chicken
- Take the marinated chicken out of the buttermilk, allowing the excess marinade to drip off. Dredge the chicken pieces in the flour mixture, making sure they’re completely coated. Shake off any excess.
Step 5: Fry the Chicken
- Gently place the coated chicken into the hot oil. Fry for about 5-7 minutes per side or until golden brown and fully cooked. A thermometer should read 165°F when they’re done.
Step 6: Prepare the Spicy Mayo
- While the chicken is frying, mix together the mayonnaise and Sriracha in a small bowl. Adjust the spice level to your liking.
Step 7: Assemble Your Sandwich
- Toast your burger buns with butter until golden. On the bottom bun, spread a generous amount of the spicy mayo. Place the fried chicken on top, add your choice of lettuce, tomatoes, and pickles, and finish with the top bun.
Step 8: Enjoy!
- Take a moment to admire your creation. Then dive right in!
Notes
- Marinate Longer: If you have the time, marinating the chicken for a few hours or even overnight enhances flavor and tenderness.
- Maintain Oil Temperature: Keep your oil hot enough. If it’s too cool, the chicken will absorb more oil and get soggy.
- Double-Fry for Extra Crispiness: For the ultimate crunch, consider cooking the chicken twice. Just fry until golden once, let it rest, and fry again until extra crispy.
- Season Your Flour: Don’t skimp on seasoning the flour mixture. It’s your chance to add flavor all the way through.
- Toast the Buns: A lightly toasted bun adds a nice crunch and prevents sogginess from the mayo.
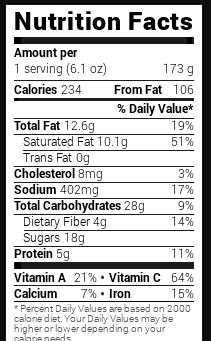
Nutrition
Frequently Asked Questions
1. Can I use chicken breast instead of thighs?
Yes, you can. However, chicken thighs provide more moisture and flavor. If using breasts, consider brining them first for juiciness.
2. Is there a vegetarian version of Jollibee’s chicken sandwich?
Absolutely! You can replace chicken with breaded and fried eggplant or cauliflower. Both offer a satisfying crunch and can be seasoned similarly.
3. How spicy is the sandwich?
The spiciness largely depends on how much Sriracha you use. Adjust it to your liking. The mayo helps balance the heat, so feel free to experiment.
4. What type of oil is best for frying?
Vegetable or canola oil works well due to their high smoke points. Avoid olive oil, as it burns at high temperatures.
5. Can I make this sandwich ahead of time?
While it’s best enjoyed fresh, you can fry the chicken ahead of time and reheat it later. Assemble the sandwich just before serving for optimal texture.
Conclusion
The Jollibee chicken sandwich is a joyful indulgence that encapsulates flavor and creates a memorable meal. Whether you’re revisiting the comforting taste of the Philippines or trying it for the first time, the experience is one to relish.
With this guide, you are armed with everything you need—from the secret sauce to perfect pairings—to entice your taste buds. So round up your friends or family, whip up this delightful sandwich, and let the feast begin. You’re not just making food; you’re creating happiness. Enjoy!