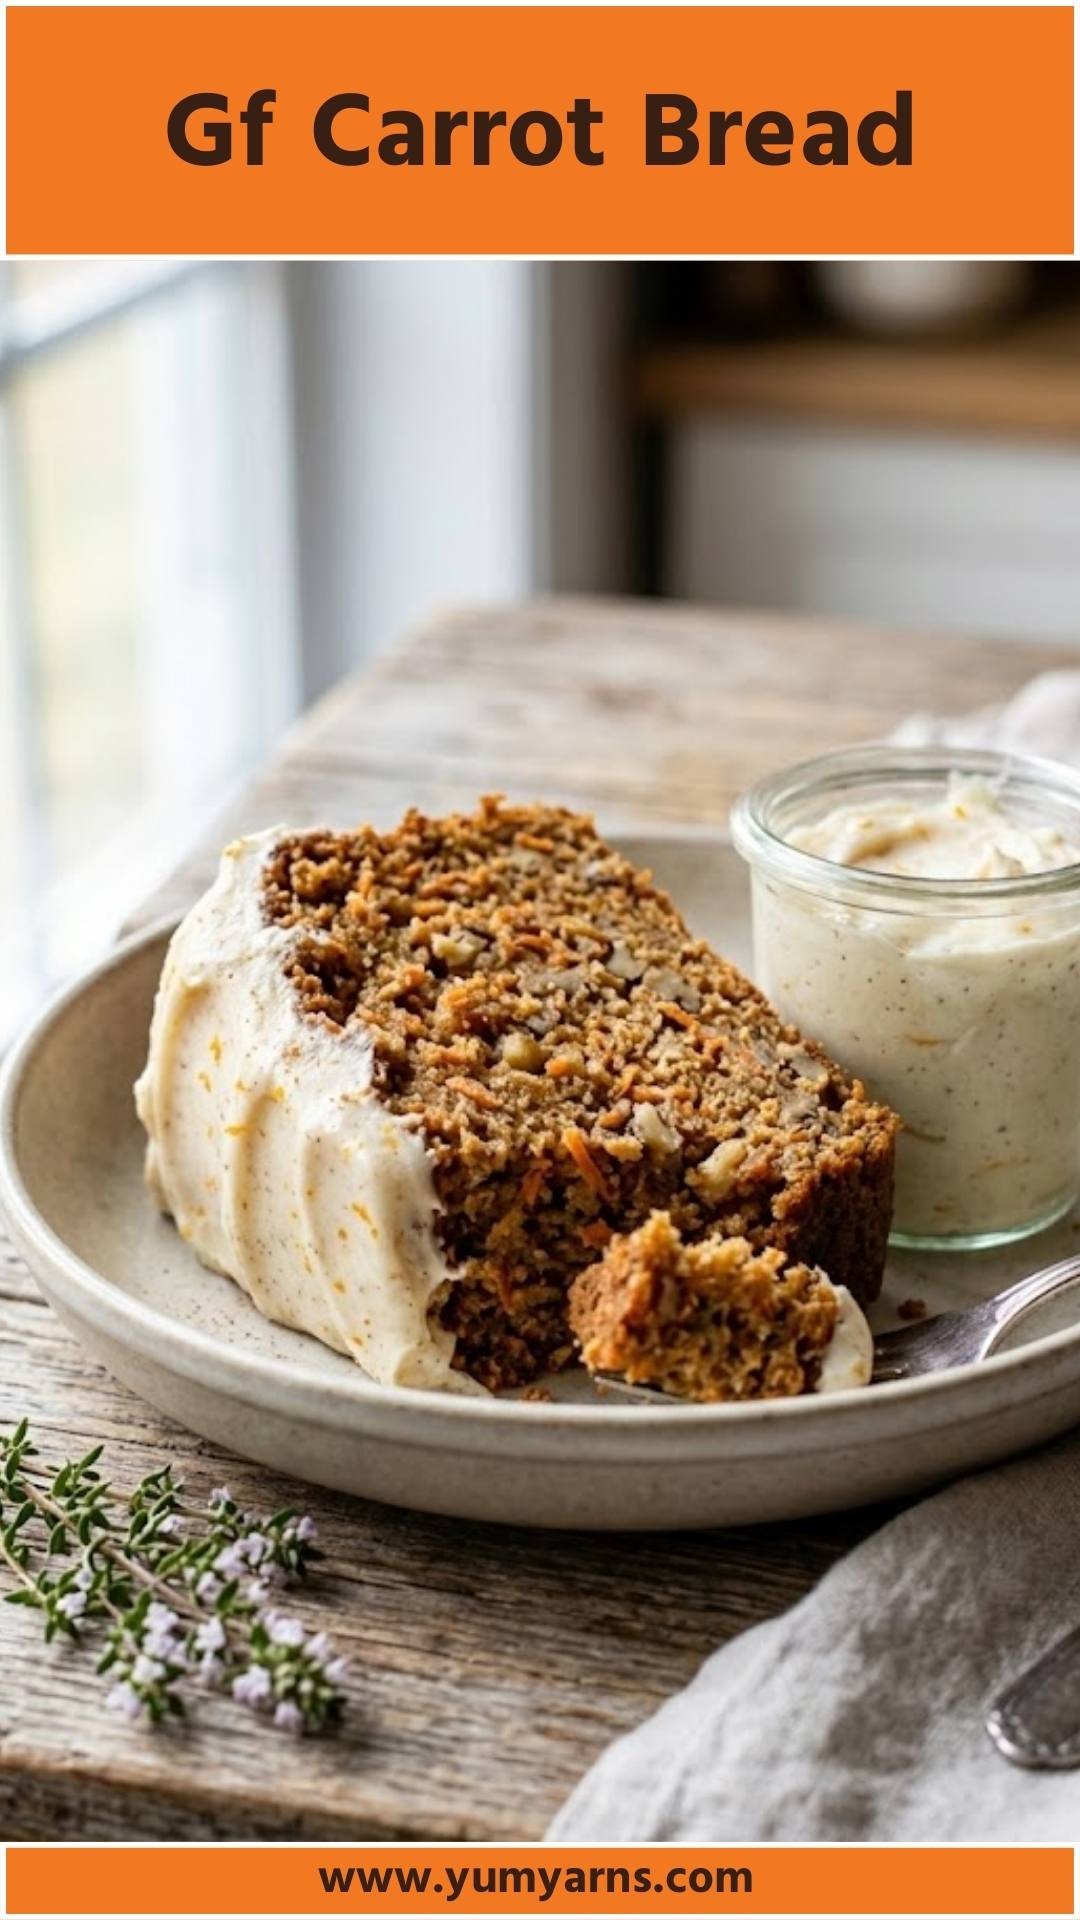
Frozen Oreo Pie – Yam Yurns

Frozen Oreo Pie

When the weather gets warm and you’re lounging on the porch, nothing beats a cold dessert to cool you down. Personally, I adore pairing this Frozen Oreo Pie with fresh fruit salads or a scoop of vanilla ice cream. 

The contrast of flavors and textures just gets my taste buds dancing. Whether it’s a picnic or a backyard gathering, this pie is the cherry on top—no pun intended!

Frozen Oreo Pie

Let me tell you about one of my all-time favorite desserts: Frozen Oreo Pie. It’s that kind of dish you whip up in no time and notice heads turning when you serve it. It’s rich, creamy, and so satisfying that I promise no one will leave the table without a smile—or a second slice. Best of all, it requires no baking, making it a go-to for busy summertime days.

You Might Like These Recipes!

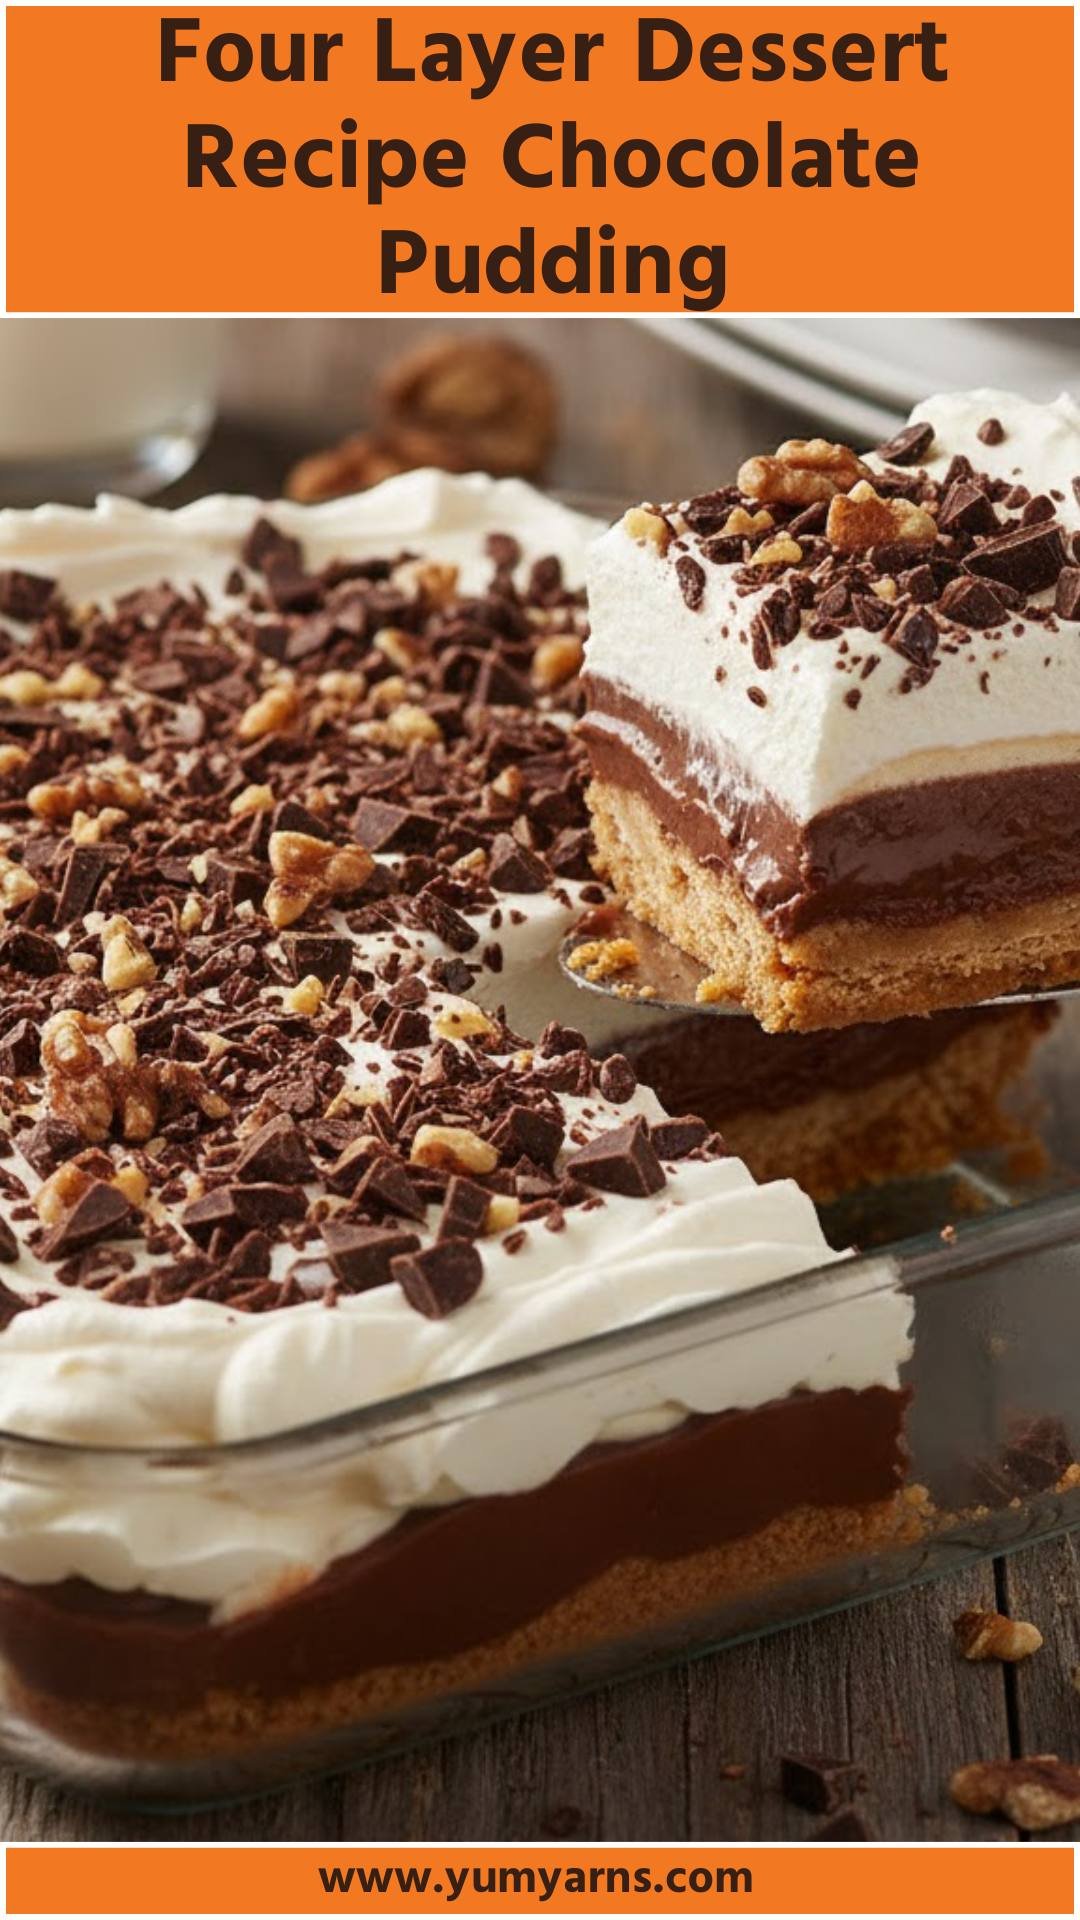
Four Layer Dessert Recipe Chocolate Pudding Recipe

Fresh Spinach Pizza Recipe

Fresh Ham Recipe In Crock Pot Recipe

What is Frozen Oreo Pie?

Frozen Oreo Pie is a delightful dessert that combines crushed Oreo cookies, creamy filling, and whipped topping, all frozen to perfection. Imagine a smooth, sweet filling set in a crunchy cookie crust—every bite is a treat! It’s a dessert that’s fun to make, and you can easily customize it to your liking.

What Makes This Recipe Different From Other Frozen Oreo Pies?

What sets this Frozen Oreo Pie apart is the highlight on fresh ingredients and the perfect balance of flavors. While many versions rely heavily on artificial ingredients or overly sweet toppings, my approach is to keep it simple and delicious with cream cheese that adds a rich texture, an extra handful of mini chocolate chips for added chocolate goodness, and a light dusting of cocoa powder on top for elegance.

How Does It Taste Like?

Think of the taste of this pie as pure bliss—chocolatey, creamy, and just the right amount of sweetness. The crunch from the crust pairs beautifully with the smooth filling, making it a satisfying dessert experience. The subtle hint of vanilla and cream from the whipped topping elevates the flavors even more—trust me, it’s a taste sensation that’s almost too good to be true!

Ingredients You’ll Need To Make This Dish

Ingredients You'll Need To Make This Dish

To make this delicious Frozen Oreo Pie, gather the following ingredients:

– For the crust:

– 30 crushed Oreo cookies

– 6 tablespoons unsalted butter, melted

– For the filling:

– 8 ounces cream cheese, softened

– ½ cup powdered sugar

– 1 ½ teaspoons pure vanilla extract

– 8 ounces frozen whipped topping (like Cool Whip), thawed

– 15 coarsely chopped Oreos

– ½ cup mini chocolate chips (for added flavor)

– For topping:

– Extra whipped topping and crushed Oreos, if desired

– A light sprinkle of cocoa powder

Ingredients From : mybakingaddiction.com

How to Make Frozen Oreo Pie?

Now, let’s dive into the steps of this easy-to-make Frozen Oreo Pie. It’s simple enough that anyone can give it a shot. Here’s how it goes:

Step 1: Prepare the Crust

Step 1: Prepare the Crust

In a medium bowl, take your crushed Oreo cookies and melted butter. Mix them together until everything is well blended. You want to make sure the crumbs are fully coated in butter, which ensures the crust will hold together nicely.

Once combined, press this mixture into the bottom and up the sides of a 9-inch pie plate. Your crust should have an even layer without any gaps. Pop the pie plate into the freezer for about 20 minutes. This will help the crust set, so it stays intact when you fill it.

Step 2: Mix the Filling

Step 2: Mix the Filling

In a large mixing bowl, grab your electric mixer and beat together the softened cream cheese, powdered sugar, and vanilla extract on medium speed. Whisk this mixture for about 3 minutes until it turns fluffy and well-combined.

The key here is to ensure there are no lumps from the cream cheese. Once that’s done, take your rubber spatula and gently fold in the thawed whipped topping. Go slow and steady to keep that light, airy texture. Finally, add in those coarsely chopped Oreos and mini chocolate chips, folding them in delicately.

Step 3: Assemble the Pie

Step 3: Assemble the Pie

Once the filling is thoroughly combined, spread it evenly into your chilled crust. Make sure it reaches all corners for an even slice later on. Smooth the top with your spatula. If you’re feeling extra fancy, you can sprinkle a little cocoa powder on top for a decorative touch!

Step 4: Chill Before Serving

Step 4: Chill Before Serving

Cover the pie and pop it in the refrigerator for at least 3 hours—or longer if you can resist the temptation! It’s a crucial step that allows all the flavors to meld together beautifully. Trust me, the longer it chills, the better it tastes.

Tips & Tricks On Making Frozen Oreo Pie

Use room temperature cream cheese for a creamier filling; this helps it blend smoothly.

Don’t skip the chilling time. It not only allows the flavors to meld but also firms up the pie for easier slicing.

Try adding a splash of espresso powder to the filling for a mocha twist.

Cut the slices with a hot knife. Dip your knife in hot water, then dry it before slicing for cleaner edges.

Get creative with toppings. Consider drizzling some melted chocolate or a sprinkle of chopped nuts for added texture.

How Do I Store This Dish?

You can store your Frozen Oreo Pie in the refrigerator for up to five days. If you have any leftovers (which is rare!), wrap it tightly in plastic wrap or cover it with aluminum foil. You can also freeze it for a future treat, but be sure to allow it to thaw in the fridge before serving again.

Serving Suggestions

Serve alongside fresh berries to cut through the richness with a pop of acidity.

Pair with a scoop of ice cream; vanilla or mint would work wonders.

Top with a drizzle of chocolate sauce for an indulgent treat.

Serve with a side of whipped cream for those who love an extra creamy bite.

Enjoy it with a cup of coffee; the chocolate pairs perfectly!

What Other Substitutes Can I Use in Frozen Oreo Pie?

Graham cracker crust can replace the Oreo crust for a different texture and flavor.

Almond milk cream cheese can work for a dairy-free version.

Coconut whipped topping is a great vegan alternative to traditional whipped topping.

Use peanut butter in the filling for a rich flavor twist.

Swap in gluten-free Oreos if you’re accommodating gluten intolerances.

Frozen Oreo Pie

Frozen Oreo Pie

Contributor One
Let me tell you about one of my all-time favorite desserts: Frozen Oreo Pie. It’s that kind of dish you whip up in no time and notice heads turning when you serve it. It’s rich, creamy, and so satisfying that I promise no one will leave the table without a smile—or a second slice. Best of all, it requires no baking, making it a go-to for busy summertime days.
Prep Time 20 minutes
Course Dessert
Cuisine American
Servings 8
Calories 350 kcal

Equipment

  • 9-inch pie plate
  • electric mixer
  • Mixing bowls
  • rubber spatula

Ingredients
  

  • To make this delicious Frozen Oreo Pie gather the following ingredients:

– For the crust:

  • – 30 crushed Oreo cookies
  • – 6 tablespoons unsalted butter melted

– For the filling:

  • – 8 ounces cream cheese softened
  • – ½ cup powdered sugar
  • – 1 ½ teaspoons pure vanilla extract
  • – 8 ounces frozen whipped topping like Cool Whip, thawed
  • – 15 coarsely chopped Oreos
  • – ½ cup mini chocolate chips for added flavor

– For topping:

  • – Extra whipped topping and crushed Oreos if desired
  • – A light sprinkle of cocoa powder

Instructions
 

Step 1: Prepare the Crust

  • In a medium bowl, take your crushed Oreo cookies and melted butter. Mix them together until everything is well blended. You want to make sure the crumbs are fully coated in butter, which ensures the crust will hold together nicely. Once combined, press this mixture into the bottom and up the sides of a 9-inch pie plate. Your crust should have an even layer without any gaps. Pop the pie plate into the freezer for about 20 minutes. This will help the crust set, so it stays intact when you fill it.

Step 2: Mix the Filling

  • In a large mixing bowl, grab your electric mixer and beat together the softened cream cheese, powdered sugar, and vanilla extract on medium speed. Whisk this mixture for about 3 minutes until it turns fluffy and well-combined. The key here is to ensure there are no lumps from the cream cheese. Once that’s done, take your rubber spatula and gently fold in the thawed whipped topping. Go slow and steady to keep that light, airy texture. Finally, add in those coarsely chopped Oreos and mini chocolate chips, folding them in delicately.

Step 3: Assemble the Pie

  • Once the filling is thoroughly combined, spread it evenly into your chilled crust. Make sure it reaches all corners for an even slice later on. Smooth the top with your spatula. If you’re feeling extra fancy, you can sprinkle a little cocoa powder on top for a decorative touch!

Step 4: Chill Before Serving

  • Cover the pie and pop it in the refrigerator for at least 3 hours—or longer if you can resist the temptation! It’s a crucial step that allows all the flavors to meld together beautifully. Trust me, the longer it chills, the better it tastes.

Notes

Use room temperature cream cheese for a creamier filling; this helps it blend smoothly.
Don’t skip the chilling time. It not only allows the flavors to meld but also firms up the pie for easier slicing.
Try adding a splash of espresso powder to the filling for a mocha twist.
Cut the slices with a hot knife. Dip your knife in hot water, then dry it before slicing for cleaner edges.
Get creative with toppings. Consider drizzling some melted chocolate or a sprinkle of chopped nuts for added texture.

Nutrition

Calories: 350kcalCarbohydrates: 64gProtein: 6gFat: 33gSaturated Fat: 16gTrans Fat: 0.4gCholesterol: 56mgSodium: 373mgPotassium: 230mgFiber: 2gSugar: 41g
Keyword Frozen Oreo Pie
Tried this recipe?Let us know how it was!

FAQs

1. Can I make this pie ahead of time?

Absolutely! Frozen Oreo Pie is perfect for make-ahead treats. Just ensure you store it covered in the freezer.

2. What if I don’t have mini chocolate chips?

No worries! You can simply omit them or use regular chocolate chips for a more pronounced chocolate flavor.

3. How can I make this pie more chocolatey?

You could add a chocolate drizzle on top or use chocolate-flavored whipped topping.

4. Can I use different flavored Oreos?

Yes! Feel free to experiment with different Oreo flavors, like mint or peanut butter, for a unique twist.

5. Is this pie suitable for special diets?

You can make this pie gluten-free and dairy-free with the right ingredient choices, as mentioned in the substitute section.

Conclusion

Making a Frozen Oreo Pie is as joyful as eating it! With simple ingredients and an easy method, you just can’t go wrong when treating yourself and your loved ones to this delectable dessert. Embrace the spirit of summer with this cool and creamy delight, and I can guarantee there will be smiles all around.

So whether you’re celebrating a special occasion or just want to indulge in something sweet, this Frozen Oreo Pie is a surefire way to sweeten your day! Enjoy every bite!

You Might Also Like These Latest Recipes!

Fried Salmon Tacos Recipe

Fresh Spinach Pizza Recipe

Fresh Ham Recipe In Crock Pot Recipe

Four Layer Dessert Recipe Chocolate Pudding – Yam Yurns

Four Layer Dessert Recipe Chocolate Pudding

Let’s face it—sometimes you just need a dessert that hits all the sweet spots. For me, that’s where a four-layer dessert comes into play. Picture this: a backyard barbecue on a sunny afternoon, the smell of grilled burgers in the air, and your family gathered around. Nothing complements that scene better than digging into a luscious dessert that looks as good as it tastes. This four-layer chocolate pudding dessert always steals the spotlight.

Four Layer Dessert Recipe Chocolate Pudding

Ah, the four-layer dessert—where rich chocolate pudding meets creamy layers and a crunchy base to make everyone forget their troubles. It’s the kind of treat that catches your eye and has you going back for seconds. The best part? It’s easy to whip up, making it the ideal choice for any occasion, from birthday parties to impromptu summer get-togethers.

You Might Like These Recipes

Pina Colada Italian Ice Pops Recipe

Strawberry and Pistachio Tart Recipe

Blueberry Yogurt Cookies Recipe

What is Four Layer Dessert Recipe Chocolate Pudding?

The four-layer dessert is a delightful treat composed of alternating layers of creamy textures and flavors, which play off each other beautifully. At the bottom, there’s a crunchy walnut crust, followed by a velvety cream cheese and whipped topping layer. Next comes the decadent chocolate pudding, topped off with more whipped topping, chocolate chunks, and a sprinkle of walnuts. It’s everything you want in a dessert, layered together in perfect harmony!

How Does It Taste Like?

The flavor profile of this four-layer dessert is nothing short of divine. You’ll first experience the buttery crunch of the crust that gives way to the rich, creamy textures of the cream cheese layer. The chocolate pudding is intense, yet light enough not to weigh you down, creating a delicious contrast atop the fluffy whipped topping. Finally, the sprinkling of chocolate chunks adds a hint of bittersweetness, balancing each spoonful beautifully.

Why You’ll Love This?

You’re going to adore this recipe for several reasons. First, it’s incredibly easy to prepare, taking just about 40 minutes from start to finish. Second, it’s versatile—feel free to swap in your family’s favorite nuts or chocolate variations. Lastly, with its rich layers and indulgent flavors, this dessert satisfies every chocolate lover’s dream.

The Ingredients

The Ingredients

To recreate this sumptuous four-layer dessert, you’ll need the following:

– 1 cup all-purpose flour

– 1/2 cup chilled unsalted butter

– 1 cup chopped walnuts, toasted (plus an extra 1/4 cup for topping)

– 1 package (8 ounces) cream cheese, softened

– 1 cup powdered sugar

– 2 cartons (8 ounces each) frozen whipped topping, thawed (divided)

– 2 1/2 cups 2% milk

– 2 packages (3.9 ounces each) instant chocolate pudding mix

– 1 cup semisweet chocolate chunks

– 1 teaspoon vanilla extract

– Chocolate syrup for drizzling

Ingredients From : tasteofhome.com

How to Make Four Layer Dessert Recipe Chocolate Pudding?

Creating this four-layer dessert is an enjoyable kitchen adventure. Trust me, the end results are worth every minute spent mixing, layering, and refrigerating. Let’s dive into the steps so you can impress your guests—and yourself—next time you need a sweet fix.

Step-by-Step Directions

Step 1: Prepare the Crust

Step 1: Prepare the Crust

Preheat your oven to 350°F (175°C). In a medium-sized mixing bowl, combine the all-purpose flour with the chilled butter. Use a pastry cutter or your fingers to mix until the mixture resembles coarse crumbs. Stir in 1 cup of toasted walnuts, ensuring they’re evenly distributed. Press this crumbly mixture firmly into the bottom of an ungreased 13×9-inch baking dish. Pop it into the oven and bake for about 12 to 15 minutes, or until you see a light golden brown color. Once baked, transfer it to a wire rack to cool completely.

Step 2: Create the Cream Cheese Layer

Step 2: Create the Cream Cheese Layer

In a separate small bowl, beat together the softened cream cheese and powdered sugar using an electric mixer until smooth and creamy. Fold in one carton of the thawed whipped topping gently to combine. Spread this delightful mixture evenly over the cooled crust, making sure to reach all corners.

Step 3: Prepare the Pudding Layer

Step 3: Prepare the Pudding Layer

In a large bowl, whisk together the milk and both packages of instant chocolate pudding mix. Continue whisking for about 2 minutes until it thickens up nicely. Pour this luscious pudding layer over the cream cheese layer, smoothing it out gently with a spatula.

Step 4: Top It Off

Step 4: Top It Off

Grab your remaining carton of whipped topping and spread it on top of the chocolate pudding layer. Next, sprinkle the chocolate chunks and the additional toasted walnuts evenly over the whipped topping, adding some visual appeal and crunch.

Step 5: Chill and Serve

Step 5: Chill and Serve

Cover the dish and refrigerate the dessert for at least an hour—or until it’s cold throughout. This step is crucial as it allows the flavors to meld. Before serving, drizzle some chocolate syrup on top for that extra touch of indulgence. Cut into squares and delight in the layers of goodness.

Tips On Making Four Layer Dessert Recipe Chocolate Pudding

Use Quality Ingredients: The better the ingredients, the tastier the dessert. Opt for high-quality chocolate chunks and pure vanilla extract.

Chill Time is Key: Allowing the dessert to chill ensures it holds its shape when sliced and enhances the flavors.

Toast the Walnuts: Toasting adds a whole new dimension of flavor. Just pop them in the oven or skillet for a few minutes until fragrant.

Mix It Up: Feel free to add different flavors of pudding or toppings, like crushed cookies or fresh fruit!

Make Ahead: This dessert is perfect for prepping in advance. Just don’t add the chocolate syrup until you’re ready to serve.

Storage Tips

To store your four-layer dessert, keep it covered with plastic wrap in the refrigerator. It will stay fresh for up to four days. Be sure to slice only what you need, as the cooling time helps the layers keep their structure.

Nutrition Information

This indulgent treat, while rich and satisfying, provides a white nutritional balance due to the inclusion of nuts and cream cheese. Each serving offers a delightful dose of protein and some healthy fats, but it’s best enjoyed in moderation.

Serving Suggestions

Add Fresh Berries: Top your servings with fresh strawberries or raspberries for a burst of color and flavor.

Pair with Vanilla Ice Cream: A scoop of vanilla ice cream on the side will elevate this dessert to a whole new level.

Garnish with Mint: Fresh mint leaves add a refreshing touch and a pop of color on each plate.

Serve with Espresso: The rich flavors pair wonderfully with a shot of espresso or a latte to balance the sweetness.

Create Individual Portions: For a more elegant presentation, layer the dessert in small cups or glasses.

What Other Substitutes Can I Use in Four Layer Dessert Recipe Chocolate Pudding?

Nut Alternatives: Try pecans or almonds if you prefer a different nutty flavor.

Dairy-Free Options: Use dairy-free cream cheese and whipped topping to make it dairy-free.

Gluten-Free Crust: Substitute almond flour or gluten-free flour for the all-purpose flour in the crust to keep it gluten-free.

Different Pudding Flavors: Vanilla or caramel pudding could provide a delicious twist to this dessert.

Greek Yogurt: For a healthier alternative, swap out half of the whipped topping with Greek yogurt for extra protein.

Four Layer Dessert Recipe Chocolate Pudding

Four Layer Dessert Recipe Chocolate Pudding

Tina Cooper
Ah, the four-layer dessert—where rich chocolate pudding meets creamy layers and a crunchy base to make everyone forget their troubles. It’s the kind of treat that catches your eye and has you going back for seconds. The best part? It’s easy to whip up, making it the ideal choice for any occasion, from birthday parties to impromptu summer get-togethers.
Prep Time 25 minutes
Cook Time 15 minutes
Course Dessert
Cuisine American
Servings 12
Calories 350 kcal

Equipment

  • 13×9-inch baking dish
  • Mixing bowls
  • Whisk
  • electric mixer
  • wire rack
  • refrigerator

Ingredients
  

  • To recreate this sumptuous four-layer dessert you’ll need the following:
  • – 1 cup all-purpose flour
  • – 1/2 cup chilled unsalted butter
  • – 1 cup chopped walnuts toasted (plus an extra 1/4 cup for topping)
  • – 1 package 8 ounces cream cheese, softened
  • – 1 cup powdered sugar
  • – 2 cartons 8 ounces each frozen whipped topping, thawed (divided)
  • – 2 1/2 cups 2% milk
  • – 2 packages 3.9 ounces each instant chocolate pudding mix
  • – 1 cup semisweet chocolate chunks
  • – 1 teaspoon vanilla extract
  • – Chocolate syrup for drizzling

Instructions
 

Step 1: Prepare the Crust

  • Preheat your oven to 350°F (175°C). In a medium-sized mixing bowl, combine the all-purpose flour with the chilled butter. Use a pastry cutter or your fingers to mix until the mixture resembles coarse crumbs. Stir in 1 cup of toasted walnuts, ensuring they’re evenly distributed. Press this crumbly mixture firmly into the bottom of an ungreased 13×9-inch baking dish. Pop it into the oven and bake for about 12 to 15 minutes, or until you see a light golden brown color. Once baked, transfer it to a wire rack to cool completely.

Step 2: Create the Cream Cheese Layer

  • In a separate small bowl, beat together the softened cream cheese and powdered sugar using an electric mixer until smooth and creamy. Fold in one carton of the thawed whipped topping gently to combine. Spread this delightful mixture evenly over the cooled crust, making sure to reach all corners.

Step 3: Prepare the Pudding Layer

  • In a large bowl, whisk together the milk and both packages of instant chocolate pudding mix. Continue whisking for about 2 minutes until it thickens up nicely. Pour this luscious pudding layer over the cream cheese layer, smoothing it out gently with a spatula.

Step 4: Top It Off

  • Grab your remaining carton of whipped topping and spread it on top of the chocolate pudding layer. Next, sprinkle the chocolate chunks and the additional toasted walnuts evenly over the whipped topping, adding some visual appeal and crunch.

Step 5: Chill and Serve

  • Cover the dish and refrigerate the dessert for at least an hour—or until it’s cold throughout. This step is crucial as it allows the flavors to meld. Before serving, drizzle some chocolate syrup on top for that extra touch of indulgence. Cut into squares and delight in the layers of goodness.

Notes

Use Quality Ingredients: The better the ingredients, the tastier the dessert. Opt for high-quality chocolate chunks and pure vanilla extract.
Chill Time is Key: Allowing the dessert to chill ensures it holds its shape when sliced and enhances the flavors.
Toast the Walnuts: Toasting adds a whole new dimension of flavor. Just pop them in the oven or skillet for a few minutes until fragrant.
Mix It Up: Feel free to add different flavors of pudding or toppings, like crushed cookies or fresh fruit!
Make Ahead: This dessert is perfect for prepping in advance. Just don’t add the chocolate syrup until you’re ready to serve.

Nutrition

Calories: 350kcal
Keyword Four Layer Dessert Recipe Chocolate Pudding
Tried this recipe?Let us know how it was!

FAQs

1. Can I freeze the four-layer dessert?

It is not recommended to freeze this dessert, as the cream layers may not hold their texture once thawed.

2. How can I make this dessert healthier?

You can reduce the sugar in the cream cheese layer, use Greek yogurt, or opt for a lighter whipped topping version.

3. What can I use instead of walnuts?

You can easily use another type of nut, or even skip them entirely for a nut-free version.

4. Can I make this dessert in advance?

Yes! In fact, it’s even better when allowed to sit in the fridge overnight. Just add any toppings just before serving.

5. How do I prevent the layers from mixing?

Make sure each layer has set properly before adding the next. Chilling between layers helps maintain separation.

Conclusion

The four-layer chocolate pudding dessert is much more than just a treat; it’s a slice of joy that can brighten up any occasion. With satisfying textures and rich flavors, each layer brings something unique to the table. So whether you’re hosting a gathering or simply want a sweet indulgence for yourself, this recipe has your back. Go ahead, give it a try, and watch it disappear in a flash—after all, nothing brings people together quite like dessert!

You Might Also Like These Latest Recipes!

Fish Taco Cod

Fish Pistachio Crust Recipe

Filled Hamburger

Pina Colada Italian Ice Pops – Yum Yarns

pina colada italian ice pops

When you think about enjoying Pina Colada Italian Ice Pops, delicious pairings can elevate your experience. Picture this: a sunny afternoon, perhaps a barbecue in your backyard, or a cozy gathering with friends. These icy treats can be wonderfully matched with a variety of foods and drinks.

Fresh Fruit Platter: Bright, juicy slices of watermelon, mango, and strawberries complement the tropical flavors.
Grilled Shrimp Skewers: The char from grilling enhances the sweetness of the pops, creating a balanced meal.
Coconut Water: Refreshing and hydrating, it’s an ideal drink alongside these ice pops.
Tropical Salad: Think spinach with citrus vinaigrette, served with avocado and walnuts. The salad’s freshness cuts through the richness of the pops.

pina colada italian ice pops

Summer is the time for refreshing treats. When it’s hot, who doesn’t crave something icy and sweet? Enter Pina Colada Italian Ice Pops. With their fruity flavor and creamy texture, they deliver the vibes of a beach vacation right to your backyard. 

I first stumbled upon this recipe while dreaming of the tropical islands. One taste, and I was hooked. It’s simple to make and endlessly adaptable. Plus, it’s a fun way to impress friends at any gathering.

What Are Pina Colada Italian Ice Pops?

These treats are a frozen twist on the classic Pina Colada cocktail. Traditionally, Pina Colada combines pineapple, coconut, and rum in a smooth blend perfect for sipping. In ice pop form, the same flavors come together delightfully. 

Using real fruit, creamy coconut milk, and the right touch of sweetness, these pops offer a treat everyone can enjoy. You can feel good about serving them; they’re made with whole ingredients rather than artificial flavorings.

Why This Recipe Works

This recipe thrives on balance. The sweetness of fresh pineapple is complemented by the rich, creamy coconut milk. Lime juice adds a zesty tang, brightening flavors that might otherwise feel one-dimensional. Plus, the optional rum brings a bit of fun to adult celebrations. Each bite is like a mini-vacation, reminiscent of lounging by the pool with your toes in the sand.

You will also like the following Dessert recipes!

What You’ll Need to Make This Dish

Before we dive into the steps, let’s gather our ingredients. Here’s what you need for these ice pops:

2 pounds fresh pineapple (chopped into spears)
Juice and finely grated zest from 2 limes
1 can unsweetened full-fat coconut milk
1/2 can thick coconut cream
1 can sweetened condensed milk
10 ounces coconut-flavored rum (optional)
1 teaspoon pure vanilla extract
1/4 teaspoon ground ginger

how to make pina colada italian ice pops

How to Make Pina Colada Italian Ice Pops

Ready to dive in? The process isn’t complicated. With a bit of chopping and blending, you’ll be on your way to icy bliss. Let’s break it down step by step.

Step 1: Prepare the Ingredients

Start by chopping your fresh pineapple. Aim for bite-sized pieces; this will help them blend smoothly. You can save a few pieces for garnish later if you’d like.

Step 2: Blend the Mixture

In your blender, combine the chopped pineapple, lime juice, lime zest, coconut milk, coconut cream, sweetened condensed milk, vanilla extract, and ginger. Blend until completely smooth. This should only take a minute or two. The mixture should be creamy and fragrant.

Step 3: Taste and Adjust

This step is key. Taste the mixture and decide if you need more lime for acidity or more sweetness. If you opted for the rum, add that now. Blend gently to incorporate.

Step 4: Pour into Molds

Next, carefully pour the mixture into ice pop molds. Leave a little room at the top to allow the mixture to expand as it freezes.

Step 5: Insert Sticks

If your molds come with lids, pop those on. If they’re open-top molds, insert wooden sticks at this stage. Make sure they stand upright.

Step 6: Freeze

Place the molds in the freezer. Let them freeze for at least 6 hours, but overnight is best. The longer they freeze, the better the texture.

Step 7: Unmold and Enjoy

When you’re ready to serve, run warm water over the outside of the molds briefly to make them easier to remove. Then, pull them out and enjoy your homemade Pina Colada Italian Ice Pops!

Tips for Success

Use Fresh Ingredients: Fresh pineapple makes a significant difference. Canned pineapple lacks the vibrant flavor.
Non-Alcoholic Version: Keep it kid-friendly by omitting the rum. They’ll still taste amazing!
Experiment with Layers: For visual appeal, pour a layer of the pineapple mixture, freeze for a bit, then add another layer for contrast.
Add Texture: Toss in some crushed pineapple or shredded coconut for added texture in the pops.
Storage: Store pops tightly wrapped or put them into a freezer bag to avoid freezer burn.

How to Store Leftovers

These ice pops can be stored in your freezer for several weeks. If you have extras, simply wrap them individually in plastic wrap or place them inside an airtight container. This helps them maintain their freshness and flavor.

Nutrition Information

Each Pina Colada Italian Ice Pop contains:
Calories: Approximately 120 per pop (without rum)
Carbohydrates: 20g
Sugars: 15g (from pineapple and sweetened condensed milk)
Fat: 5g (mostly healthy fats from coconut milk)

Nutritional values can vary based on specific ingredients, especially if you decide to adjust sweetness.

pina colada italian ice pops copycat recipe

How Would I Recommend Serving Pina Colada Italian Ice Pops?

Garnished with Fresh Mint: Adding a sprig of mint elevates the presentation and adds an additional layer of flavor.
With a Tropical Drink: Serve alongside a cooler of coconut water or tropical punch for that vacation vibe.
On a Dessert Table: Include these pops as part of a summer dessert spread, featuring seasonal fruits and cakes.
As Part of a Tasting Menu: Pair these pops with other frozen desserts for a fun dessert flight at your next gathering.

What Alternatives Can You Use for the Ingredients If Not Available?

Frozen Pineapple: If fresh isn’t available, frozen pineapple works well. Just allow it to thaw slightly before blending.
Coconut Milk: If you can’t find coconut milk, almond milk serves as a good substitute, though the flavor will differ slightly.
Dairy-Free Condensed Milk: Use a plant-based condensed milk if you want to keep it dairy-free.
Honey or Agave: If you want a different sweetener, honey or agave syrup can replace the sweetened condensed milk.

pina colada italian ice pops copycat recipe

Pina Colada Italian Ice Pops

When you think about enjoying Pina Colada Italian Ice Pops, delicious pairings can elevate your experience. Picture this: a sunny afternoon, perhaps a barbecue in your backyard, or a cozy gathering with friends.
Prep Time 20 minutes
Freezing time 5 hours
Total Time 5 hours 20 minutes
Course Dessert
Cuisine Italian
Servings 16
Calories 120 kcal

Equipment

  • blender

Ingredients
  

  • 2 pounds fresh pineapple chopped into spears
  • Juice and finely grated zest from 2 limes
  • 1 can unsweetened full-fat coconut milk
  • 1/2 can thick coconut cream
  • 1 can sweetened condensed milk
  • 10 ounces coconut-flavored rum optional
  • 1 teaspoon pure vanilla extract
  • 1/4 teaspoon ground ginger

Instructions
 

Step 1: Prepare the Ingredients

  • Start by chopping your fresh pineapple. Aim for bite-sized pieces; this will help them blend smoothly. You can save a few pieces for garnish later if you’d like.

Step 2: Blend the Mixture

  • In your blender, combine the chopped pineapple, lime juice, lime zest, coconut milk, coconut cream, sweetened condensed milk, vanilla extract, and ginger. Blend until completely smooth. This should only take a minute or two. The mixture should be creamy and fragrant.

Step 3: Taste and Adjust

  • This step is key. Taste the mixture and decide if you need more lime for acidity or more sweetness. If you opted for the rum, add that now. Blend gently to incorporate.

Step 4: Pour into Molds

  • Next, carefully pour the mixture into ice pop molds. Leave a little room at the top to allow the mixture to expand as it freezes.

Step 5: Insert Sticks

  • If your molds come with lids, pop those on. If they’re open-top molds, insert wooden sticks at this stage. Make sure they stand upright.

Step 6: Freeze

  • Place the molds in the freezer. Let them freeze for at least 6 hours, but overnight is best. The longer they freeze, the better the texture.

Step 7: Unmold and Enjoy

  • When you’re ready to serve, run warm water over the outside of the molds briefly to make them easier to remove. Then, pull them out and enjoy your homemade Pina Colada Italian Ice Pops!

Notes

  • Use Fresh Ingredients: Fresh pineapple makes a significant difference. Canned pineapple lacks the vibrant flavor.
  • Non-Alcoholic Version: Keep it kid-friendly by omitting the rum. They’ll still taste amazing!
  • Experiment with Layers: For visual appeal, pour a layer of the pineapple mixture, freeze for a bit, then add another layer for contrast.
  • Add Texture: Toss in some crushed pineapple or shredded coconut for added texture in the pops.
  • Storage: Store pops tightly wrapped or put them into a freezer bag to avoid freezer burn

Nutrition

Calories: 120kcalCarbohydrates: 20gFat: 5gSugar: 15g
Keyword Pina Colada Italian Ice Pops
Tried this recipe?Let us know how it was!

Frequently Asked Questions

1. Can I make these ice pops vegan?

Yes! Use vegan condensed milk and ensure your coconut products are dairy-free.

2. How long can I store these ice pops?

They can be stored in a sealed container for up to 2 months, but they taste best within a few weeks.

3. Can I add other fruit flavors?

Absolutely! Mango, kiwi, or even berries would blend beautifully. Feel free to experiment.

4. What’s the best way to serve these?

Enjoy them as a dessert, or consider using them as a fun addition to a cocktail party!

5. Can I use store-bought juice instead of fresh fruit?

In a pinch, you can use juice. However, for the best flavor and texture, fresh ingredients are recommended.

6. Are these ice pops kid-friendly?

Yes! They are delicious without the rum, making them a great treat for kids during summer.

Conclusion

Making Pina Colada Italian Ice Pops is a treat that everyone will love. They’re fun, refreshing, and easy to make. With simple ingredients that bring joy and a taste of the tropics, you’ll want to enjoy these all summer long. 

Embrace the summer sun, gather your friends, and create lasting memories around these delightful pops. Whether as a treat for yourself or a special dessert for a gathering, these ice pops will delight and satisfy. So grab your ingredients and get ready to freeze up a batch! Happy cooking!

You’ll also like these latest recipes!

Strawberry and Pistachio Tart – Yum Yarns

strawberry and pistachio tart

Before we dive into the details of making a delightful strawberry and pistachio tart, let’s talk about what you can serve alongside it.

First up, whipped cream is always a winner. It’s a classic pairing that adds a light, fluffy texture. You can add a dash of vanilla extract for that extra flavor punch.

Next, consider a scoop of vanilla ice cream. The creaminess of the ice cream melds perfectly with the fruity tart. Picture this: a warm afternoon, serving up slices of tart with ice cream slowly melting over it. Heaven.

Lastly, a refreshing mint tea can cleanse the palate. The cooling aroma pairs wonderfully with the tart’s nutty flavors.

strawberry and pistachio tart

Have you ever tried a dish that felt like it belonged in a fine restaurant yet could be whipped up in your own kitchen? The strawberry and pistachio tart is one such treat. I remember the first time I savored this perfect balance of textures and flavors. 

It was during a summer picnic, sun gleaming off the nearby lake, and friends gathered around. The vibrant colors of crimson strawberries and soft green pistachios caught everyone’s eye. But it’s the first bite that you remember forever—the crisp tart shell giving way to the creamy pistachio filling and fresh strawberries dancing on your tongue.

Let’s embark on this culinary adventure together. Whether you’re aiming to impress guests or simply want to indulge, this strawberry and pistachio tart is not just another dessert; it’s an experience.

Why This Recipe Works?

1. Fresh Ingredients Make a Difference
Using seasonal ingredients always elevates a dish. Fresh strawberries, for example, burst with flavor. Shop for strawberries that are firm and bright red. I promise these will make your tart unforgettable.

2. Standout Flavor Combination
Pistachio and strawberry are a match made in heaven. The earthy, nutty flavor of the pistachio complements the sweet, juicy strawberries beautifully. As someone who doesn’t shy away from experimenting in the kitchen, I can vouch for this harmony of flavors.

3. Textural Delight
Each bite is a joy ride of textures. The crispness of the tart shell contrasts sharply with the silky cream filling and the tender strawberries. It’s this mix that makes every bite more exciting than the last.

4. Easy Steps to Success
Worried about complicated baking techniques? Fear not! This recipe uses straightforward methods and common kitchen tools. Even if you’re a beginner, you’ll find yourself whipping this up with confidence.

How Does It Taste?

Imagine taking a forkful. The first thing that hits you is the cool, creamy pistachio filling, followed by the sweetness of ripe strawberries. It’s heavenly. You’ll taste a hint of vanilla and lemon zest in the cream that adds brightness. The tart shell is buttery and crumbly, creating a satisfying contrast. In short, it’s a balance of flavors that leaves you wanting more.

You will also like the following Dessert recipes!

What Sets This Recipe Apart from Other Strawberry and Pistachio Tart Variations?

This recipe stands out because it emphasizes using pistachio paste in the pastry cream, giving it a richer flavor. Rather than just sprinkling pistachios on top, the nut flavor runs throughout the dessert. It simplifies complexity without cutting corners.

Moreover, the use of fresh lemon zest elevates the cream, providing an unexpected twist. Most variations stick with plain cream. This tart is anything but plain—it’s a festival of flavors.

Ingredients

For the Pistachio Pastry Cream:

  • 1–2 tablespoons smooth pistachio paste
  • 60 g (¼ cup) fine caster sugar
  • 5 organic egg yolks
  • 400 ml (1⅔ cups) full-fat milk
  • 30 g (2 tbsp) fresh single cream or heavy cream
  • 2 tablespoons cornflour (cornstarch)
  • ¼ teaspoon pure vanilla powder or extract
  • 1 teaspoon finely grated lemon zest
  • 1 tablespoon finely chopped roasted pistachios

For the Classic Sweet Pastry (prepared as per recipe below):

  • 200 g (7 oz) all-purpose flour
  • 100 g (3.5 oz) butter, cubed
  • 50 g (1.75 oz) sugar
  • 1 large egg

To Garnish:

  • A light dusting of icing sugar (optional)
  • 1 punnet ripe strawberries, hulled and sliced
how to make strawberry and pistachio tart

Instructions

Step 1: Prepare the Tart Shell

  • In a bowl, mix flour and sugar.
  • Rub in the cold butter until it resembles breadcrumbs.
  • Add egg, mix until a dough forms. Do not overwork it.
  • Wrap in plastic cling film and chill for 30 minutes.

Step 2: Roll and Bake

  • Preheat your oven to 180°C (350°F).
  • Roll out the dough on a floured surface to about 3 mm thick.
  • Press into a tart pan, ensuring there are no air bubbles.
  • Line with baking paper and fill with baking beans.
  • Bake for 15 minutes, then remove the beans and paper. Bake for another 10 minutes until golden.

Step 3: Make the Pistachio Pastry Cream

  • In a saucepan, heat milk but do not boil.
  • In another bowl, whisk egg yolks and sugar until creamy.
  • Blend cornflour with pistachio paste. Gradually add hot milk to this mixture.
  • Pour back into the saucepan and stir until it thickens.
  • Remove from heat. Stir in vanilla, lemon zest, and cream. Cool in the fridge.

Step 4: Assemble the Tart

  • Pour the pistachio cream into the cooled tart shell.
  • Arrange sliced strawberries over the top.
  • Chill in the fridge for at least an hour before serving.

Step 5: Serve

  • Dust with icing sugar just before serving for a lovely finish. Enjoy!

Notes

  • Quality Ingredients Matter: Always use the freshest ingredients for the best taste.
  • Chill the Pastry: Chilling the dough makes it easier to roll and prevents shrinking during baking.
  • Use a Tart Pan with Removable Bottom: This makes serving the tart a breeze.
  • Don’t Overmix the Pastry: Overmixing can lead to a tough crust. Mix just until combined.
  • Let It Cool: Allow your tart to cool completely before slicing to prevent the filling from spilling out.

Nutrition Information

Wondering about the health aspect? Here’s a rough estimate of nutrition per serving (based on 4 servings):

  • Calories: 350
  • Protein: 20g
  • Carbohydrates: 68g
  • Fat: 18g
  • Fiber: 2g
strawberry and pistachio tart copycat recipe

How Do You Store This Strawberry and Pistachio Tart?

Store any leftovers in an airtight container in the fridge. It’s best eaten within three days. If you need to make it ahead, don’t top it with strawberries until you’re ready to serve.

Sides for Strawberry and Pistachio Tart

1. Whipped Cream
Fluffy whipped cream adds lightness. Whip heavy cream with a bit of sugar and vanilla.

2. Vanilla Ice Cream
A scoop of classic vanilla ice cream offers a creamy contrast. The coldness pairs wonderfully with the warm summer tart.

3. Fresh Mint Tea
Brew a pot of fresh mint tea. Its cooling nature complements the dessert while cutting through the sweetness.

What Alternatives Can You Use for the Ingredients If They Are Not Present in Your Kitchen?

1. Almond Paste:
If you can’t find pistachio paste, almond paste works well. It has a similar texture and nutty flavor.

2. Coconut Milk:
For a dairy-free option, substitute full-fat milk with coconut milk for the pastry cream.

3. Gluten-Free Flour:
For a gluten-free version of the tart shell, use a gluten-free flour blend.

4. Sugar Substitutes:
You can use natural sweeteners like honey or maple syrup instead of sugar, but adjust the quantities accordingly.

strawberry and pistachio tart copycat recipe

Strawberry and Pistachio Tart

Before we dive into the details of making a delightful strawberry and pistachio tart, let’s talk about what you can serve alongside it.
Prep Time 25 minutes
Cook Time 20 minutes
Chilling Time: 1 hour
Total Time 1 hour 45 minutes
Course Dessert, Tea time
Cuisine French
Servings 8
Calories 350 kcal

Equipment

  • Oven

Ingredients
  

For the Pistachio Pastry Cream:

  • 1 –2 tablespoons smooth pistachio paste
  • 60 g ¼ cup fine caster sugar
  • 5 organic egg yolks
  • 400 ml 1⅔ cups full-fat milk
  • 30 g 2 tbsp fresh single cream or heavy cream
  • 2 tablespoons cornflour cornstarch
  • ¼ teaspoon pure vanilla powder or extract
  • 1 teaspoon finely grated lemon zest
  • 1 tablespoon finely chopped roasted pistachios

For the Classic Sweet Pastry (prepared as per recipe below):

  • 200 g 7 oz all-purpose flour
  • 100 g 3.5 oz butter, cubed
  • 50 g 1.75 oz sugar
  • 1 large egg

To Garnish:

  • A light dusting of icing sugar optional
  • 1 punnet ripe strawberries hulled and sliced

Instructions
 

Step 1: Prepare the Tart Shell

  • In a bowl, mix flour and sugar.
  • Rub in the cold butter until it resembles breadcrumbs.
  • Add egg, mix until a dough forms. Do not overwork it.
  • Wrap in plastic cling film and chill for 30 minutes.

Step 2: Roll and Bake

  • Preheat your oven to 180°C (350°F).
  • Roll out the dough on a floured surface to about 3 mm thick.
  • Press into a tart pan, ensuring there are no air bubbles.
  • Line with baking paper and fill with baking beans.
  • Bake for 15 minutes, then remove the beans and paper. Bake for another 10 minutes until golden.

Step 3: Make the Pistachio Pastry Cream

  • In a saucepan, heat milk but do not boil.
  • In another bowl, whisk egg yolks and sugar until creamy.
  • Blend cornflour with pistachio paste. Gradually add hot milk to this mixture.
  • Pour back into the saucepan and stir until it thickens.
  • Remove from heat. Stir in vanilla, lemon zest, and cream. Cool in the fridge.

Step 4: Assemble the Tart

  • Pour the pistachio cream into the cooled tart shell.
  • Arrange sliced strawberries over the top.
  • Chill in the fridge for at least an hour before serving.

Step 5: Serve

  • Dust with icing sugar just before serving for a lovely finish. Enjoy!

Notes

  • Quality Ingredients Matter: Always use the freshest ingredients for the best taste.
  • Chill the Pastry: Chilling the dough makes it easier to roll and prevents shrinking during baking.
  • Use a Tart Pan with Removable Bottom: This makes serving the tart a breeze.
  • Don’t Overmix the Pastry: Overmixing can lead to a tough crust. Mix just until combined.
Let It Cool: Allow your tart to cool completely before slicing to prevent the filling from spilling out.

Nutrition

Calories: 350kcalCarbohydrates: 68gProtein: 20gFat: 18gFiber: 2g
Keyword Strawberry and Pistachio Tart
Tried this recipe?Let us know how it was!

Frequently Asked Questions

1. Can I freeze the tart?

 Yes! The tart can be frozen, but it’s best to freeze the pastry separately. Once baked and cooled, wrap the tart tightly. Thaw in the refrigerator before serving.

2. Can I use frozen strawberries?

While fresh strawberries are recommended due to better flavor and texture, you can use frozen if necessary. Just ensure they are thawed and excess water is drained off.

3. Can I add other fruits?

 Absolutely! Try raspberries, blueberries, or sliced peaches. Be thoughtful of the sweetness and adjust the sugar accordingly.

4. How can I make this tart healthier?

 To make it healthier, you could reduce sugar in the cream, use less butter in the crust, or swap for a whole grain flour.

Conclusion

Now that you’ve explored the enticing world of strawberry and pistachio tart, it’s time to create this delicious dish in your own kitchen. From the first bite to the last, this dessert is not just about taste; it’s about sharing moments with loved ones. 

So gather your ingredients, follow the steps, and prepare for a delightful treat that’s sure to impress. Enjoy your culinary adventure, and remember to savor every moment as you enjoy your homemade masterpiece!

You’ll also like these latest recipes!

Blueberry Yogurt Cookies – Yum Yarns

blueberry yogurt cookies

Before we deep dive into the delightful universes of blueberry yogurt cookies, let’s set the stage for what complements these scrumptious treats. Picture this: a cozy afternoon, perhaps some friends gathered around, and the warm smell of baking wafting through the air. It’s a time to enjoy flavors that blend perfectly.

Pairing Suggestions:
Coffee: A rich cup of coffee, whether it’s a dark roast or a creamy latte, balances the sweetness of the cookies.
Tea: Herbal tea offers a fragrant contrast, especially varieties like chamomile or lemon balm.
Milk: The classic duo—milk sets off the creamy yogurt notes in each bite.
Whipped Cream: A dollop of fresh whipped cream on top can elevate these cookies into a decadent experience.
Fruit Salad: A fresh mix of seasonal fruits brightens things up and adds a refreshing crunch.

Now that we’ve teased your palate, let’s jump into the world of blueberry yogurt cookies.

blueberry yogurt cookies

Welcome, fellow cookie enthusiasts! If you love cookies that feel both indulgent and health-conscious, you’re in for a real treat. Blueberry yogurt cookies are not your average snack. 

These delights pack natural flavors and benefits, thanks to the sweet blueberries and creamy yogurt. As a passionate food blogger and a registered dietitian, I’ve crafted this recipe with care, knowing that balanced snacks should taste as good as they are for your body.

What Are Blueberry Yogurt Cookies?

Blueberry yogurt cookies blur the lines between sweet and wholesome. They are soft, cake-like cookies that incorporate Greek yogurt, which lends moisture and protein. 

The blueberries, bursting with flavor, add juicy pockets of sweetness that make each bite exciting. The cookie’s flavor is light, fruity, and perfect for any time of year, but they shine particularly in summer when blueberries are at their peak.

These aren’t just cookies; they’re a tribute to the joys of baking. Whether you’re whipping them up for a gathering or treating yourself, they provide a little slice of happiness.

You will also like the following Dessert recipes!

How Do They Taste?

Imagine taking a big ol’ bite. You’ll first notice the soft texture. The yogurt makes them tender, while the blueberries pop with every chew. There’s a gentle sweetness that doesn’t overpower but invites you back for more. Add a hint of lemon zest, and you’ve got a flavor explosion with a subtle hint of tartness.

If you enjoy a balance of flavor, these cookies will make you smile. They are hearty enough to feel satisfying but light enough to indulge without guilt. Whether enjoying one in the morning or as an afternoon snack, you’ll be grateful for the delightful combo.

Why You’ll Love This?

This is a unique cookie that checks multiple boxes. Here’s a list of reasons why they deserve a prominent place in your recipe rotation:

Healthy Ingredients: With Greek yogurt and fresh blueberries, you know you’re putting good stuff into your body.
Easy to Make: No fancy equipment or skills needed! These cookies come together in a flash.
Versatile: Great for breakfast, dessert, or a snack, they fit seamlessly into any occasion.
Customizable: Feeling adventurous? Add in some nuts or swap out the blueberries for your favorite fruits.
Kid-Friendly: Kids love them! They’re charming enough to make everyone smile.

Ingredients

Let’s get to the magic part—here’s what you’ll need to whip up blueberry yogurt cookies:

1 ¼ cups granulated sugar (superfine or regular)
1 large egg, lightly beaten
2 cups plain all-purpose flour
1 ½ teaspoons baking powder
1 ¼ cups thick Greek-style yogurt
½ teaspoon baking soda
¼ teaspoon fine sea salt
1 teaspoon freshly squeezed lemon juice
½ cup pearl sugar (Swedish style)
1 ¼ cups fresh wild blueberries
½ teaspoon pure vanilla extract
Zest of 1 lemon
1 tablespoon finely chopped fresh thyme (optional, adds subtle herbal note)

how to make blueberry yogurt cookies

Step-by-Step Directions

Step 1: Preheat the Oven

First, preheat your oven to 350°F (175°C). This will ensure that your cookies bake evenly and to perfection.

Step 2: Prepare the Baking Sheet

Line a large baking sheet with parchment paper. This prevents sticking and makes cleanup a breeze.

Step 3: Mix the Dry Ingredients

In a bowl, combine the flour, baking powder, baking soda, and salt. Whisk them together to ensure an even distribution of the leavening agents.

Step 4: Combine the Wet Ingredients

In another bowl, beat together the granulated sugar and egg until creamy. Add the Greek yogurt, lemon juice, vanilla extract, and lemon zest. Mix until fully combined. You’ll find yourself drawn to the fresh citrus aroma—just stunning.

Step 5: Incorporate Dry into Wet

Gradually add the dry mixture to the wet mixture, folding gently with a spatula or wooden spoon. Avoid over-mixing to keep those cookies tender.

Step 6: Add Blueberries

Now comes the fun part! Fold in the blueberries gently, being careful not to mash them. Each blueberry should stay intact, ready to burst when bitten into.

Step 7: Scoop the Dough

Using a cookie scoop or tablespoon, place dough blobs on the prepared baking sheet. Space them a couple of inches apart, as they will spread slightly.

Step 8: Sprinkle with Pearl Sugar

If you’re feeling a bit decadent, sprinkle a little pearl sugar on top of each mound of dough. This will add a delightful crunch.

Step 9: Bake

Throw the baking sheet into the preheated oven. Bake for about 12–15 minutes or until the edges are golden brown. The centers will look slightly undercooked; that’s exactly what you want for that soft texture.

Step 10: Cool and Enjoy

Once baked, remove the cookies and let them cool on the baking sheet for a few minutes before transferring them to a wire rack. They’ll firm up as they cool. Now, go ahead and enjoy those delicious cookies with your favorite drink!

Tips on Making Blueberry Yogurt Cookies

Baking can be a science, but there are some tips to make your cookies even better:

Use Fresh Ingredients: Fresh blueberries make all the difference in flavor and texture.
Don’t Overbeat: Mix just until combined. Overworking the dough can lead to tougher cookies.
Chill the Dough: If you want thicker cookies, chill the dough for 30 minutes before baking.
Room Temperature Ingredients: Make sure your yogurt and egg are at room temperature for better mixing.
Experiment with Flavors: Consider adding nuts, spices like cinnamon, or even some chocolate chips for variety!

Nutrition Information

For those mindful of nutrition, here’s a quick overview per cookie (based on a batch of 24):

Calories: Approximately 150
Carbohydrates: 22g
Protein: 3g
Fat: 4g
Fiber: 1g
Sugar: 9g

Keep in mind, nutritional values can fluctuate based on exact ingredients and specific brands used.

How Do You Store These Cookies?

Storing your blueberry yogurt cookies is quite simple:

Room Temperature: Keep them in an airtight container for up to 3 days.
Refrigerate: For extended freshness, store in the fridge for up to a week. Just allow them to come to room temp before enjoying.
Freezing: You can freeze them! Allow them to cool completely, then place them in a freezer bag. They’ll last up to 2 months. Just thaw them overnight in the fridge before eating.

blueberry yogurt cookies copycat recipe

What Other Substitutes Can You Use in Blueberry Yogurt Cookies?

If you’re looking for alternatives or want to cater to specific dietary needs, here are some great options:

Greek Yogurt: Plain regular yogurt can work too, just keep the consistency similar for the best results.
Blueberries: Raspberries or chopped strawberries can easily replace blueberries for a different flavor twist.
Lemon Juice: Lime juice can swap in well if you’re out of lemons.
Flour: Almond flour or whole wheat flour can substitute for all-purpose flour; just be cautious of the moisture level.
Egg: For an egg-free version, a flax egg (1 tablespoon of flaxseed meal mixed with 2.5 tablespoons of water) can replace one egg.

how to make blueberry yogurt cookies

Blueberry Yogurt Cookies

Before we deep dive into the delightful universes of blueberry yogurt cookies, let’s set the stage for what complements these scrumptious treats
Prep Time 10 minutes
Cook Time 14 minutes
Total Time 24 minutes
Course Dessert
Cuisine American
Servings 30
Calories 150 kcal

Equipment

  • Bowl
  • Baking sheet

Ingredients
  

  • 1 ¼ cups granulated sugar superfine or regular
  • 1 large egg lightly beaten
  • 2 cups plain all-purpose flour
  • 1 ½ teaspoons baking powder
  • 1 ¼ cups thick Greek-style yogurt
  • ½ teaspoon baking soda
  • ¼ teaspoon fine sea salt
  • 1 teaspoon freshly squeezed lemon juice
  • ½ cup pearl sugar Swedish style
  • 1 ¼ cups fresh wild blueberries
  • ½ teaspoon pure vanilla extract
  • Zest of 1 lemon
  • 1 tablespoon finely chopped fresh thyme optional, adds subtle herbal note

Instructions
 

Step 1: Preheat the Oven

  • First, preheat your oven to 350°F (175°C). This will ensure that your cookies bake evenly and to perfection.

Step 2: Prepare the Baking Sheet

  • Line a large baking sheet with parchment paper. This prevents sticking and makes cleanup a breeze.

Step 3: Mix the Dry Ingredients

  • In a bowl, combine the flour, baking powder, baking soda, and salt. Whisk them together to ensure an even distribution of the leavening agents.

Step 4: Combine the Wet Ingredients

  • In another bowl, beat together the granulated sugar and egg until creamy. Add the Greek yogurt, lemon juice, vanilla extract, and lemon zest. Mix until fully combined. You’ll find yourself drawn to the fresh citrus aroma—just stunning.

Step 5: Incorporate Dry into Wet

  • Gradually add the dry mixture to the wet mixture, folding gently with a spatula or wooden spoon. Avoid over-mixing to keep those cookies tender.

Step 6: Add Blueberries

  • Now comes the fun part! Fold in the blueberries gently, being careful not to mash them. Each blueberry should stay intact, ready to burst when bitten into.

Step 7: Scoop the Dough

  • Using a cookie scoop or tablespoon, place dough blobs on the prepared baking sheet. Space them a couple of inches apart, as they will spread slightly.

Step 8: Sprinkle with Pearl Sugar

  • If you’re feeling a bit decadent, sprinkle a little pearl sugar on top of each mound of dough. This will add a delightful crunch.

Step 9: Bake

  • Throw the baking sheet into the preheated oven. Bake for about 12–15 minutes or until the edges are golden brown. The centers will look slightly undercooked; that’s exactly what you want for that soft texture.

Step 10: Cool and Enjoy

  • Once baked, remove the cookies and let them cool on the baking sheet for a few minutes before transferring them to a wire rack. They’ll firm up as they cool. Now, go ahead and enjoy those delicious cookies with your favorite drink!

Notes

  • Use Fresh Ingredients: Fresh blueberries make all the difference in flavor and texture.
  • Don’t Overbeat: Mix just until combined. Overworking the dough can lead to tougher cookies.
  • Chill the Dough: If you want thicker cookies, chill the dough for 30 minutes before baking.
  • Room Temperature Ingredients: Make sure your yogurt and egg are at room temperature for better mixing.
  • Experiment with Flavors: Consider adding nuts, spices like cinnamon, or even some chocolate chips for variety!

Nutrition

Calories: 150kcalCarbohydrates: 22gProtein: 3gFat: 4gFiber: 1gSugar: 9g
Keyword Blueberry Yogurt Cookies
Tried this recipe?Let us know how it was!

Frequently Asked Questions

1. Can I use frozen blueberries instead of fresh?

Yes! Frozen blueberries work well, but you may need to gently fold them in, since they can be a bit more delicate.

2. How can I ensure my cookies stay soft?

Make sure not to overbake them. The cookies should look slightly undercooked in the center before cooling off, as they will firm up.

3. Can I add nuts to the recipe?

Absolutely! Chopped walnuts or pecans would add a lovely crunch and flavor dimension to the cookies.

4. What’s the raw dough like? Can I eat it safely?

The dough contains raw flour and egg, which could lead to foodborne illness if eaten raw. It’s best to bake the dough for safe consumption.

5. How can I make the cookies gluten-free?

You can replace all-purpose flour with a gluten-free flour blend. Ensure the rest of your ingredients are also gluten-free to avoid contamination.

6. Can I double the recipe?

Definitely! Just make sure you have enough space and baking sheets to accommodate all those cookies!

Conclusion

Blueberry yogurt cookies are not just baked goods; they are a wonderful blend of taste and health. They bring joy and nourishment, and their flavors can spark fond memories shared with friends over tea or coffee. With easy preparation and customizable options, these cookies deserve a regular spot on your baking sheet.

So grab your ingredients and preheat that oven! Creating these gems is an adventure in itself, and biting into one will give you that sweet satisfaction that comes only from a made-at-home treat. Whether you savor them with a cup of coffee or pack them for lunch, they’re sure to win hearts all around. Happy baking!

You’ll also like these latest recipes!

Homemade Ice Cream Cones Recipe – Yum Yarns

Homemade Ice Cream Cones Recipe

Nothing elevates a scoop of ice cream quite like a crispy, homemade ice cream cone. Picture this: after a long day, you sit down with a bowl of your favorite ice cream. Maybe it’s mint chocolate chip, or perhaps a rich vanilla bean.

 Whatever the flavor, having it in a homemade cone adds an extra touch of joy. But let’s be real, it’s not just about the ice cream itself. It’s also about what you can pair with it.

 Think crispy nuts, sprinkles, or fresh fruit on top. You can even drizzle some homemade caramel sauce or fudge for that indulgent finish. The sky’s the limit here!

Homemade Ice Cream Cones Recipe

Welcome, ice cream lovers! If you’ve ever found yourself daydreaming about the crunchy delight of a freshly baked ice cream cone, then you’re in the right place. 

I am a registered dietitian, food blogger, and all-around food enthusiast, and today, I’m thrilled to share my tried-and-true homemade ice cream cone recipes with you. Get ready for crispy perfection that you can enjoy with your favorite ice cream flavors.

What is Homemade Ice Cream Cones?

Homemade ice cream cones are simple, fun, and a wonderful way to elevate your ice cream experience. You have two styles to choose from in this recipe: stovetop sugar cones and delicious waffle cones. 

Each offers a unique texture and flavor that pairs beautifully with any ice cream flavor you can imagine. Why buy store-bought cones when you can create your own crispy bases from your kitchen?

You will also like the following Dessert recipes!

What is the Flavor Profile of This Dish?

The flavor profile of these cones is delightful. The sugar cones have a light sweetness enhanced by a hint of lemon zest, providing that refreshing twist. 

Alternatively, the waffle cones showcase a nutty, buttery essence combined with a subtle almond extract that lingers. Both options offer a perfect crunch that complements and contrasts with your favorite ice cream. Every bite takes you on a journey—a delightful dance between sweet and creamy.

Why You’ll Love This?

You might wonder why you should take the plunge into making homemade ice cream cones. First off, they are incredibly fresh and can be customized to suit any flavor preference. Secondly, the smell wafting through your kitchen will transport you back to childhood summer days.

 Plus, it’s a wonderful family activity! Picture your kids eagerly waiting for their cones, ready to fill them with their favorite flavors. Trust me, this will be a summertime hit.

Ingredients

Stovetop Sugar Cones

⅔ cup plain all-purpose flour

2 large egg whites

2 tablespoons unsalted butter, melted

½ cup superfine granulated sugar

1 teaspoon finely grated lemon zest

3 tablespoons whole milk

½ teaspoon pure vanilla extract

pinch of fine sea salt

Waffle Cones

½ cup plus 2 tablespoons plain all-purpose flour

¼ cup (½ stick) unsalted butter, melted and slightly cooled

1 whole egg

1 tablespoon finely chopped toasted pecans or walnuts

¼ cup plus 1 tablespoon caster sugar

1 large egg white

2 tablespoons whole milk

¼ teaspoon kosher salt

1 teaspoon almond extract

For Dipping

Melted semisweet or bittersweet chocolate

How to make Homemade Ice Cream Cones Recipe

Step-by-Step Instructions

Step 1: Prepare Your Ingredients

Gather all your ingredients on a clean countertop. This will make the whole process smoother.

Step 2: Stovetop Sugar Cones

  1. In a mixing bowl, whisk together the flour, sugar, and salt.
  2. In a separate bowl, mix the egg whites until slightly frothy.
  3. Add the melted butter, milk, vanilla extract, and lemon zest to the egg whites. Combine well.
  4. Gradually add the flour mixture to the wet ingredients, stirring until the batter is smooth.

Step 3: Cook the Sugar Cones

  1. Preheat a cone maker or a nonstick skillet over medium heat.
  2. Pour a small amount of batter onto the hot surface and spread it into a thin circle, about 5 inches in diameter.
  3. Cook for about 1-2 minutes until the edges turn golden brown.
  4. Quickly remove the cone from the surface and shape it around a cone mold or a rolled-up piece of parchment paper. Hold until it sets.

Step 4: Waffle Cones

  1. In a bowl, mix together the flour, sugar, and salt.
  2. In another bowl, whisk the whole egg and egg white together. Add the melted butter, milk, and almond extract.
  3. Stir in the chopped nuts.
  4. Gradually mix the dry ingredients with the wet until completely combined.

Step 5: Cook the Waffle Cones

  1. Preheat a waffle cone maker or a waffle iron.
  2. Pour the batter onto the heated surface and close the lid. Cook for about 2-3 minutes until golden.
  3. Remove and quickly form it into a cone shape, using the same method as above.

Step 6: Dip the Cones (Optional)

Melt chocolate in a microwave or over a double boiler. Dip the top of your cones into the melted chocolate, then sprinkle with nuts or sprinkles. Allow to cool before filling with ice cream.

Tips & Tricks

  • Use Cold Ingredients: Cold milk and eggs create a smoother batter.
  • Don’t Overcook: Make sure to keep an eye on your cones; they can quickly go from golden brown to burnt.
  • Experiment with Flavors: Feel free to swap in flavored extracts or add cocoa powder to your batter.
  • Keep an Eye on the Temperature: If the batter spreads too much, decrease the heat slightly to ensure they cook without becoming too flat.
  • Shape with Care: Work quickly when shaping the cones; they harden fast.

Nutrition Information

Homemade Ice Cream Cones Recipe Nutrition Facts

How Can You Store This Homemade Ice Cream Cone?

Homemade cones are best enjoyed fresh but can be stored. Allow them to cool completely, then place them in an airtight container. Store in a cool, dry area at room temperature for up to a week. If you need to keep them longer, consider freezing them. Just ensure they’re well-wrapped to avoid ice crystals forming.

Homemade Ice Cream Cones copycat Recipe

Ingredient Alternatives

If you’re missing some ingredients, here are some solid replacements:

  • Flour: Whole wheat flour works well for a slightly nutty flavor and health boost.
  • Butter: Coconut oil can be swapped in for a dairy-free version or for a different flavor profile.
  • Almond Extract: Vanilla extract is a perfect substitute if almond isn’t available.
Homemade Ice Cream Cones copycat Recipe

Homemade Ice Cream Cones Recipe

Nothing elevates a scoop of ice cream quite like a crispy, homemade ice cream cone. Picture this: after a long day, you sit down with a bowl of your favorite ice cream
Course Dessert
Cuisine American
Servings 14
Calories 127 kcal

Equipment

  • Mixing bowls

Ingredients
  

Stovetop Sugar Cones

  • cup plain all-purpose flour
  • 2 large egg whites
  • 2 tablespoons unsalted butter melted
  • ½ cup superfine granulated sugar
  • 1 teaspoon finely grated lemon zest
  • 3 tablespoons whole milk
  • ½ teaspoon pure vanilla extract
  • pinch of fine sea salt

Waffle Cones

  • ½ cup plus 2 tablespoons plain all-purpose flour
  • ¼ cup ½ stick unsalted butter, melted and slightly cooled
  • 1 whole egg
  • 1 tablespoon finely chopped toasted pecans or walnuts
  • ¼ cup plus 1 tablespoon caster sugar
  • 1 large egg white
  • 2 tablespoons whole milk
  • ¼ teaspoon kosher salt
  • 1 teaspoon almond extract

For Dipping

  • Melted semisweet or bittersweet chocolate

Instructions
 

Step 1: Prepare Your Ingredients

  • Gather all your ingredients on a clean countertop. This will make the whole process smoother.

Step 2: Stovetop Sugar Cones

  • In a mixing bowl, whisk together the flour, sugar, and salt.
  • In a separate bowl, mix the egg whites until slightly frothy.
  • Add the melted butter, milk, vanilla extract, and lemon zest to the egg whites. Combine well.
  • Gradually add the flour mixture to the wet ingredients, stirring until the batter is smooth.

Step 3: Cook the Sugar Cones

  • Preheat a cone maker or a nonstick skillet over medium heat.
  • Pour a small amount of batter onto the hot surface and spread it into a thin circle, about 5 inches in diameter.
  • Cook for about 1-2 minutes until the edges turn golden brown.
  • Quickly remove the cone from the surface and shape it around a cone mold or a rolled-up piece of parchment paper. Hold until it sets.

Step 4: Waffle Cones

  • In a bowl, mix together the flour, sugar, and salt.
  • In another bowl, whisk the whole egg and egg white together. Add the melted butter, milk, and almond extract.
  • Stir in the chopped nuts.
  • Gradually mix the dry ingredients with the wet until completely combined.

Step 5: Cook the Waffle Cones

  • Preheat a waffle cone maker or a waffle iron.
  • Pour the batter onto the heated surface and close the lid. Cook for about 2-3 minutes until golden.
  • Remove and quickly form it into a cone shape, using the same method as above.

Step 6: Dip the Cones (Optional)

  • Melt chocolate in a microwave or over a double boiler. Dip the top of your cones into the melted chocolate, then sprinkle with nuts or sprinkles. Allow to cool before filling with ice cream.

Notes

  • Use Cold Ingredients: Cold milk and eggs create a smoother batter.
  • Don’t Overcook: Make sure to keep an eye on your cones; they can quickly go from golden brown to burnt.
  • Experiment with Flavors: Feel free to swap in flavored extracts or add cocoa powder to your batter.
  • Keep an Eye on the Temperature: If the batter spreads too much, decrease the heat slightly to ensure they cook without becoming too flat.
  • Shape with Care: Work quickly when shaping the cones; they harden fast.

Nutrition

Serving: 41gCalories: 127kcalCarbohydrates: 16gProtein: 3gFat: 5.3gSaturated Fat: 2.4gCholesterol: 54mgSodium: 93mgSugar: 6g
Keyword Homemade Ice Cream Cones Recipe
Tried this recipe?Let us know how it was!

Frequently Asked Questions

Can I make these in advance?

 Yes! Make your cones ahead of time and store them as directed above. They hold up well.

Can I freeze the cones?

While possible, it’s better to store them at room temperature to maintain crunchiness.

What’s the best way to fill the cones?

 Use a scoop or a piping bag for easier filling, which will prevent melting ice cream from spilling over.

Can I add toppings to the batter?

Absolutely! Fold in chocolate chips, sprinkles, or other mix-ins for added fun.

What’s the ideal ice cream for these cones?

 Any flavor works! Creamy and rich ones complement the crunch of the cone.

Conclusion

There you have it! Making homemade ice cream cones is not only enjoyable but also a fantastic way to elevate your ice cream game. The textures and flavors you create in your kitchen will surely impress friends and family. 

Plus, it’s a wonderful way to spend a sunny afternoon—watching the soccer game on TV while enjoying your creation.

Grab your ingredients, roll up your sleeves, and whip up some cones that will have everyone smiling. Let summer fun begin, one scoop at a time!

You’ll also like these latest recipes!

Savory Smores Recipe – Yum Yarns

Savory Smores Recipe

When you think of s’mores, images of gooey marshmallows, melting chocolate, and graham crackers flood your mind. But let’s flip that sweet script on its head and dive into the savory side with savory s’mores! 

Before we indulge ourselves in the details of creating this exciting dish, let’s consider what you can pair with it.

Savory s’mores are surprisingly versatile! You can complement them with a fresh, crisp salad or some grilled vegetables. Imagine a bed of mixed greens drizzled with lemon vinaigrette. This bright and zesty salad cuts through the richness of your s’mores beautifully. 

Or how about a side of roasted cherry tomatoes? They bring a little sweetness and tang, marshaling forth all those complex flavors.

Of course, don’t forget about dipping sauces! A zesty chimichurri or a rich balsamic glaze can elevate the experience to new heights. 

Consider a side of pickled vegetables for a zingy crunch. Each bite of savory s’mores paired with these accompaniments can create a colorful feast for the eyes—and your palate.

Savory Smores Recipe

A summer evening, friends gathered around a fire pit. The air is warm with the scent of charcoal, and laughter fills the air. 

You could whip up the traditional s’mores. Or you could knock everyone’s socks off with savory s’mores! This twist on a classic hits all the right notes: crunchy, creamy, salty, and deliciously indulgent.

Sharing joy through food is magical. This recipe is not only a conversation starter; it’s an experience! As a registered dietitian and food enthusiast, I find great joy experimenting with flavors and textures. 

By melding traditional savory ingredients into a familiar treat, I discovered how magic truly unfolds. Let’s explore the extraordinary world of savory s’mores together!

What Are Savory S’mores?

Savory s’mores deviate from the classic combination we all know. Instead of sweet elements, they feature rich cheeses, cured meats, and savory spreads. 

Think creamy Brie, thinly sliced prosciutto, and an herbaceous drizzle that awakens the senses. Each component contributes unique flavors that dance harmoniously within the crispy outer layer.

Traditionally, s’mores are simple. You have graham crackers, chocolate, and marshmallows. Savory s’mores elevate this classic treat to gourmet levels. With this vibrant creation, you can impress guests or just enjoy a cozy night in.

You will also like the following Dessert recipes!

Why This Recipe Works

  • Flavor Contrast: Savory s’mores brilliantly balance flavors. Creaminess of cheese, saltiness of prosciutto, and freshness from herbs meld together. This combination keeps your taste buds intrigued.
  • Texture Dynamics: The crunch of the cracker juxtaposed with the creaminess of the cheese creates a delightful bite. Your mouth welcomes playfulness—a familiar comfort transitioning beautifully into gourmet territory.
  • Easy Preparation: Making savory s’mores is as simple as assembling your ingredients. In under thirty minutes, you can serve these to eager friends and family. Less time cooking means more time enjoying the company!
  • Adaptable Ingredients: You have room to play! Modify the ingredients based on personal preferences or what you have in your pantry. This flexibility empowers you to experiment without straying far from the foundational tastes.

Ingredients You’ll Need to Make Savory S’mores

To create these delightful savory s’mores, you will need the following ingredients:

Assembly:

1 pound creamy Brie, cut into 1 ½-inch cubes

6 ounces ultra-thinly sliced prosciutto di Parma

Honey for drizzling and serving

Ingredients:

½ cup cold unsalted European-style butter, diced small

1 cup plus 2 tablespoons plain all-purpose flour

4 ounces freshly grated aged Parmesan cheese

2 teaspoons chopped fresh thyme leaves

1 tablespoon finely sliced fresh chives

1 teaspoon lemon zest

1 teaspoon finely chopped fresh rosemary

¼ teaspoon freshly ground black pepper

½ teaspoon sea salt

1 tablespoon ice-cold water

1 teaspoon toasted pine nuts

How to make  Savory Smores Recipe

How to Make Savory S’mores

Creating savory s’mores is an exciting journey! Let’s break it down step-by-step.

Step 1: Prepare the Base

Start by mixing the butter, flour, and parmesan cheese in a bowl. Combine until the texture resembles coarse crumbs. Add in the herbs, pepper, and salt. Pour in the ice-cold water gradually and mix until the dough forms.

Step 2: Roll It Out

Flour your work surface and roll out the dough to about ¼ inch thickness. Cut your crackers into the size you prefer. Think traditional s’more size or even larger for a grand presentation!

Step 3: Bake the Crackers

Preheat your oven to 350°F (175°C). Line a baking sheet with parchment paper and place your cracker shapes on it. Bake for 12-15 minutes until golden brown and crisp.

Step 4: Assemble the S’mores

Once cool, layer the Brie cube on one cracker. Follow with a slice of prosciutto. Drizzle with a touch of honey for a sweet finish. Cap it with another cracker, making sure everything is tucked in nicely.

Step 5: Toast and Serve

If you’re adventurous, give your assembled s’mores a quick toast over the grill or a fire. Just a few moments till they’re golden! If you prefer, serve them fresh without toasting. Either way, they’ll impress.

Tips & Tricks

Here are some insider tips to elevate your savory s’mores experience:

  • Choose Quality Ingredients: Opt for a high-quality Brie and prosciutto. The flavors radiate, making a noticeable difference.
  • Experiment with Add-Ins: Consider adding sliced figs or a sprinkle of crushed nuts. Each twist takes you further down the flavor rabbit hole.
  • Customize for Dietary Needs: Seeking gluten-free? Substitute with gluten-free flour. Want vegan? Use a plant-based cheese alternative!
  • Healthier Alternatives: You can use whole-grain crackers or lower-fat cheese to cater to health-conscious guests.
  • Presentation Matters: Serve your savory s’mores on a beautiful platter with herbs sprigs for garnish. It invites people to take a closer look.

Nutrition Information

Savory Smores Recipe Nutrition Facts

How Do You Store the Leftovers?

If you somehow have leftovers (which I doubt will happen!), store them in an airtight container. They stay fresh in the refrigerator for about two days. To reheat, toast them briefly in an oven or microwave.

  Savory Smores copycat Recipe

What Sides Would Complement Savory S’mores?

Looking to round out your meal? Consider these sides:

  • Zucchini Planks: Lightly grilled or roasted with olive oil, salt, and pepper, zucchini brings a refreshing crunch that contrasts beautifully with savory flavors.
  • Caprese Salad: Fresh tomatoes, mozzarella, and basil drizzled with balsamic vinegar acts as a light appetizer. It offers a refreshing balance after each bite of savory s’mores.
  • Herb-Infused Quinoa: Quinoa seasoned with lemon zest and fresh herbs can serve as a nutrient-dense side. Its fluffy texture provides a lovely contrast to the rich s’mores.

What Alternatives Can You Use for the Ingredients If They Are Not Present?

Don’t fret if you lack certain ingredients! Here are some alternatives:

  • Brie Substitute: You can use camembert or goat cheese as a creamy alternative. They have different flavors but still work well in this recipe.
  • Prosciutto Alternative: For a less salty option, consider deli ham or turkey slices. They’ll provide protein without overwhelming with saltiness.
  • Herbs Swap: If you don’t have thyme, use oregano or parsley. Both will offer freshness to the overall profile.
  • Honey Replacement: Maple syrup can replace honey if you desire a touch of sweetness without using honey. It pairs beautifully with cheese!
Savory Smores copycat Recipe

Savory Smores Recipe

When you think of s’mores, images of gooey marshmallows, melting chocolate, and graham crackers flood your mind
Prep Time 10 minutes
Cook Time 5 minutes
Total Time 15 minutes
Course Dessert
Cuisine American
Servings 15
Calories 266 kcal

Equipment

  • Oven

Ingredients
  

Assembly:

  • 1 pound creamy Brie cut into 1 ½-inch cubes
  • 6 ounces ultra-thinly sliced prosciutto di Parma
  • Honey for drizzling and serving

Ingredients:

  • ½ cup cold unsalted European-style butter diced small
  • 1 cup plus 2 tablespoons plain all-purpose flour
  • 4 ounces freshly grated aged Parmesan cheese
  • 2 teaspoons chopped fresh thyme leaves
  • 1 tablespoon finely sliced fresh chives
  • 1 teaspoon lemon zest
  • 1 teaspoon finely chopped fresh rosemary
  • ¼ teaspoon freshly ground black pepper
  • ½ teaspoon sea salt
  • 1 tablespoon ice-cold water
  • 1 teaspoon toasted pine nuts

Instructions
 

Step 1: Prepare the Base

  • Start by mixing the butter, flour, and parmesan cheese in a bowl. Combine until the texture resembles coarse crumbs. Add in the herbs, pepper, and salt. Pour in the ice-cold water gradually and mix until the dough forms.

Step 2: Roll It Out

  • Flour your work surface and roll out the dough to about ¼ inch thickness. Cut your crackers into the size you prefer. Think traditional s’more size or even larger for a grand presentation!

Step 3: Bake the Crackers

  • Preheat your oven to 350°F (175°C). Line a baking sheet with parchment paper and place your cracker shapes on it. Bake for 12-15 minutes until golden brown and crisp.

Step 4: Assemble the S’mores

  • Once cool, layer the Brie cube on one cracker. Follow with a slice of prosciutto. Drizzle with a touch of honey for a sweet finish. Cap it with another cracker, making sure everything is tucked in nicely.

Step 5: Toast and Serve

  • If you’re adventurous, give your assembled s’mores a quick toast over the grill or a fire. Just a few moments till they’re golden! If you prefer, serve them fresh without toasting. Either way, they’ll impress.

Notes

  • Choose Quality Ingredients: Opt for a high-quality Brie and prosciutto. The flavors radiate, making a noticeable difference.
  • Experiment with Add-Ins: Consider adding sliced figs or a sprinkle of crushed nuts. Each twist takes you further down the flavor rabbit hole.
  • Customize for Dietary Needs: Seeking gluten-free? Substitute with gluten-free flour. Want vegan? Use a plant-based cheese alternative!
  • Healthier Alternatives: You can use whole-grain crackers or lower-fat cheese to cater to health-conscious guests.
  • Presentation Matters: Serve your savory s’mores on a beautiful platter with herbs sprigs for garnish. It invites people to take a closer look.

Nutrition

Serving: 86gCalories: 266kcalCarbohydrates: 10gProtein: 10gFat: 19.6gSaturated Fat: 8.5gTrans Fat: 0.3gCholesterol: 48mgSodium: 542mgSugar: 2g
Keyword Savory Smores Recipe
Tried this recipe?Let us know how it was!

Frequently Asked Questions

Can I make savory s’mores in advance?

Absolutely! Prepare the components ahead of time, store them separately, and assemble before serving.

What if I don’t have a grill?

Use your oven instead! Simply broil the assembled s’mores for a minute or two, keeping an eye on it.

Is this dish kid-friendly?

 Yes! Kids love fun textures. You can tone down the flavors to cater to their tastes by selecting mild cheeses and drier meats.

Can I use different crackers?

 Definitely! Whole wheat, rye crisps, or even pita chips can work remarkably well to provide a unique twist.

Do savory s’mores fit well at formal gatherings?

 For sure! Their assembly can be beautiful and they serve as perfect conversation pieces. Style it up, and it fits right into any gourmet platter.

What’s a good drink pairing?

 Pair savory s’mores with a light, crisp white wine, such as Pinot Grigio. A refreshing spritzer can also complement the flavors perfectly.

Conclusion

Savory s’mores are more than just a twist; they’re a culinary adventure—all while keeping it simple! The delightful interplay of textures and flavors is bound to amaze anyone at your gathering. 

This recipe celebrates creativity, encourages experimentation, and showcases how traditional ideas can evolve in the kitchen.

With every taste, you draw people together, creating connections over shared experiences. So fire up those grills, gather your friends, and embark on a delicious, savory journey in your next culinary creation! 

Let me know how your savory s’mores turn out; I can’t wait to hear all about your experiences!

You’ll also like these latest recipes!

Spanish Churros Recipe – Yum Yarns

Spanish Churros Recipe

Churros are not just a treat; they are an experience. Imagine biting into a warm, cinnamon-sugar-coated churro, only to dip it into luscious chocolate sauce. Sounds delightful, right? 

Other perfect pairings include caramel sauce, whipped cream, or even a scoop of vanilla ice cream for that contrasting temperature. And, for those who treasure the fresh and fruity, you can consider serving churros with a side of fresh fruit salsa. 

The sweetness and acidity of the fruit offer a brilliant counterpoint to the sugary exterior of the churros. You see, churros can adapt easily to different flavor profiles, and that’s what makes them an ideal dessert for sharing.

Spanish Churros Recipe

Why This Recipe is Great for You

You might wonder, why am I so enthusiastic about churros? Well, first of all, making these Spanish delights at home is straightforward and fun. Most importantly, you have control over the ingredients. 

No preservatives. No artificial flavors. Just pure joy wrapped in dough. I can still recall the first time I tasted churros at a bustling street fair, the sweet scent wafting through the air, leading me right to a vendor. It was love at first bite. 

Ever since then, I’ve been on a mission to recreate that magical moment in my kitchen.

This recipe features simple ingredients that you most likely already have at home. Each one plays a vital role in transforming humble flour, water, and sugar into these delicious treats. 

You won’t believe the satisfaction of biting into a freshly made churro, its warm dough combined with that burst of chocolate. Let’s roll up our sleeves and dive into the ingredient list!

You will also like the following Dessert recipes!

Ingredients

Here’s what you need to get started:

  • 1 cup + 2 tablespoons hot boiling water
  • ½ teaspoon fine sea salt
  • ½ teaspoon pure vanilla extract
  • 1 teaspoon aluminum-free baking powder
  • 1 cup all-purpose flour
  • 8 ounces dark chocolate (60–70% cocoa), finely chopped and melted
  • 2 tablespoons granulated sugar, for dusting
  • vegetable oil, for deep frying
  • ½ teaspoon ground cinnamon
Spanish Churros copycat  Recipe

How to Make Spanish Churros

Let’s get down to the nuts and bolts of making these golden delights! I’m excited for you to see how simple it really is.

Step 1: Prepare the Churro Dough

Begin by boiling your water in a saucepan. 

When it reaches a roaring boil, remove it from heat. In a mixing bowl, combine the hot water, sea salt, vanilla extract, and baking powder. This mixture will start to create an aromatic base.

Next, gradually add the all-purpose flour, stirring consistently. At first, it may seem impossible to incorporate the flour fully, but keep at it until a smooth, cohesive dough forms. 

It should not be sticky, and you should be able to handle it easily with your hands. If it’s too wet, add a bit more flour.

Step 2: Prepare to Fry

In a heavy-bottomed pot, pour in enough vegetable oil to deep fry the churros. Aim for a depth of at least 2 inches. 

Heat the oil over medium heat. You can test the oil’s readiness by dropping a small piece of dough into it. If it bubbles and floats up, it’s go time!

Step 3: Pipe the Dough

While the oil heats, fill a piping bag fitted with a star tip designed for churros. If you don’t have one, a simple ziplock bag with the corner snipped off will work, too! Carefully fill the bag with the churro dough.

Step 4: Fry the Churros

Once the oil is hot and bubbling, carefully pipe about 4-6 inches of dough directly into the hot oil, using scissors to cut off the dough. 

Fry the churros in batches, taking care not to overcrowd the pot. Fry them for about 2-3 minutes on each side, until they reach a golden color.

Step 5: Sugar and Cinnamon Coating

Once fried, remove the churros using a slotted spoon and transfer them to a paper towel-lined plate to absorb excess oil. Immediately roll them in a mixture of granulated sugar and ground cinnamon. 

This is where the magic happens! That sugar-coating ritual truly sends them to “churro paradise.”

Step 6: Melting the Chocolate

While the churros cool, melt your chopped dark chocolate in a heatproof bowl over a simmering pot of water, stirring constantly. 

This method, known as a double boiler, helps you get that silky-smooth consistency that will elevate your churros from delicious to divine.

Recipe Notes

Let’s break down the ingredients a little more to understand why each one matters so much.

  • Hot Boiling Water: Using boiling water ensures that the starch in the flour hydrates properly, creating that fluffy texture in the finished churro.
  • Fine Sea Salt: We often overlook salt, but in this case, it’s essential. Salt fortifies sweetness in desserts and elevates flavors across the board.
  • Pure Vanilla Extract: Artificial flavoring cannot compare to the richness of pure vanilla. That subtle warmth adds layers to the final product.
  • Baking Powder: It’s critical for creating that puffy churro texture; it acts as a leavening agent.
  • All-Purpose Flour: The type of flour affects the texture. All-purpose gives you that perfect balance of chewy and tender.
  • Dark Chocolate: Not any chocolate will do; the higher cocoa content provides a deeper, more complex flavor that pairs beautifully with the sugary churros.
  • Granulated Sugar and Ground Cinnamon: The classic churro topping that gives them their signature crunch and sweetness.
  • Vegetable Oil: A neutral oil that allows the flavors of the churros to shine without altering their taste.

Recipe Variations

Churros can be adapted to fit almost any flavor profile. Here are a few I love experimenting with:

  1. Chocolate-Stuffed Churros: Pipe the dough around a strip of Nutella or chocolate ganache for an indulgent treat.
  2. Jalapeño-Cheddar Churros: For a savory twist, mix shredded cheese and some finely chopped jalapeños into the dough, then fry. Serve with a creamy dip.
  3. Matcha Churros: Add matcha powder to the dough for a green tea-flavored version. Perfect for the matcha enthusiast!
  4. Fruit-Flavored Churros: Infuse the dough with fruit purees like raspberry or strawberry for a refreshing sweet treat.
  5. Coconut Churros: Add shredded coconut to the dough for an extra tropical bite. Rolling them in coconut sugar post-frying enhances the flavor.
  6. Vegan Churros: Substitute the chocolate with dark chocolate free from dairy, and use aquafaba instead of egg for an egg-free treat.

Nutrition Facts

Spanish Churros Recipe Nutrition Facts

How to make Spanish Churros Recipe

Spanish Churros Recipe

Churros are not just a treat; they are an experience. Imagine biting into a warm, cinnamon-sugar-coated churro, only to dip it into luscious chocolate sauce. Sounds delightful, right?
Prep Time 15 minutes
Cook Time 25 minutes
Total Time 40 minutes
Course Dessert
Cuisine American
Servings 6
Calories 302 kcal

Equipment

  • Mixing bowl

Ingredients
  

  • 1 cup + 2 tablespoons hot boiling water
  • ½ teaspoon fine sea salt
  • ½ teaspoon pure vanilla extract
  • 1 teaspoon aluminum-free baking powder
  • 1 cup all-purpose flour
  • 8 ounces dark chocolate 60–70% cocoa, finely chopped and melted
  • 2 tablespoons granulated sugar for dusting
  • vegetable oil for deep frying
  • ½ teaspoon ground cinnamon

Instructions
 

Step 1: Prepare the Churro Dough

  • Begin by boiling your water in a saucepan.
  • When it reaches a roaring boil, remove it from heat. In a mixing bowl, combine the hot water, sea salt, vanilla extract, and baking powder. This mixture will start to create an aromatic base.
  • Next, gradually add the all-purpose flour, stirring consistently. At first, it may seem impossible to incorporate the flour fully, but keep at it until a smooth, cohesive dough forms.
  • It should not be sticky, and you should be able to handle it easily with your hands. If it’s too wet, add a bit more flour.

Step 2: Prepare to Fry

  • In a heavy-bottomed pot, pour in enough vegetable oil to deep fry the churros. Aim for a depth of at least 2 inches.
  • Heat the oil over medium heat. You can test the oil’s readiness by dropping a small piece of dough into it. If it bubbles and floats up, it’s go time!

Step 3: Pipe the Dough

  • While the oil heats, fill a piping bag fitted with a star tip designed for churros. If you don’t have one, a simple ziplock bag with the corner snipped off will work, too! Carefully fill the bag with the churro dough.

Step 4: Fry the Churros

  • Once the oil is hot and bubbling, carefully pipe about 4-6 inches of dough directly into the hot oil, using scissors to cut off the dough.
  • Fry the churros in batches, taking care not to overcrowd the pot. Fry them for about 2-3 minutes on each side, until they reach a golden color.

Step 5: Sugar and Cinnamon Coating

  • Once fried, remove the churros using a slotted spoon and transfer them to a paper towel-lined plate to absorb excess oil. Immediately roll them in a mixture of granulated sugar and ground cinnamon.
  • This is where the magic happens! That sugar-coating ritual truly sends them to “churro paradise.”

Step 6: Melting the Chocolate

  • While the churros cool, melt your chopped dark chocolate in a heatproof bowl over a simmering pot of water, stirring constantly.
  • This method, known as a double boiler, helps you get that silky-smooth consistency that will elevate your churros from delicious to divine.

Notes

  • Hot Boiling Water: Using boiling water ensures that the starch in the flour hydrates properly, creating that fluffy texture in the finished churro.
  • Fine Sea Salt: We often overlook salt, but in this case, it’s essential. Salt fortifies sweetness in desserts and elevates flavors across the board.
  • Pure Vanilla Extract: Artificial flavoring cannot compare to the richness of pure vanilla. That subtle warmth adds layers to the final product.
  • Baking Powder: It’s critical for creating that puffy churro texture; it acts as a leavening agent.
  • All-Purpose Flour: The type of flour affects the texture. All-purpose gives you that perfect balance of chewy and tender.
  • Dark Chocolate: Not any chocolate will do; the higher cocoa content provides a deeper, more complex flavor that pairs beautifully with the sugary churros.
  • Granulated Sugar and Ground Cinnamon: The classic churro topping that gives them their signature crunch and sweetness.
  • Vegetable Oil: A neutral oil that allows the flavors of the churros to shine without altering their taste.

Nutrition

Serving: 59gCalories: 302kcalCarbohydrates: 33gProtein: 5gFat: 16.3gSaturated Fat: 9.3gCholesterol: 1mgSodium: 202mgFiber: 5gSugar: 9g
Keyword Spanish Churros Recipe
Tried this recipe?Let us know how it was!

Frequently Asked Questions

1. Can you prepare the dough ahead of time?

You can prepare the dough ahead of time. Refrigerate it for up to 24 hours. When you’re ready to fry, allow it to come to room temperature before piping.

2. Can churros be made gluten-free?

Absolutely! Swap the all-purpose flour with a gluten-free blend. Ensure your baking powder is gluten-free as well.

3. Why do my churros end up oily?

If your churros absorb too much oil, it might be due to the oil not being hot enough. Make sure to maintain the oil temperature during frying.

4. What’s the best way to store leftover churros?

Churros are best enjoyed fresh, but you can store leftover ones in an airtight container at room temperature for 1-2 days. Reheat them briefly in an oven to regain some crispness.

5. Can I freeze churros?

Yes! Fry them, then let them cool completely. Store them in a freezer-safe bag. When you’re ready to enjoy, bake or fry them from frozen until heated through.

6. What’s a good dipping sauce for churros besides chocolate?

Aside from chocolate, options can include caramel sauce, a citrus glaze, or even dulce de leche. You can get creative!

Conclusion

Making Spanish churros at home is a rewarding experience. With a few simple ingredients and a little bit of patience, you can whip up a batch of these beloved treats that will impress anyone who tries them. 

Whether you serve them with a rich chocolate sauce or a fun dipping option, churros are bound to bring a smile to your face.

So, gather your loved ones, roll up your sleeves, and start frying. It’s a guaranteed way to make your kitchen the happiest place on the block. 

You won’t just create churros; you’ll create memories filled with laughter and sweetness. Happy frying!

You’ll also like these latest recipes!

Jollibee Peach Mango Pie Recipe – Yum Yarns

Best Jollibee Peach Mango Pie Recipe

Jollibee Peach Mango Pie is a sweet, irresistible treat that pairs wonderfully with a variety of accompaniments to enhance its flavors. For a classic combo, enjoy the pie with a scoop of creamy vanilla ice cream. 

The contrast between the warm pie and cold ice cream creates a delightful melt-in-your-mouth experience. If you’re in the mood for something fresh, a vibrant tropical fruit salad made with pineapple, kiwi, and strawberries adds tangy brightness that perfectly complements the richness of the pie. 

For a cozy touch, pair your dessert with a comforting cup of coffee or tea; a robust cappuccino or a calming chamomile tea will balance the sweetness of the pie. And if you want to take it up a notch, a dollop of freshly whipped cream on top adds an extra layer of indulgence.

These pairings make for a truly satisfying dessert experience.

Best Jollibee Peach Mango Pie Recipe

I remember the first time I took a bite of a Jollibee Peach Mango Pie. The crispy crust gave way to a warm, gooey filling that burst with sunny flavors. It was like a slice of happiness wrapped in flaky goodness. 

If you’ve been lucky enough to experience this treat, you know exactly what I mean. If not, allow me to take you on a delicious journey into the heart of this beloved dessert.

The Jollibee Peach Mango Pie is more than just a dessert. It’s a cultural icon that captures the essence of Filipino flavors with a hint of nostalgia. I’ve tried making this pie at home multiple times and am excited to share a recipe that gets it just right. 

With a few simple ingredients, a step-by-step guide, and personal insights along the way, you too can create this masterpiece in your kitchen.

You will also like the following Dessert recipes!

What is Jollibee Peach Mango Pie?

Jollibee Peach Mango Pie is a deep-fried pastry filled with a delightful mixture of sweet peaches and ripe mangoes. This iconic dessert is famous for its unique combination of flavors and textures – a crisp exterior giving way to a luscious, gooey center. 

On a busy day, grabbing one of these pies at Jollibee feels like a warm hug. But the best part? You can recreate this beloved treat in your own kitchen.

Why This Recipe Works

1. Authentic Flavor: The use of ripe peaches and mangoes ensures that the pie is bursting with tropical flavor. Fresh ingredients make all the difference.

2. Easy Preparation: This recipe uses pre-made pie crusts which saves a tremendous amount of time. Even busy folks can whip this up in no time.

3. Versatility: You can adjust the sweetness or spices based on your preferences. Don’t like vanilla? Substitute it with almond extract.

4. Satisfying Texture: The combination of a flaky crust with a gooey filling hits all the right spots. Each bite is a delightful contrast that keeps you going back for more.

Ingredients You’ll Need to Make This Jollibee Peach Mango Pie

Before we dive into the steps, here’s a quick view of the ingredients you’ll need:

  • 2 pre-made 9-inch pie crusts (store-bought or homemade)
  • 1 large egg, lightly beaten
  • 1 tablespoon of heavy cream
  • A sprinkle of raw sugar, for topping
  • ¾ cup diced mangoes (fresh or frozen)
  • ¾ cup diced peaches (fresh or frozen)
  • ½ cup white sugar
  • 2 tablespoons of cornstarch
  • ¼ teaspoon ground cinnamon
  • 1 tablespoon freshly squeezed lemon juice
  • A pinch of sea salt
  • ½ teaspoon pure vanilla extract
  • All-purpose flour, for dusting the counter
  • ¼ teaspoon ground ginger
  • 1 tablespoon maple syrup
Jollibee Peach Mango Pie Recipe

How to Make These?

Follow these steps to create your very own Jollibee Peach Mango Pie.

Step 1: Prepare the Filling

In a mixing bowl, combine the diced mangoes and peaches. Add the white sugar, cornstarch, ground cinnamon, lemon juice, sea salt, vanilla extract, ground ginger, and maple syrup. Gently fold everything together until evenly mixed. Let this sit while you prepare your crust.

Step 2: Roll Out the Crust

Dust your countertop with flour. Take one of the 9-inch pie crusts and gently roll it out to smooth any creases. You want it to be pliable enough to form into a pie shape without breaking.

Step 3: Fill the Pie Crust

Carefully place the rolled-out pie crust into a pie dish. Use your fingers to mold the crust into the shape of the dish. Now, take your fruit filling and pour it into the crust, spreading it evenly.

Step 4: Seal the Pie

Roll out the second pie crust in a similar manner. Cover the pie with this second crust. Pinch the edges of both crusts together to seal in the delicious filling. You can make decorative cuts on top to let steam escape.

Step 5: Brush and Sprinkle

Mix the beaten egg and heavy cream together. Gently brush the top of the pie with this mixture for a golden finish. Sprinkle some raw sugar on top for added crunch and sweetness.

Step 6: Bake

Preheat your oven to 375°F (190°C). Bake for about 25 to 30 minutes or until the crust is golden brown. Allowing the baking aroma to fill your kitchen is a definite plus.

Step 7: Cool and Serve

Once baked, let the pie cool for a few minutes before slicing. This will help the filling set a bit.

Tips for Success

  • Choose Ripe Fruit: For the best flavor, select ripe, sweet peaches and mangoes. Overripe fruit can make the pie too mushy.
  • Watch the Baking Time: Every oven is different. Keep an eye on your pie to avoid over-baking.
  • Cool Before Serving: Let the pie cool slightly; this helps the filling firm up.
  • Experiment with Spices: Cinnamon and ginger are classic, but feel free to experiment with nutmeg or other spices.
  • Dusting Flour: Don’t skimp on the flour when rolling out crusts. It prevents sticking and tearing.
Easy Jollibee Peach Mango Pie Recipe

How to Store the Leftovers?

If you happen to have leftover pie (which seems unlikely, but just in case!), store it in an airtight container in the refrigerator. It should last for about 3-4 days. You can reheat slices in the oven for a warm treat or enjoy it cold.

What are Some Recommended Side Dishes for Jollibee Peach Mango Pie?

Pairing your pie with sides can elevate your meal experience. Here are a few ideas:

1. Steamed Asparagus: Its crispness contrasts the softness of the pie, making for a refreshing addition.

2. Side Salad: A light salad with mixed greens, nuts, and a tangy vinaigrette can add a nice balance to the sweetness of your dessert.

3. Roasted Sweet Potatoes: These can be a savory side that complements the sweetness of the pie well.

4. Grilled Shrimp Skewers: Add some grilled proteins to your fare. The smokiness contrasts the sweet flavors perfectly.

Substitute Options for the Ingredients

Not all ingredients may be available, but don’t worry. Here are some substitutes:

  • Pre-made Pie Crusts: Use homemade dough or phyllo pastry instead for a different texture.
  • Heavy Cream: Half-and-half or coconut cream are alternatives that yield a similar result.
  • Granulated Sugar: Brown sugar or coconut sugar will add a deeper flavor.
  • Cornstarch: Arrowroot powder or all-purpose flour can work as thickening alternatives in your filling.
Easy Jollibee Peach Mango Pie Recipe

Jollibee Peach Mango Pie Recipe

Tina Cooper
Jollibee Peach Mango Pie is a sweet, irresistible treat that pairs wonderfully with a variety of accompaniments to enhance its flavors. For a classic combo, enjoy the pie with a scoop of creamy vanilla ice cream. 
Prep Time 15 minutes
Cook Time 25 minutes
Total Time 40 minutes
Course Dessert
Cuisine Filipino
Servings 8 Servings
Calories 278 kcal

Equipment

  • Mixing bowl

Ingredients
  

  • 2 pre-made 9-inch pie crusts store-bought or homemade
  • 1 large egg lightly beaten
  • 1 tablespoon of heavy cream
  • A sprinkle of raw sugar for topping
  • ¾ cup diced mangoes fresh or frozen
  • ¾ cup diced peaches fresh or frozen
  • ½ cup white sugar
  • 2 tablespoons of cornstarch
  • ¼ teaspoon ground cinnamon
  • 1 tablespoon freshly squeezed lemon juice
  • A pinch of sea salt
  • ½ teaspoon pure vanilla extract
  • All-purpose flour for dusting the counter
  • ¼ teaspoon ground ginger
  • 1 tablespoon maple syrup

Instructions
 

  • Follow these steps to create your very own Jollibee Peach Mango Pie.

Step 1: Prepare the Filling

  • In a mixing bowl, combine the diced mangoes and peaches. Add the white sugar, cornstarch, ground cinnamon, lemon juice, sea salt, vanilla extract, ground ginger, and maple syrup. Gently fold everything together until evenly mixed. Let this sit while you prepare your crust.

Step 2: Roll Out the Crust

  • Dust your countertop with flour. Take one of the 9-inch pie crusts and gently roll it out to smooth any creases. You want it to be pliable enough to form into a pie shape without breaking.

Step 3: Fill the Pie Crust

  • Carefully place the rolled-out pie crust into a pie dish. Use your fingers to mold the crust into the shape of the dish. Now, take your fruit filling and pour it into the crust, spreading it evenly.

Step 4: Seal the Pie

  • Roll out the second pie crust in a similar manner. Cover the pie with this second crust. Pinch the edges of both crusts together to seal in the delicious filling. You can make decorative cuts on top to let steam escape.

Step 5: Brush and Sprinkle

  • Mix the beaten egg and heavy cream together. Gently brush the top of the pie with this mixture for a golden finish. Sprinkle some raw sugar on top for added crunch and sweetness.

Step 6: Bake

  • Preheat your oven to 375°F (190°C). Bake for about 25 to 30 minutes or until the crust is golden brown. Allowing the baking aroma to fill your kitchen is a definite plus.

Step 7: Cool and Serve

  • Once baked, let the pie cool for a few minutes before slicing. This will help the filling set a bit.

Notes

  • Choose Ripe Fruit: For the best flavor, select ripe, sweet peaches and mangoes. Overripe fruit can make the pie too mushy.
  • Watch the Baking Time: Every oven is different. Keep an eye on your pie to avoid over-baking.
  • Cool Before Serving: Let the pie cool slightly; this helps the filling firm up.
  • Experiment with Spices: Cinnamon and ginger are classic, but feel free to experiment with nutmeg or other spices.
  • Dusting Flour: Don’t skimp on the flour when rolling out crusts. It prevents sticking and tearing.

Nutrition

Serving: 56gCalories: 278kcalCarbohydrates: 29gProtein: 3gFat: 16.8gCholesterol: 3mgSodium: 200mgFiber: 1g
Keyword Jollibee Peach Mango Pie Recipe
Tried this recipe?Let us know how it was!

Frequently Asked Questions

1. Can I freeze Jollibee Peach Mango Pie?

Yes! You may freeze it before baking or after. Wrap it tightly in plastic wrap and foil to prevent freezer burn. It should last for about three months.

2. Can I use canned peaches and mangoes?

Absolutely! Canned fruits can offer convenience. Just make sure to drain them well to avoid excess moisture.

3. Is it necessary to deep-fry the pie?

While traditional recipes fry the pie, baking yields a lighter option. Just keep an eye on the oven for that golden crisp.

4. Can I make mini pies?

Definitely! Use muffin tins for mini versions. Adjust baking time because they will cook faster.

5. What type of mango is best?

Alfonso mangoes are sweet and flavorful, making them ideal for this recipe. Pick whatever is ripe!

Conclusion

Creating your very own Jollibee Peach Mango Pie is a rewarding experience that’s easy, fun, and delicious. Whether you enjoy it fresh from the oven or save it for a snack, each bite will take you on a flavor adventure. 

The perfect combination of sweet fruit and flaky crust is one bite away. Now that you’ve got the recipe, it’s time to gather your ingredients and get baking. Happy pie-making!

You’ll also like these latest recipes!

Jollibee Peach Mango Pie Recipe – Yum Yarns

Best Jollibee Peach Mango Pie Recipe

If you’ve ever been to Jollibee, you likely have a fond memory of your last visit. Maybe you were enjoying a delicious Chicken Joy or savoring their iconic spaghetti. Regardless, one item that shouldn’t be overlooked is the Peach Mango Pie. But let’s set the stage.

Before diving into this delightful dessert, think about the perfect meal to accompany it. A savory plate of Chickenjoy pairs beautifully with the sweet and tangy notes of the Peach Mango Pie.

 The crunchy exterior of the fried chicken complements the pie’s flaky crust. You might also enjoy a side of Jolly Spaghetti to add a bit of sweetness to your meal.

Need a quick refresher? 

Here’s a quick suggestion: try the Peach Mango Pie as a side to a light summer salad. The fresh basil and vibrant flavors can elevate both dishes, making for a satisfying lunch.

Alright, now let’s get to the good stuff!

Best Jollibee Peach Mango Pie Recipe

Ah, the Peach Mango Pie. This is not just a dessert; it’s an experience. Every bite takes you on a flavorful journey that combines the sweetness of ripe peaches with the exotic touch of mangoes. 

For many, it’s a staple at Jollibee, one of the beloved restaurants that have gained a devoted following worldwide.

You may have stumbled upon this recipe because you want to recreate that iconic dessert at home. Maybe you’re entertaining guests or just want to treat yourself. 

Either way, you’re in for a treat! This article will guide you through every aspect of making the perfect Jollibee-inspired Peach Mango Pie. From ingredients to cooking tips, you’ll find it all here.

What is Jollibee Peach Mango Pie?

The Jollibee Peach Mango Pie is a delightful pastry that features a crispy exterior filled with a sweet mixture of peaches and mangoes. 

It’s golden brown and wonderfully crunchy, giving way to a warm, fruity filling that feels like a special hug from the inside.

This dessert is famous not just for its taste, but also for its backstory. The combination of peaches and mangoes reflects the Philippines’ rich agricultural bounty, making it a beloved treat in Filipino culture. 

The pie genius was ripe for the iconic fast-food chain, and since then, it has been a must-try for newcomers and a nostalgic reminder for regulars.

You will also like the following Dessert recipes!

Why You’ll Love This Jollibee Peach Mango Pie

Let’s break it down. Why should you make this dessert at home? First off, the flavors are incredible. The sweetness of the mango combined with the tartness of the peaches creates a delicious balance. 

When you take a bite, you might just close your eyes and find yourself transported to a tropical paradise. And let’s talk about the texture. When baked to perfection, the crust offers a delicious crunch that holds all that juicy goodness inside.

Besides the taste, making this pie offers a unique bonding opportunity. Picture this—you’re in the kitchen with family, mixing ingredients and sharing stories. It’s more than just cooking; it’s about creating memories.

Plus, making the peach mango filling from scratch means you control the ingredients. You can tweak the sugar to suit your taste, or even add a little kick with spices like cinnamon or ginger. Homemade equals satisfaction.

Ingredients You Will Need to Make Jollibee Peach Mango Pie

To create this treat, you’ll need several straightforward ingredients. Most of these are readily available, making this an accessible recipe. Here’s the comprehensive list:

For the Fruit Filling:

  • ½ cup white sugar
  • 1 tablespoon freshly squeezed lemon juice
  • ¾ cup diced mango (fresh or frozen)
  • ¾ cup diced peaches (fresh or frozen)
  • ¼ teaspoon ground cinnamon (optional, for a warm flavor)
  • ⅛ teaspoon sea salt
  • ½ teaspoon pure vanilla extract
  • 2 tablespoons potato starch (or cornstarch)
  • 1 tablespoon finely chopped fresh ginger 

For the Pie Crust and Topping:

  • All-purpose flour, as needed for dusting
  • 2 9-inch pie crusts (either homemade or store-bought)
  • 1 large egg (beaten, for egg wash)
  • 1 tablespoon heavy cream (for egg wash)
  • Raw sugar for sprinkling on top
Jollibee Peach Mango Pie Recipe

Directions

Creating this pie is easy and straightforward. Let’s break it down into manageable steps.

Step 1: Prepare the Filling

Start by gathering your ingredients. In a large mixing bowl, combine the sugar, lemon juice, mango, and peaches. Stir gently to coat the fruit. Sprinkle in the cinnamon, sea salt, vanilla extract, and potato starch. Finally, add the fresh ginger. This mixture is your flavorful filling.

Step 2: Roll Out the Pie Crust

Dust your workspace with a bit of flour to prevent sticking. If you’re using store-bought crusts, carefully unroll them. If homemade, get rolling! Aim for about ¼ inch thickness.

Step 3: Assemble the Pie

Once you have your crust ready, place it in a pie pan. Spoon your fruit filling into the center, making sure not to overfill. Take the second crust and place it over the filling. To seal, gently pinch the edges together. You want to keep that delicious filling inside!

Step 4: Create Vents

It’s essential to allow steam to escape while baking. With a sharp knife, cut a few small slits into the top crust. This prevents it from bursting.

Step 5: Brush for Shine

In a small bowl, combine the beaten egg and heavy cream. Brush this egg wash over the top crust for a lovely golden color when baked.

Step 6: Sprinkle Sugar

Finish by sprinkling raw sugar over the top for added crunch and sweetness.

Step 7: Bake

Preheat your oven to 375°F (190°C). Bake the pie for about 25 to 30 minutes, or until the crust is golden brown. Enjoy the delightful aroma wafting through your kitchen!

Notes

Let’s take a moment to dive into some helpful tips to ensure your Peach Mango Pie turns out perfectly every time:

  • Use ripe fruit. For the best flavor, choose ripe mangoes and peaches. They should be fragrant and slightly soft to the touch.
  • Chill the crust. If you’re making a homemade crust, refrigerate it for at least 30 minutes before using. This helps achieve a flakier texture.
  • Experiment with spices. While cinnamon and ginger are great, feel free to explore other flavors. Nutmeg or cardamom can add a unique twist.
  • Avoid overfilling. Too much filling can cause the pie to leak out while baking. Less is often more.
  • Let it cool. After baking, allow the pie to cool for a bit before slicing. This allows the filling to firm up for easier serving.

Storage Tips

Storing leftovers? Here’s how to do it right:

  • Room Temperature. Allow the pie to cool completely, then cover with foil or plastic wrap. It can stay at room temperature for a day or two.
  • Refrigeration. For longer storage, place the pie in the fridge. Properly wrapped, it can last up to a week.
  • Freezing. You can also freeze the pie before or after baking. If freezing unbaked, wrap very well and use within three months. For baked pies, wrap tightly and consume within four months for the best quality.
Easy Jollibee Peach Mango Pie Recipe

Serving Suggestions

Ready to present your masterpiece? Here are some delicious ways to serve your Peach Mango Pie:

1. A Scoop of Ice Cream
Top your pie with vibrant vanilla or coconut ice cream. The cold creaminess contrasts beautifully with the warm pie, creating a delightful experience.

2. Fresh Whipped Cream
A dollop of whipped cream adds a light, fluffy touch. You can even add a splash of vanilla for extra flavor.

3. Fruit Salsa
Serve with a refreshing fruit salsa. Chopped strawberries, kiwi, and a drizzle of lime juice can brighten up the dessert.

4. Chocolate Drizzle
If you’re a chocoholic, drizzle dark chocolate over the top for an indulgent treat. The blend of flavors is simply irresistible.

5. Nuts on Top
Crushed nuts sprinkled on top add a crunchy texture and toasted flavor that pairs beautifully with the fruit filling.

What Other Substitutes Can I Use in Jollibee Peach Mango Pie?

Substitutions can be a delicious adventure! Here are some alternatives to consider:

1. Other Fruits
If mangoes or peaches aren’t available, try apples, apricots, or even berries. Each will bring its unique sweetness and flavor.

2. Gluten-Free Crust
For those avoiding gluten, opt for a gluten-free crust. There are various brands available that hold up well for pies.

3. Agave or Honey
Instead of white sugar, consider substituting with agave syrup or honey. Adjust the quantity based on your sweetness preference.

4. Coconut Milk
Want a creamier filling? Replace part of the lemon juice with coconut milk for an additional layer of flavor.

5. Spices
Feel free to swap out spices. Nutmeg can lend a warm, earthy scent, or add a pinch of chili powder for something different.

Easy Jollibee Peach Mango Pie Recipe

Jollibee Peach Mango Pie Recipe

Tina Cooper
Ah, the Peach Mango Pie. This is not just a dessert; it’s an experience. Every bite takes you on a flavorful journey that combines the sweetness of ripe peaches with the exotic touch of mangoes. 
Prep Time 15 minutes
Cook Time 25 minutes
Total Time 40 minutes
Course Dessert
Cuisine American
Servings 8 Servings
Calories 277 kcal

Equipment

  • Mixing bowl

Ingredients
  

For the Fruit Filling:

  • ½ cup white sugar
  • 1 tablespoon freshly squeezed lemon juice
  • ¾ cup diced mango fresh or frozen
  • ¾ cup diced peaches fresh or frozen
  • ¼ teaspoon ground cinnamon optional, for a warm flavor
  • teaspoon sea salt
  • ½ teaspoon pure vanilla extract
  • 2 tablespoons potato starch or cornstarch
  • 1 tablespoon finely chopped fresh ginger

For the Pie Crust and Topping:

  • All-purpose flour as needed for dusting
  • 2 9- inch pie crusts either homemade or store-bought
  • 1 large egg beaten, for egg wash
  • 1 tablespoon heavy cream for egg wash
  • Raw sugar for sprinkling on top

Instructions
 

  • Creating this pie is easy and straightforward. Let’s break it down into manageable steps.

Step 1: Prepare the Filling

  • Start by gathering your ingredients. In a large mixing bowl, combine the sugar, lemon juice, mango, and peaches. Stir gently to coat the fruit. Sprinkle in the cinnamon, sea salt, vanilla extract, and potato starch. Finally, add the fresh ginger. This mixture is your flavorful filling.

Step 2: Roll Out the Pie Crust

  • Dust your workspace with a bit of flour to prevent sticking. If you’re using store-bought crusts, carefully unroll them. If homemade, get rolling! Aim for about ¼ inch thickness.

Step 3: Assemble the Pie

  • Once you have your crust ready, place it in a pie pan. Spoon your fruit filling into the center, making sure not to overfill. Take the second crust and place it over the filling. To seal, gently pinch the edges together. You want to keep that delicious filling inside!

Step 4: Create Vents

  • It’s essential to allow steam to escape while baking. With a sharp knife, cut a few small slits into the top crust. This prevents it from bursting.

Step 5: Brush for Shine

  • In a small bowl, combine the beaten egg and heavy cream. Brush this egg wash over the top crust for a lovely golden color when baked.

Step 6: Sprinkle Sugar

  • Finish by sprinkling raw sugar over the top for added crunch and sweetness.

Step 7: Bake

  • Preheat your oven to 375°F (190°C). Bake the pie for about 25 to 30 minutes, or until the crust is golden brown. Enjoy the delightful aroma wafting through your kitchen!

Notes

Let’s take a moment to dive into some helpful tips to ensure your Peach Mango Pie turns out perfectly every time:
  • Use ripe fruit. For the best flavor, choose ripe mangoes and peaches. They should be fragrant and slightly soft to the touch.
  • Chill the crust. If you’re making a homemade crust, refrigerate it for at least 30 minutes before using. This helps achieve a flakier texture.
  • Experiment with spices. While cinnamon and ginger are great, feel free to explore other flavors. Nutmeg or cardamom can add a unique twist.
  • Avoid overfilling. Too much filling can cause the pie to leak out while baking. Less is often more.
  • Let it cool. After baking, allow the pie to cool for a bit before slicing. This allows the filling to firm up for easier serving.

Nutrition

Serving: 186gCalories: 277kcalCarbohydrates: 27gProtein: 8gFat: 15.6gCholesterol: 405mgSodium: 68mgFiber: 3gSugar: 9g
Keyword Jollibee Peach Mango Pie Recipe
Tried this recipe?Let us know how it was!

Frequently Asked Questions

1. Can I make the pie vegan?

Yes! Opt for a plant-based crust and substitute the egg wash with a mixture of almond milk and maple syrup. The filling can remain the same, as it’s naturally vegan-friendly.

2. How do I prevent the crust from burning?

If you notice the crust browning too quickly, cover the edges with aluminum foil halfway through baking. This prevents over-browning while allowing the pie to cook fully.

3. What to do if my filling is too runny?

If your filling turns out runny, you can add a bit more cornstarch to thicken it up. Sprinkle an extra tablespoon into your mixture, and it should help absorb excess moisture.

4. Can I bake mini pies?

Absolutely! Use a muffin tin or mini pie dish to create adorable, single-serving pies. Baking time will be shorter, generally around 15 to 20 minutes.

5. Is this pie freezer-friendly?

Definitely! Both before and after baking, you can freeze this pie. Just ensure it’s well wrapped. When ready to enjoy, simply bake from frozen or let it thaw in the fridge overnight before reheating.

6. How should I serve the pie?

This pie shines best when served warm. Pair it with ice cream or whipped cream for an extra special touch. It’s perfect for gatherings or simply enjoying on your own!

Conclusion

Making the Jollibee Peach Mango Pie at home is not just a culinary endeavor; it’s an opportunity to bring joy and sweetness into your life. Each bite echoes the flavors of comfort and nostalgia, reminding us of warm meals shared with loved ones.

You’ve now equipped yourself with the information to whip up this delightful dessert, making it a standout feature at any gathering or a cherished treat for personal enjoyment. 

Try making this at home, and I guarantee you’ll discover just how satisfying it is to create something both delicious and deeply meaningful. Now, go ahead, get baking, and let the delightful aroma of your freshly baked pie fill the air!

You’ll also like these latest recipes!