Ah, breakfast—a sacred meal that sets the tone for the day. But let’s be real: mornings can be chaotic. Whether it’s the kids scrambling for their shoes or you miscounting the seconds until you’re late for work, mornings often feel like a whirlwind. That’s where a good breakfast casserole swoops in like a superhero to save the day.
Before we dive into the details, consider pairing your breakfast casserole with a refreshing beverage, such as freshly squeezed orange juice or, for those who enjoy a little kick, a spicy Bloody Mary. A side of fruit salad or yogurt can round out your breakfast beautifully.

A Companion for Every Palate
1. Fresh Fruit Salad: Light, colorful, and refreshing, this will add a hint of sweetness to your savory dish. Plus, it provides a lovely texture contrast.
2. Yogurt Parfaits: Layering yogurt with granola and berries complements the warmth of the casserole while adding a creamy alternative.
3. Smoothies: Consider a green smoothie for a health kick. Spinach, banana, and almond milk blend seamlessly into the morning.
4. Coffee or Tea: Nothing beats a hot cup of coffee or tea to revitalize those sleepy eyes and stimulate the senses.
5. Breakfast Pastries: A croissant or pastry can add a touch of indulgence to your morning, especially if you have guests.
Introduction
Breakfast casserole is an unassuming yet powerful dish. It’s one of those meals that can generously serve your family and friends while requiring minimal effort from you. In the hustle of life, this comforting dish is a lifeline, filling bellies with warmth and joy.
But what exactly is a breakfast casserole? Imagine a fluffy blend of eggs, meats, cheese, and veggies, all baked until golden brown. The beauty of it lies in its adaptability. You can tailor it to fit your tastes. Want more veggies? Toss in some spinach. Prefer a different protein? Swap sausage for bacon.
This breakfast casserole isn’t just about tasting good; it’s about that moment when you take the first bite and feel all your worries fade away—at least for a few minutes.
What is Breakfast Casserole?
A breakfast casserole, in essence, is a one-dish meal typically composed of eggs as the base. It’s baked in the oven, which allows the flavors to mingle harmoniously. Most recipes include some sort of meat (like sausage or ham), cheese, and a variety of vegetables. The end product is a hearty, filling dish that checks all the boxes for texture, flavor, and satisfaction.
Unlike traditional breakfast items that need to be prepared individually—a fight with frying pans and endless plates—a breakfast casserole offers a simplified solution. You combine everything in a single dish and let the oven do the work. There’s something artistically satisfying about watching each layer meld together in that hot oven, transforming simple ingredients into a glorious creation.
You will also like the following Breakfast recipes!
- Bacon Cheddar And Chive Quiche With A Hash Brown Crust
- How to make Savory Sausage Strata
- Savory Herb French Toast Recipe
Why You’ll Love This Breakfast Casserole
You might be asking: why should I care about yet another breakfast recipe? Let’s break it down.
First and foremost, convenience is the star here. Mornings are often hurried, and this casserole allows you to wake up, toss ingredients together, and get on with your morning routine. You can even prepare it the night before! Imagine setting it in the fridge, then popping it in the oven first thing. There’s no racing against time, just an easy transition from sleep to a delicious breakfast.
Next, it’s all about versatility. The ingredients you can add are endless, making it easy to use whatever you already have. Got leftover veggies? Toss ‘em in! Found a stray piece of cheese in your fridge? Now’s the time to use it.
Let’s also talk about nutrition. With this casserole, you can pack it full of proteins, fiber, and vitamins, depending on your choice of ingredients. Swap out heavier meats or cheeses for leaner options, or add wholesome greens for that extra health boost.
Lastly, the flavor is key! The blend of eggs with sausage, cheese, and spices creates an explosion of tastes that will make your taste buds cheer. Whether you like it spicy (hello, jalapeños!) or prefer savory and mild, there’s a flavor profile for everyone.
The Ingredients You Will Need to Make Breakfast Casserole
Ready to dive into creating this glorious dish? Here’s what you’ll need:
- 12 large eggs: The foundation of our breakfast masterpiece.
- 2 pounds ground pork sausage: A hearty protein choice. You can use turkey or chicken sausage if you’re looking to lighten it up.
- 2 cups sharp shredded cheddar cheese (200 g): A must for that gooey texture. You can substitute with a different cheese, like Monterey Jack if desired.
- 1 cup plain sour cream (light or regular) (240 g): This adds creaminess and also helps the eggs rise.
- 1/4 cup whole milk (60 ml): For added richness.
- 1/2 cup diced green bell pepper: Adds freshness and a pop of color.
- 1/2 cup diced red bell pepper: More color and a hint of sweetness.
- 4 stalks green onions, chopped: For that fresh onion flavor.
- 1 teaspoon kosher salt: Necessary for flavor.
- 1/2 teaspoon freshly ground black pepper: A pinch of warmth to complement the dish.
- 1 teaspoon smoked paprika: Oh, the depth of flavor this adds!
- 1/4 teaspoon garlic powder: Because everything is better with garlic.

Directions
Get your apron on; it’s time to mix and create!
Step 1: Preheat the Oven
Before anything else, preheat your oven to 350°F (175°C). This is crucial, as a hot oven ensures that your casserole cooks evenly and gets that beautiful golden crust.
Step 2: Cook the Sausage
In a large skillet over medium heat, add the ground sausage. Cook it thoroughly, breaking it apart with a spatula as it cooks. The aim is to get it browned and crumbly. This should take about 6-8 minutes. When it’s done, drain excess grease.
Step 3: Prepare the Vegetables
While the sausage is cooking, chop your bell peppers and green onions. This step is simple, but it adds layers of flavor and color.
Step 4: Whisk the Eggs and Cream
In a large mixing bowl, whisk together the eggs, sour cream, and milk. Add in the salt, pepper, smoked paprika, and garlic powder. Make sure it’s well combined and fluffy.
Step 5: Combine Ingredients
Once the sausage is ready, let it cool for a minute. Then, combine the cooked sausage, bell peppers, and green onions into the egg mixture, followed by the shredded cheese. Stir until everything is well coated.
Step 6: Bake
Lightly grease a large baking dish, and pour the mixture in. Spread it out evenly, and pop it into your preheated oven. Bake for 35-40 minutes or until the top is lightly golden and a toothpick inserted in the center comes out clean.
Step 7: Serve
Once baked, remove from the oven and allow it to sit for about 5 minutes before slicing. This helps everything set nicely. Serve warm and watch it disappear!
Notes
Tips for a Perfect Casserole
- Make Ahead: Feel free to prepare everything the night before. Just refrigerate it and pop it in the oven in the morning.
- Don’t Skip the Drain: Ensure you drain any excess grease from the sausage to prevent your casserole from becoming soggy.
- Customizable: The beauty of this recipe is in customization. Don’t be afraid to add your favorite veggies or switch up the meats.
- Watch the Bake Time: Every oven is different. Start checking your casserole at the 30-minute mark to avoid overcooking.
- Leftovers: Store leftovers in an airtight container in the refrigerator for up to three days.
Storage Tips
After devouring your casserole, you may have leftovers (or that’s the goal, right?). To store them properly, cool down the leftover pieces first. Place them in an airtight container, and keep them in the fridge. For longer storage, consider freezing individual portions. This way, you can reheat a slice whenever you need a quick breakfast.
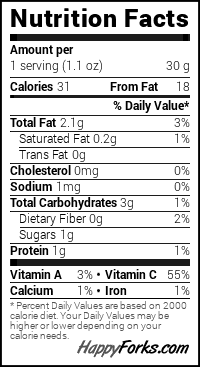
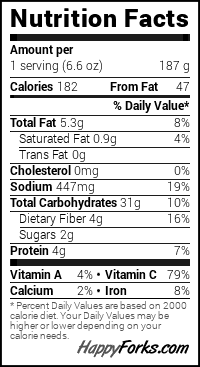
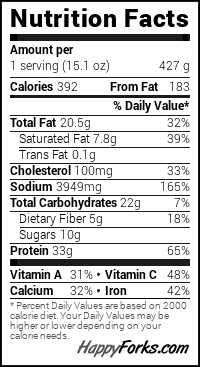
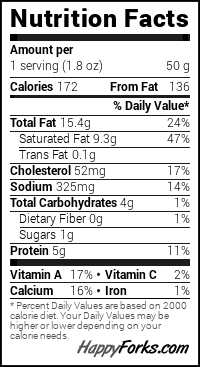
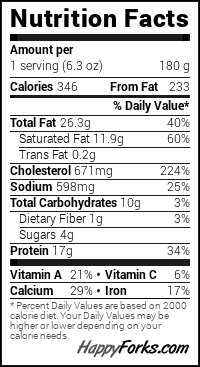
Nutrition Information
Each serving of this breakfast casserole offers a well-rounded balance of nutrients:
- Calories: Approximately 350 (per serving)
- Protein: 25g
- Carbohydrates: 10g
- Fat: 22g
- Fiber: 1g
These values can vary based on ingredient choices, so it’s wise to adjust accordingly.

Serving Suggestions
1. Top with Avocado: Adding slices of fresh avocado gives a creamy finish that contrasts beautifully with the warm casserole.
2. Salsa: A spoonful of fresh salsa elevates the flavors, adding a bright, zesty contrast.
3. Hot Sauce: If you love heat, a dash of hot sauce can wake up your taste buds.
4. Crème Fraîche or Greek Yogurt: A dollop on top adds creaminess and sophistication.
5. Chopped Herbs: Fresh herbs like cilantro or parsley sprinkled on top bring freshness and liveliness to the dish.
What Other Substitutes Can I Use in Breakfast Casserole?
Want to get creative? Here are some substitutes to elevate your casserole experience:
- Substitute Pork Sausage with Turkey Sausage: Lighter in calories and fat, turkey sausage offers a similar flavor without the heaviness.
- Use Different Cheeses: Consider mozzarella for a stringy texture or feta for a tangy twist.
- Add Spinach Instead of Bell Peppers: Spinach wilts beautifully and adds color and nutrients.
- Cottage Cheese in Place of Sour Cream: For a healthier option, cottage cheese adds protein and creaminess without extra fat.
- Non-Dairy Milk: Almond or oat milk can replace regular milk while still providing the needed consistency.

Breakfast Casserole
Equipment
- Oven
- Bowl
Ingredients
- 12 large eggs: The foundation of our breakfast masterpiece.
- 2 pounds ground pork sausage: A hearty protein choice. You can use turkey or chicken sausage if you’re looking to lighten it up.
- 2 cups sharp shredded cheddar cheese 200 g: A must for that gooey texture. You can substitute with a different cheese, like Monterey Jack if desired.
- 1 cup plain sour cream light or regular (240 g): This adds creaminess and also helps the eggs rise.
- 1/4 cup whole milk 60 ml: For added richness.
- 1/2 cup diced green bell pepper: Adds freshness and a pop of color.
- 1/2 cup diced red bell pepper: More color and a hint of sweetness.
- 4 stalks green onions chopped: For that fresh onion flavor.
- 1 teaspoon kosher salt: Necessary for flavor.
- 1/2 teaspoon freshly ground black pepper: A pinch of warmth to complement the dish.
- 1 teaspoon smoked paprika: Oh the depth of flavor this adds!
- 1/4 teaspoon garlic powder: Because everything is better with garlic.
Instructions
Step 1: Preheat the Oven
- Before anything else, preheat your oven to 350°F (175°C). This is crucial, as a hot oven ensures that your casserole cooks evenly and gets that beautiful golden crust.
Step 2: Cook the Sausage
- In a large skillet over medium heat, add the ground sausage. Cook it thoroughly, breaking it apart with a spatula as it cooks. The aim is to get it browned and crumbly. This should take about 6-8 minutes. When it’s done, drain excess grease.
Step 3: Prepare the Vegetables
- While the sausage is cooking, chop your bell peppers and green onions. This step is simple, but it adds layers of flavor and color.
Step 4: Whisk the Eggs and Cream
- In a large mixing bowl, whisk together the eggs, sour cream, and milk. Add in the salt, pepper, smoked paprika, and garlic powder. Make sure it’s well combined and fluffy.
Step 5: Combine Ingredients
- Once the sausage is ready, let it cool for a minute. Then, combine the cooked sausage, bell peppers, and green onions into the egg mixture, followed by the shredded cheese. Stir until everything is well coated.
Step 6: Bake
- Lightly grease a large baking dish, and pour the mixture in. Spread it out evenly, and pop it into your preheated oven. Bake for 35-40 minutes or until the top is lightly golden and a toothpick inserted in the center comes out clean.
Step 7: Serve
- Once baked, remove from the oven and allow it to sit for about 5 minutes before slicing. This helps everything set nicely. Serve warm and watch it disappear!
Notes
- Make Ahead: Feel free to prepare everything the night before. Just refrigerate it and pop it in the oven in the morning.
- Don’t Skip the Drain: Ensure you drain any excess grease from the sausage to prevent your casserole from becoming soggy.
- Customizable: The beauty of this recipe is in customization. Don’t be afraid to add your favorite veggies or switch up the meats.
- Watch the Bake Time: Every oven is different. Start checking your casserole at the 30-minute mark to avoid overcooking.
- Leftovers: Store leftovers in an airtight container in the refrigerator for up to three days.
Nutrition
Frequently Asked Questions
What Can I Use Instead of Eggs?
If you’re looking for an egg-free option, consider using a flaxseed meal mixed with water. Combine 1 tablespoon of flaxseed meal with 2.5 tablespoons of water and let it sit for a few minutes until it becomes gel-like. This works as a binding agent in the casserole.
Can I Make a Vegetarian Version?
Absolutely! Substitute sausage with plant-based sausage or increase the amount of veggies. Mushrooms, zucchini, or even sweet potatoes can be delightful additions.
How Long Will the Casserole Last In the Fridge?
If properly stored in an airtight container, it can last up to 3-4 days. Just make sure it’s cooled down before you seal it up.
Can I Freeze Breakfast Casserole?
Yes, it freezes well. Cut it into individual portions, wrap them tightly in plastic wrap, and then place them in a freezer-safe container. They can be frozen for up to 2 months!
Can I Use Egg Whites Instead Of Whole Eggs?
Using egg whites will work, but the texture and flavor will change. To maintain flavor, add herbs or seasoning to spice it up!
Is it Safe to Reheat Multiple Times?
It’s best to reheat only what you’re going to eat. Reheating and cooling multiple times can result in food safety issues. Always ensure it’s heated thoroughly before serving.
Conclusion
Breakfast casseroles are the answer to the morning scramble we all face. With their ease of preparation, adaptability, and outright deliciousness, they could become a staple to your morning routine. Give it a shot! You might find that cooking ahead saves you time and stress, letting you actually enjoy your morning coffee instead of guzzling it on the go. Now, who wouldn’t love that?
So, gather your ingredients and get ready. A world of flavors awaits you, and it starts with the humble breakfast casserole. Happy cooking!