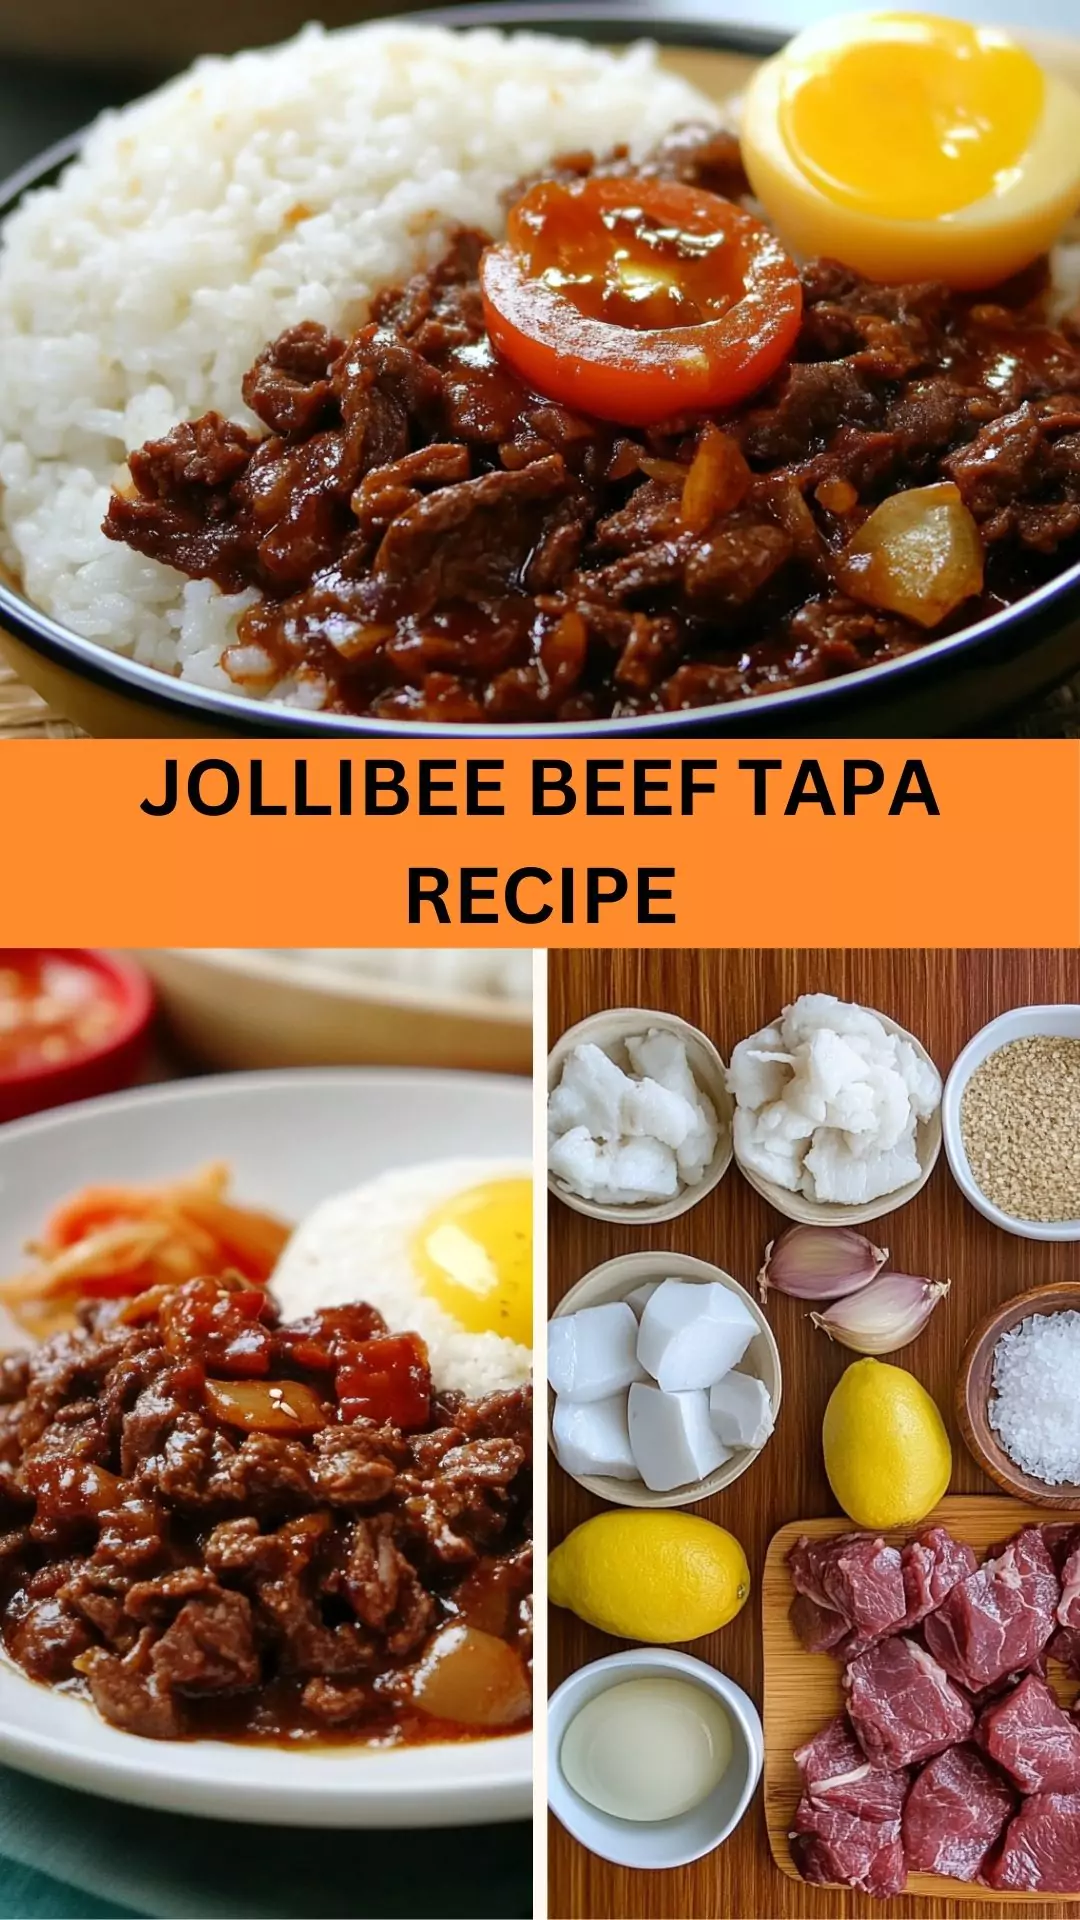
If there’s one dish that warms my heart and transports me back to the Philippines, it’s Jollibee Beef Tapa. This dish, with its blend of savory marinated beef, is not just a meal; it’s a reminder of the flavorful family gatherings and street-side turo-turo spots. Now, before we dive deeper into the recipe, let us consider what pairs well with Jollibee Beef Tapa.
When I think of perfect companions for this dish, a few things come to mind. Eggs — particularly a fried sunny side up — are a must. The yolk adds a richness that elevates each bite.
Steamed rice is essential as it soaks up the savory marinade, and pickled vegetables add a refreshing crunch that balances the dish. So, if you’re ready to create a feast, let’s delve into this culinary adventure!

Jollibee is more than just a fast-food chain; it’s an institution filled with flavors, tradition, and nostalgia. Among its many offerings, the Beef Tapa stands out. This dish is not just about taste; it’s about sharing memories over meals.
With tender beef marinated in a medley of spices and sauces, it promises a meal that is both comforting and satisfying. Join me as we explore how to bring this taste of home into your own kitchen.
You will also like the following Delicious recipes!
- Best Pollo Tropical Plantains Recipe
- How to make Pollo Tropical Grilled Wings
- Easy Pollo Tropical Fried Yuca Recipe
Why Does This Recipe Work?
- Flavor Complexity: The marinade combines soy sauce, oyster sauce, and a hint of calamansi, creating a rich umami flavor that’s both familiar and exciting. The balance of sweet, salty, and tangy is irresistible.
- Tender Meat: By using beef sirloin, we ensure that the meat remains tender and juicy. Thinly slicing it allows for quick cooking, making it perfect for any weeknight or a gathering.
- Ease of Preparation: You don’t need a culinary degree to enjoy this dish. The marinade requires minimal ingredients and is quick to whip up. The cooking process is straightforward, making it accessible even for novice cooks.
- Versatility: This dish is great for breakfast, lunch, or dinner. Pair it with rice and eggs for breakfast, or toss it in a salad for lunch. Beef Tapas fit seamlessly into various meal plans.
How Does It Taste?
Imagine sinking your teeth into a piece of tender beef, perfectly caramelized and infused with bold flavors. There’s a subtle sweetness from the sugar that balances the saltiness of the soy and oyster sauces.
The tang from calamansi gives a refreshing zing, making every bite a delightful experience. The aroma that wafts through your kitchen while it cooks? Pure magic! It’s savory, slightly sweet, and undeniably Filipino.
What Sets This Recipe Apart From Other Jollibee Beef Tapa Variations?
This recipe brings together traditional ingredients while also focusing on fresh, quality products. Each ingredient serves a purpose — from the rice vinegar, which adds a slight tang, to the sesame oil that enriches the flavor profile.
Unlike other variations that might use powdered mixes or artificial flavorings, this recipe relies on fresh ingredients for authenticity and depth.
The Ingredients
To create the mouthwatering Jollibee Beef Tapa, you’ll need the following:
- 500 grams beef sirloin, thinly sliced into strips
- 1 tablespoon rice vinegar (for a slight tang)
- 1/2 teaspoon sesame oil (for added richness)
- 1/4 cup creamy mayonnaise (adds creaminess)
- 1 to 2 tablespoons soy sauce (essential for umami)
- 1 tablespoon liquid seasoning (for enhanced flavor)
- 2 tablespoons dark oyster sauce (contributes a depth of flavor)
- 3 to 5 pieces calamansi, juiced (for a refreshing twist)
- 1 teaspoon granulated sugar (a tip of sweet)
- 1/2 head garlic, finely minced (for aromatic profile)
- 1/2 teaspoon freshly ground black pepper
- Vegetable oil (for frying)
- Crispy fried garlic (for garnish)

Instructions
Step 1: Prepare the Marinade
In a large bowl, combine the soy sauce, oyster sauce, liquid seasoning, calamansi juice, rice vinegar, sesame oil, sugar, minced garlic, and black pepper. Stir until well mixed. This blend is a burst of flavor waiting to embrace the beef.
Step 2: Marinate the Beef
Add the sliced beef sirloin to the marinade. Ensure each piece is well coated. Cover the bowl and let it marinate for at least 30 minutes. For deeper flavor, consider marinating for several hours in the refrigerator.
Step 3: Heat the Oil
In a pan, heat about 2 tablespoons of vegetable oil over medium heat. Ensure the oil is hot enough to sear the beef but not so hot that it smokes.
Step 4: Cook the Beef
Remove the beef from the marinade (reserve the marinade for later) and place it in the hot pan. Cook for about 4-5 minutes, or until browned and cooked through.
Step 5: Add Marinade Back to the Pan
Once the beef is cooked, pour the reserved marinade over the beef in the pan. Let it simmer for 1-2 minutes to thicken the sauce slightly. This adds flavor and ensures every bite is packed with that delicious marinade.
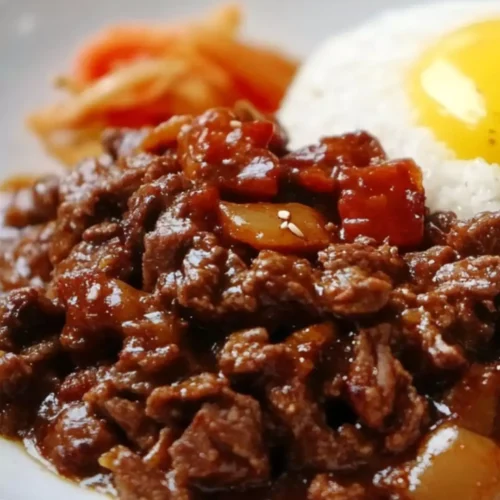
Step 6: Serve
Transfer the beef tapa to a plate and top with crispy fried garlic. Serve immediately with steamed rice and a side of fried eggs.
Notes
- Choosing the Right Cut: Use sirloin for nice tenderness. Avoid tougher cuts that might need longer cooking.
- Marinate Longer: The longer you marinate, the deeper the flavors.
- Control the Spice: Adjust black pepper and other seasonings to suit your palate.
- Garnishing: Crispy fried garlic adds a fantastic texture and flavor. You can find it in many Asian grocery stores or make your own.
- Leftovers: Jollibee beef tapa tastes even better the next day. Store it well, and you’ll be in for a treat!

How Do You Store This Jollibee Beef Tapa?
Once prepared, store leftover Jollibee beef tapa in an airtight container. It can last in the refrigerator for about 3-4 days.
For longer storage, consider freezing it for up to a month. Make sure to thaw it in the fridge overnight before reheating.
Sides for Jollibee Beef Tapa
- Fried Rice: A tasty way to elevate your meal. Just toss in some garlic, green onions, and leftover veggies for a delicious fried rice.
- Atchara: This sweet and tangy pickled papaya salad contrast wonderfully with the beef tapa. It’s refreshing and cleans the palate.
- Eggs: A simple sunny-side-up or scrambled egg adds richness and completes the traditional breakfast combo.
Alternatives for Ingredients
- Beef Sirloin: Substitute with flank steak or even chicken breast for a leaner option; just adapt cooking time accordingly.
- Soy Sauce: Use tamari for a gluten-free alternative, or coconut aminos for a slightly sweeter flavor.
- Oyster Sauce: For a vegetarian option, consider using mushroom oyster sauce or hoisin sauce.
- Calamansi: Limes or lemons can work; however, they won’t give the same unique flavor.
Jollibee Beef Tapa Recipe
Equipment
- pan
Ingredients
- 500 grams beef sirloin thinly sliced into strips
- 1 tablespoon rice vinegar for a slight tang
- 1/2 teaspoon sesame oil for added richness
- 1/4 cup creamy mayonnaise
- 1 to 2 tablespoons soy sauce
- 1 tablespoon liquid seasoning
- 2 tablespoons dark oyster sauce
- 3 to 5 pieces calamansi juiced
- 1 teaspoon granulated sugar
- 1/2 head garlic finely minced
- 1/2 teaspoon freshly ground black pepper
- Vegetable oil for frying
- Crispy fried garlic for garnish
Instructions
Step 1: Prepare the Marinade
- In a large bowl, combine the soy sauce, oyster sauce, liquid seasoning, calamansi juice, rice vinegar, sesame oil, sugar, minced garlic, and black pepper. Stir until well mixed. This blend is a burst of flavor waiting to embrace the beef.
Step 2: Marinate the Beef
- Add the sliced beef sirloin to the marinade. Ensure each piece is well coated. Cover the bowl and let it marinate for at least 30 minutes. For deeper flavor, consider marinating for several hours in the refrigerator.
Step 3: Heat the Oil
- In a pan, heat about 2 tablespoons of vegetable oil over medium heat. Ensure the oil is hot enough to sear the beef but not so hot that it smokes.
Step 4: Cook the Beef
- Remove the beef from the marinade (reserve the marinade for later) and place it in the hot pan. Cook for about 4-5 minutes, or until browned and cooked through.
Step 5: Add Marinade Back to the Pan
- Once the beef is cooked, pour the reserved marinade over the beef in the pan. Let it simmer for 1-2 minutes to thicken the sauce slightly. This adds flavor and ensures every bite is packed with that delicious marinade.
Step 6: Serve
- Transfer the beef tapa to a plate and top with crispy fried garlic. Serve immediately with steamed rice and a side of fried eggs.
Notes
- Choosing the Right Cut: Use sirloin for nice tenderness. Avoid tougher cuts that might need longer cooking.
- Marinate Longer: The longer you marinate, the deeper the flavors.
- Control the Spice: Adjust black pepper and other seasonings to suit your palate.
- Garnishing: Crispy fried garlic adds a fantastic texture and flavor. You can find it in many Asian grocery stores or make your own.
- Leftovers: Jollibee beef tapa tastes even better the next day. Store it well, and you’ll be in for a treat!
Nutrition
Frequently Asked Questions
Q1: Can I use a different meat for this recipe?
Yes! Pork, chicken, or even tofu can be used. Adjust the marinade time accordingly for better flavor absorption.
Q2: Why is my beef tough?
If the beef is overcooked or if you used a tougher cut, it can be chewy. Always slice against the grain and choose cuts that are known for tenderness.
Q3: How can I add more heat to this dish?
Simple! Add some chopped chili peppers or a dash of chili powder to the marinade for an extra kick.
Q4: Can I make this recipe ahead of time?
Absolutely. Marinate the beef a day in advance and cook it the next day. It will infuse even more flavor.
Conclusion
Jollibee Beef Tapa is more than just a meal; it’s a cultural experience that’s rich in flavors. This recipe allows you to savor a piece of Filipino cuisine right at home. With its simplicity and deliciousness, Jollibee Beef Tapa will surely impress your friends and family.
Serve it alongside your favorite accompaniments, and you’ll be transported straight back to that street-side Jollibee. Enjoy the journey as much as the destination, and happy cooking!