Before diving into the delightful world of Jollibee lumpia, let’s chat about perfect partners! These crispy treasures shine when served alongside a few tasty comrades. Consider pairing them with sweet and sour sauce for a zesty kick.
The tang complements the savory filling beautifully. Garlic vinegar dip adds a punch of flavor for those who enjoy a tart bite. Want a cool contrast?
Spicy vinegar can give you that thrill of heat against the crunchy texture. These pairings transform a delightful snack into a memorable feast.

The first time I tasted Jollibee lumpia, I was mesmerized. This wasn’t just any snack; it was a comforting little package that, when bitten into, released a medley of flavors.
Growing up, I often watched my grandparents make lumpia from scratch, and while it was an intricate process, the joy on their faces while sharing it was worth every moment.
Fast-forward to today, and I find myself recreating that love in my kitchen.
Whether it’s a cozy family meal or a festive gathering, Jollibee lumpia is always a hit. The crispy wrapper, complemented by a savory filling, brings nostalgia and joy to the table. Ready to make your own? Let’s explore what Jollibee lumpia is all about!
You will also like the following Appetizer recipes!
- Best Jollibee Lumpiang Shanghai Recipe
- How to make Pollo Tropical Plantains
- Easy Pollo Tropical Fried Yuca Recipe
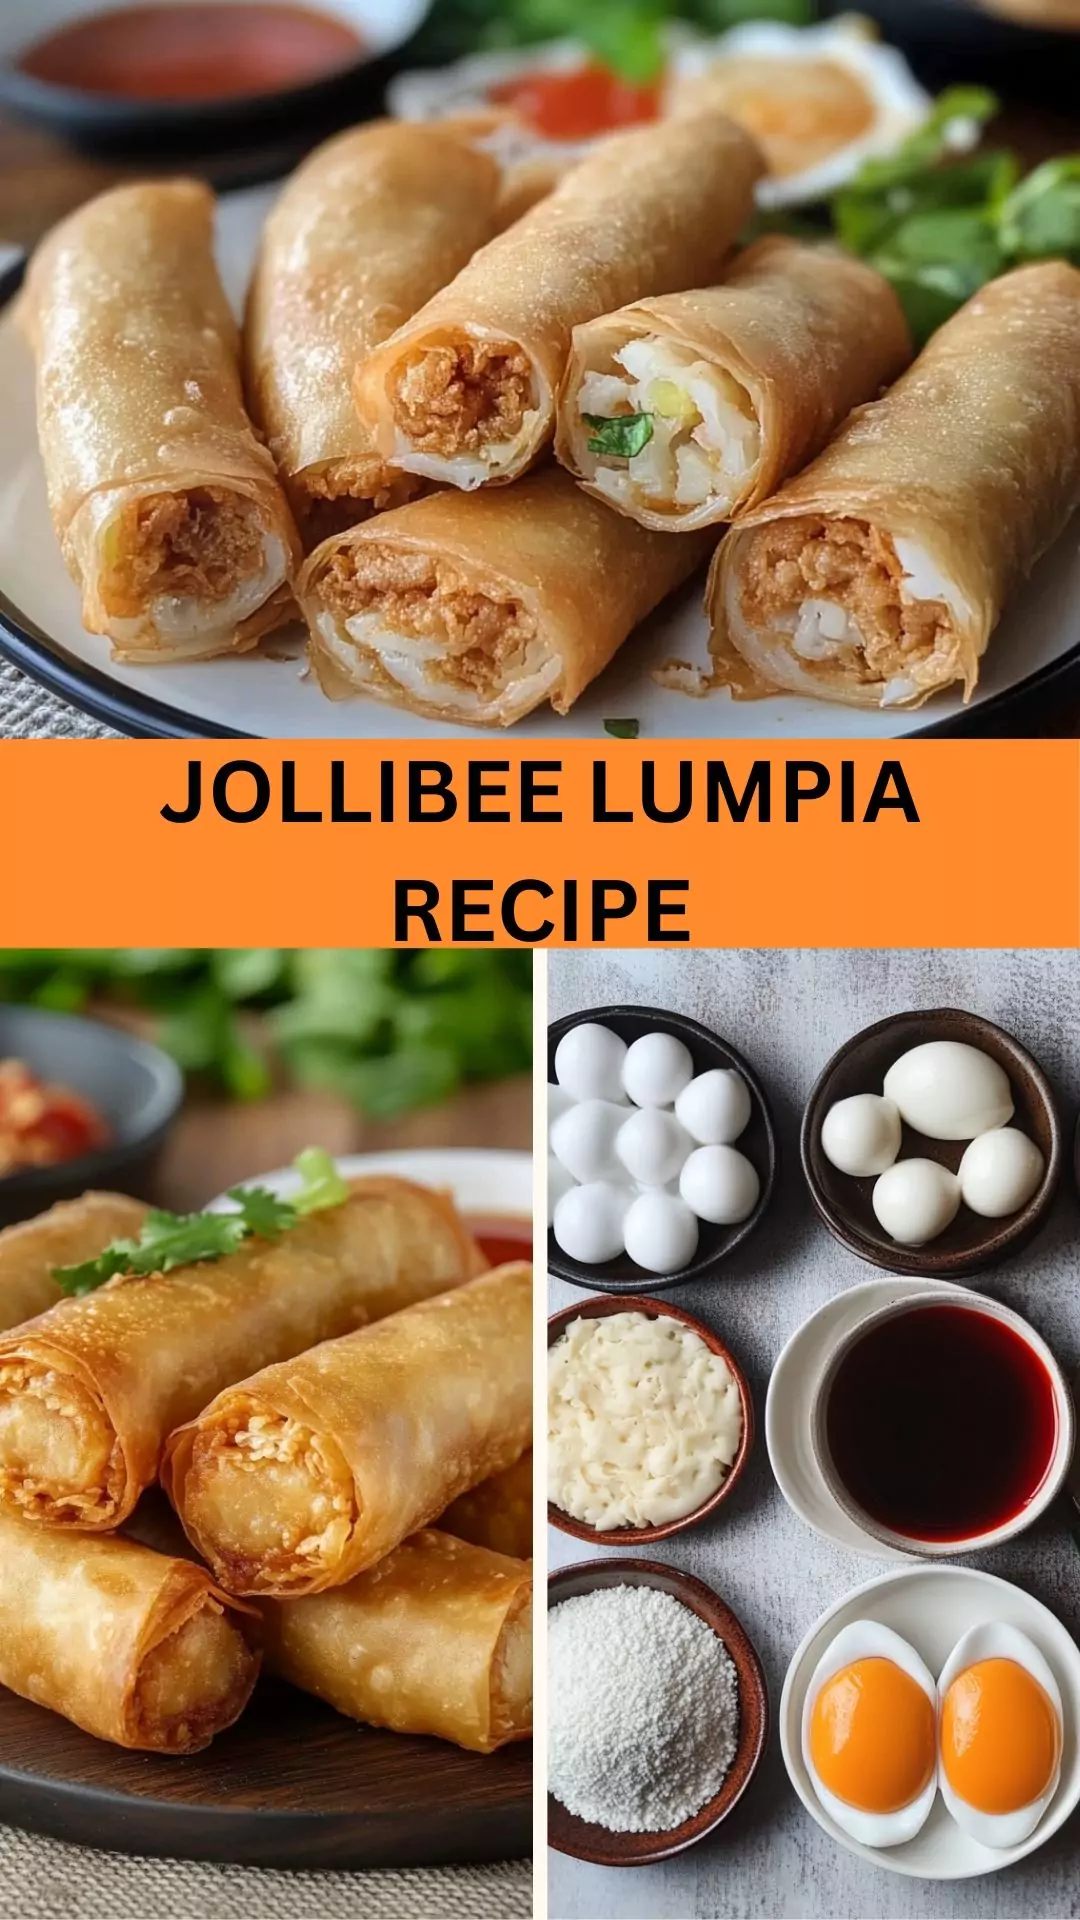
What is Jollibee Lumpia?
Jollibee lumpia is a popular Filipino snack that features a crispy wrapper stuffed with seasoned meats and vegetables.
These delightful rolls are often served as appetizers or side dishes. You can find them in various forms, but the Jollibee twist includes an irresistible flavor profile.
These rolls are loved for their satisfying crunch on the outside and savory goodness inside. The entire experience is a delightful journey of textures and tastes. Whether you’re at a Jollibee restaurant or making them at home, lumpia brings people together.
Why This Recipe Works?
You might be wondering why this recipe has become a staple in many households. Here are four solid reasons that make Jollibee lumpia a winner every time.
1. Crispy Perfection Every Time
Achieving that golden, crispy exterior is key. With the right frying technique and proper temperature, you’ll have perfectly crispy lumpia that you won’t be able to resist.
2. Flavorful Filling
The mixture of ground pork, fresh vegetables, and seasoning creates a filling that’s bursting with flavor. Each bite offers a savory taste, bringing comfort food to new heights.
3. Easy to Prepare
While lumpia might seem daunting at first, the step-by-step process is simple. The ingredients are easy to find and require minimal prep, making it accessible even for beginners.
4. Versatile and Customizable
One of the fantastic aspects of lumpia is its versatility. You can play with the filling ingredients to suit your preferences. Want to add shrimp or switch to a vegetarian filling? The possibilities are endless!
Ingredients You’ll Need to Make This Dish
To embark on your Jollibee lumpia journey, here’s what you’ll need:
- 1 1/2 lbs ground pork
- 2 large eggs
- 2 medium onions, finely minced
- 2 carrots, finely diced
- 1/2 cup fresh parsley, finely chopped
- 1 1/2 teaspoons garlic powder
- 1 tablespoon toasted sesame oil
- 1 tablespoon soy sauce
- 1 1/2 teaspoons sea salt
- 1/2 teaspoon freshly ground black pepper
- 1/4 teaspoon ground white pepper
Lumpia Wrappers & Oil:
- 50 pieces of lumpia wrappers
- 3 cups vegetable oil for frying

How to Make Jollibee Lumpia?
Let’s get into the nitty-gritty of preparing this delightful dish.
Step 1: Prepare the Filling
Start by gathering all your filling ingredients. In a large bowl, combine the ground pork, minced onions, diced carrots, and chopped parsley.
Next, add in the eggs, garlic powder, sesame oil, soy sauce, sea salt, black pepper, and white pepper. Mix everything well until it’s uniformly combined. Don’t be afraid to get your hands in there!
Step 2: Assemble the Lumpia
Take a lumpia wrapper and lay it on a clean surface. Spoon about two tablespoons of the filling into the center.
Make sure not to overfill; it needs room to roll. Fold the sides toward the center and roll tightly, sealing the last edge with a bit of water. Repeat this until all wrappers and filling are used up.
Step 3: Heat the Oil
In a large pan or deep fryer, heat the vegetable oil over medium heat. You want enough oil for deep frying, usually about two inches deep. To test if the oil is ready, throw in a small piece of wrapper; if it bubbles and rises, you’re good to go.
Step 4: Fry the Lumpia
Carefully place a few lumpia in the hot oil, avoiding overcrowding. Fry for about 3-4 minutes per side or until golden brown and crispy. Use tongs to turn them gently to ensure even cooking. Remove from heat and place on paper towels to drain excess oil.
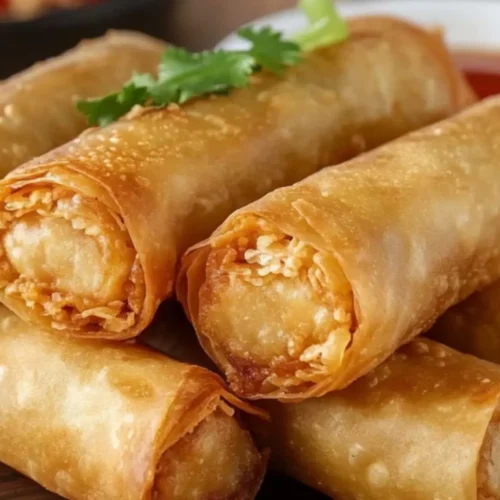
Step 5: Serve and Enjoy!
Serve the lumpia hot and crispy, accompanied by dipping sauces of your choice. Watching everyone enjoy the fruits of your labor is rewarding. Savor the moment!
Tips & Tricks
To enhance your lumpia-making experience, keep these handy tips in mind:
- Don’t Skip the Drain: Allow the fried lumpia to sit on paper towels to absorb excess oil. This keeps them crunchy and not greasy.
- Make Ahead: You can prepare the filling a day in advance and keep it refrigerated. Just wrap and fry when you’re ready!
- Experiment with Fillings: Toss in some shredded cabbage or bean sprouts for a different texture.
- Maintain Oil Temperature: Keep an eye on the oil temperature by adjusting the heat as needed. If it gets too hot, the lumpia may burn.
- Use Fresh Wrappers: Fresh lumpia wrappers yield the best results. If they feel dry, spritz them lightly with water.

How Do You Store The Leftovers?
If you find yourself with leftovers (which is rare because they go quickly!), allow the lumpia to cool completely before storing. Place them in an airtight container and refrigerate for up to 3 days.
To reheat, pop them in the oven at 375°F until warmed through for that crispy texture. Avoid using a microwave, as it can make them soggy.
What Sides Would Complement Jollibee Lumpia?
Here are three sides that amplify your lumpia experience:
1. Pancit (Noodles)
A classic Filipino dish, Pancit is vibrant and flavorful. With stir-fried noodles, vegetables, and meats, it pairs beautifully with crispy lumpia, making a complete meal.
2. Filipino Fried Rice
Egg fried rice with a dash of soy sauce offers a savory base. It balances the crispiness of lumpia while adding comforting familiarity.
3. Fresh Fruit Salad
A refreshing fruit salad can cleanse the palate. Combine tropical fruits like mangoes, pineapples, and bananas for a bright contrast to savory lumpia.
What Alternatives Can You Use for the Ingredients?
Running low on ingredients? Here are some alternatives:
1. Ground Turkey or Chicken
If you prefer a leaner option, ground turkey or chicken can replace the pork. It offers the same texture with less fat.
2. Tofu
For a vegetarian alternative, finely crumbled tofu can be used. Add soy sauce and spices for a boost of flavor.
3. Green Onions
Instead of onions, chopped green onions can add a fresh kick to your filling.
4. Any Wrappers
Don’t have lumpia wrappers? Spring roll or egg roll wrappers work well. Just ensure they’re sealed properly.
Jollibee Lumpia Recipe
Equipment
- large pan or deep fryer
Ingredients
Filling Ingredients:
- 1 1/2 lbs ground pork
- 2 large eggs
- 2 medium onions finely minced
- 2 carrots finely diced
- 1/2 cup fresh parsley finely chopped
- 1 1/2 teaspoons garlic powder
- 1 tablespoon toasted sesame oil
- 1 tablespoon soy sauce
- 1 1/2 teaspoons sea salt
- 1/2 teaspoon freshly ground black pepper
- 1/4 teaspoon ground white pepper
Lumpia Wrappers & Oil:
- 50 pieces of lumpia wrappers
- 3 cups vegetable oil for frying
Instructions
- Let’s get into the nitty-gritty of preparing this delightful dish.
Step 1: Prepare the Filling
- Start by gathering all your filling ingredients. In a large bowl, combine the ground pork, minced onions, diced carrots, and chopped parsley.
- Next, add in the eggs, garlic powder, sesame oil, soy sauce, sea salt, black pepper, and white pepper. Mix everything well until it’s uniformly combined. Don’t be afraid to get your hands in there!
Step 2: Assemble the Lumpia
- Take a lumpia wrapper and lay it on a clean surface. Spoon about two tablespoons of the filling into the center.
- Make sure not to overfill; it needs room to roll. Fold the sides toward the center and roll tightly, sealing the last edge with a bit of water. Repeat this until all wrappers and filling are used up.
Step 3: Heat the Oil
- In a large pan or deep fryer, heat the vegetable oil over medium heat. You want enough oil for deep frying, usually about two inches deep. To test if the oil is ready, throw in a small piece of wrapper; if it bubbles and rises, you’re good to go.
Step 4: Fry the Lumpia
- Carefully place a few lumpia in the hot oil, avoiding overcrowding. Fry for about 3-4 minutes per side or until golden brown and crispy. Use tongs to turn them gently to ensure even cooking. Remove from heat and place on paper towels to drain excess oil.
Step 5: Serve and Enjoy!
- Serve the lumpia hot and crispy, accompanied by dipping sauces of your choice. Watching everyone enjoy the fruits of your labor is rewarding. Savor the moment!
Notes
- Don’t Skip the Drain: Allow the fried lumpia to sit on paper towels to absorb excess oil. This keeps them crunchy and not greasy.
- Make Ahead: You can prepare the filling a day in advance and keep it refrigerated. Just wrap and fry when you’re ready!
- Experiment with Fillings: Toss in some shredded cabbage or bean sprouts for a different texture.
- Maintain Oil Temperature: Keep an eye on the oil temperature by adjusting the heat as needed. If it gets too hot, the lumpia may burn.
- Use Fresh Wrappers: Fresh lumpia wrappers yield the best results. If they feel dry, spritz them lightly with water.
Nutrition
Frequently Asked Questions
1. Can I bake lumpia instead of frying them?
Yes, you can bake lumpia! Preheat the oven to 400°F, brush them with oil, and bake for about 20 minutes or until golden brown, flipping them halfway through.
2. Are lumpia gluten-free?
Typically, lumpia wrappers aren’t gluten-free. However, you can find gluten-free wrappers at specialty stores or online.
3. Can lumpia be frozen for later use?
Absolutely! You can freeze uncooked lumpia. Just ensure they’re sealed well in plastic wrap and then in a freezer bag. Fry them straight from the freezer, adding a few extra minutes to the cooking time.
4. How do I make lumpia less greasy?
To reduce greasiness, ensure the oil is at the right temperature before frying. Also, make sure to drain the fried lumpia on paper towels.
5. Can I use leftover ingredients for this recipe?
Sure! If you have leftover ground meat or veggies, feel free to throw them in as long as they complement the flavors.
6. How many lumpia can I make from this recipe?
This recipe yields about 50 pieces of lumpia, making it perfect for gatherings or freezing for later.
Conclusion
Making Jollibee lumpia at home is not just about cooking; it’s about reliving memories and sharing joy. With its perfect crunch and savory filling, it’s more than a dish—it’s an experience.
Whether enjoyed at a festive gathering or a peaceful evening at home, lumpia holds a special place in the hearts of many.
I hope this guide inspires you to create your own lumpia masterpiece. Dive into the process, experiment with flavors, and enjoy the delightful experience of sharing this Filipino favorite.
Trust me, the smiles around the table will be worth it!