Before diving into the spectacular world of Pollo Tropical Cuatro Leches, let’s chat about the best companions for this dish. It’s a truly unique recipe that packs a delightful punch of flavors, and pairing it correctly can elevate your meal to new heights. Here are a few great options: Steamed Vegetables, Garlic Bread, Chilies or Salsa, White Rice or Salad.

For many of us, food isn’t just fuel; it’s a celebration. It tells stories, brings back cherished memories, and introduces us to new horizons. One dish that caught my attention recently is Pollo Tropical Cuatro Leches.
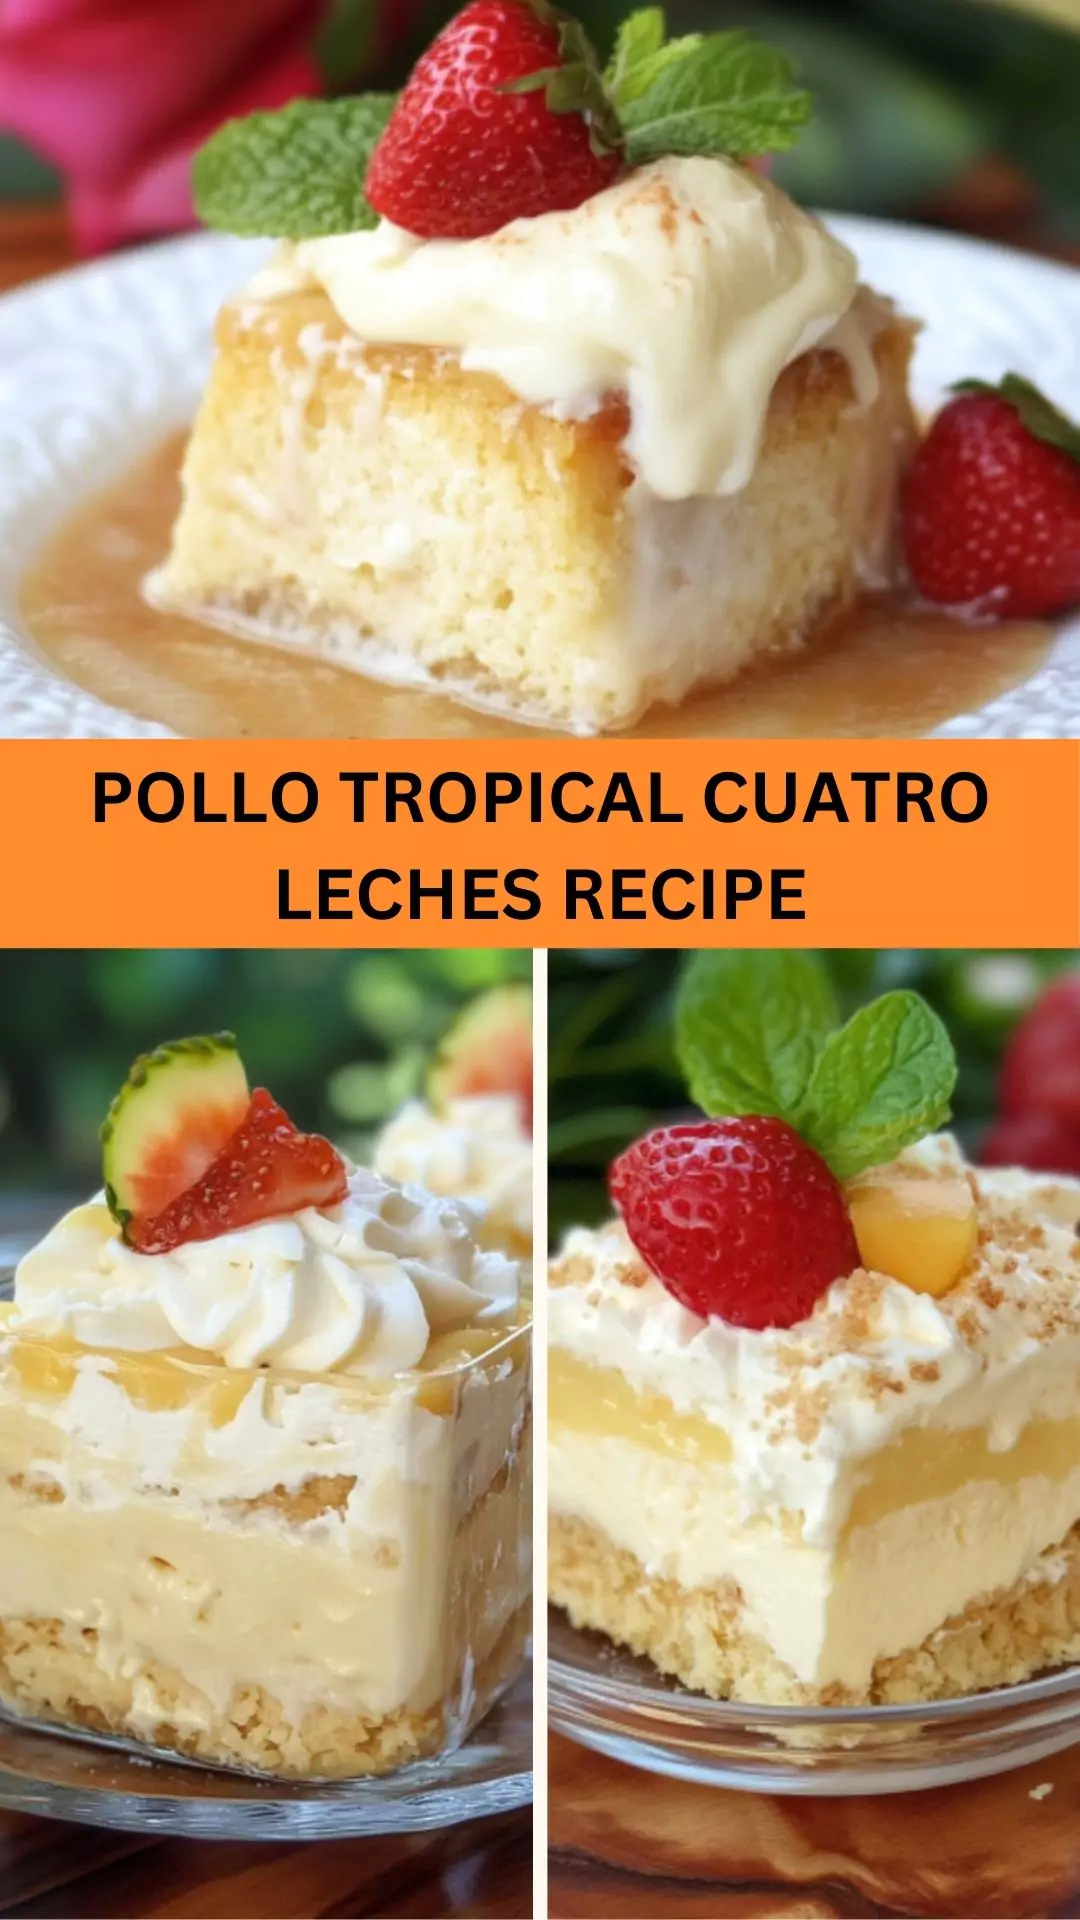
A delightful fusion of flavors, it has become a staple for gatherings and casual dinners alike. The charm of Pollo Tropical Cuatro Leches is not just in its unique taste but also in the layers of textures and aromas that fill your kitchen while cooking.
Let’s embark on a culinary adventure and explore everything there is to know about this enticing dish.
What is Pollo Tropical Cuatro Leches?
At its core, Pollo Tropical Cuatro Leches is a delightful chicken dish soaked in a creamy mixture of four milks. If you’re scratching your head wondering how such a mixture works, think of it this way: each type of milk brings its own distinct characteristics to the table.
The uniqueness comes from blending heavy cream, whole milk, sweetened condensed milk, and evaporated milk. Instead of being overly sweet, the result is a delicate blend of creaminess that complements the chicken’s savory profile beautifully.
You will also like the following Appetizer recipes!
- Best Pollo Tropical Chicken Breast Recipe
- How to make Chuy’s Jalapeno Ranch
- Easy Vietnamese Egg Roll Recipe With Taro
How Does It Taste Like?
Imagine biting into a piece of tender chicken enveloped in a velvety sauce that’s sweet yet balances savory notes. The whole experience feels indulgent without overwhelming your palate.
Each forkful offers a delightful contrast of flavors—a little sweetness, a whole lot of creaminess, and the satisfying flavor of well-cooked chicken. The experience is complex yet comforting, reminiscent of a home-cooked meal that wraps you in a warm hug.
Why You’ll Love This?
There are countless reasons to fall in love with Pollo Tropical Cuatro Leches. Here are a few that stand out:
- Flavor Profile: The combination of four milks creates a taste sensation like no other. The creaminess perfectly complements the spices and seasoning used in the chicken.
- Visual Appeal: The layered presentation, with the chicken bathing in a luscious white sauce, makes this dish a feast for the eyes.
- Ease of Preparation: Despite its gourmet appearance, making Pollo Tropical Cuatro Leches is straightforward. Perfect for both novice cooks and seasoned chefs.
- Crowd-Pleaser: Whether you’re hosting a dinner party or a casual get-together, this dish is sure to impress and gather compliments.
- Versatility: You can easily alter ingredients based on dietary preferences, ensuring that everyone can enjoy it.
Ingredients
To create Pollo Tropical Cuatro Leches, you’ll need the following ingredients:
For the Cake:
- 1 tablespoon baking powder: This leavening agent ensures our cake rises to perfection.
- 2 cups all-purpose flour: A staple in many baking recipes that provides structure.
- 3 large eggs, at room temperature: Essential for binding and moisture.
- 1/2 cup granulated sugar: To add a touch of sweetness.
- 1/2 cup whole milk: Adds moisture to our cake.
For the Cuatro Leches Filling:
- 2 cups heavy whipping cream: Provides richness and lusciousness.
- 1/2 cup whole milk: Adds additional creaminess.
- 1 (14-oz) can sweetened condensed milk: To sweeten things up.
- 1 (12-oz) can evaporated milk: Contributes to the luxurious texture.
- 1 tablespoon pure vanilla extract: Adds warmth and depth.
- 1/2 teaspoon almond extract: A hint of nuttiness enhances the experience.
For the Frosting:
- 4 large egg whites: The base for our meringue frosting.
- 1/4 teaspoon cream of tartar: Helps stabilize our meringue.
- 1/2 cup granulated sugar: To sweeten our frosting.

Step by Step Directions
Let’s dive into creating this culinary masterpiece. Follow these steps closely to ensure success!
Step 1: Prepare the Cake
Start by preheating your oven to 350°F (175°C). Grease and flour a rectangular cake pan. In a mixing bowl, whisk together the baking powder and flour. In a separate bowl, cream together the granulated sugar and the eggs until light and fluffy. Gradually add the dry ingredients and mix until combined. Finally, stir in the milk until smooth.
Step 2: Bake the Cake
Pour the batter into the prepared pan, smoothing out the top with a spatula. Place it in the oven and bake for 25 to 30 minutes, or until a toothpick inserted into the center comes out clean. Let it cool in the pan for 10 minutes before transferring it to a wire rack to cool completely.
Step 3: Prepare the Cuatro Leches Mixture
While the cake cools, it’s time to make the filling. In a mixing bowl, combine the heavy cream, whole milk, sweetened condensed milk, evaporated milk, vanilla extract, and almond extract. Whisk until well combined.
Step 4: Soak the Cake
Once the cake has cooled completely, poke holes all over the surface using a fork. This allows the milk mixture to seep into the cake. Slowly pour the Cuatro Leches mixture over the cake, ensuring it soaks in evenly. Let the cake rest in the refrigerator for several hours or overnight.
Step 5: Make the Meringue Frosting
In a clean mixing bowl, beat the egg whites and cream of tartar until soft peaks form. Gradually add the sugar while continuing to beat until stiff peaks form and the meringue is glossy.
Step 6: Frost the Cake
Once the cake is completely soaked, spread the meringue frosting evenly on top. You can use a spatula or the back of a spoon to create peaks for a decorative finish.
Step 7: Chill and Serve
Refrigerate the frosted cake for at least an hour. This gives the meringue time to set. When ready to serve, slice into pieces and enjoy the delicious layers of flavor!
Tips On Making Pollo Tropical Cuatro Leches
Here are some useful tips to ensure your Pollo Tropical Cuatro Leches turns out perfectly:
- Use Room Temperature Ingredients: Room temperature eggs and milk incorporate better and contribute to a fluffier cake.
- Don’t Rush the Soak: Allow the cake enough time to absorb the milk mixture. Overnight soaking yields the best results.
- Whip the Egg Whites Properly: Ensure that your bowl and utensils are grease-free. Any oil can prevent the whites from whipping to peak perfection.
- Chill Before Serving: The flavors improve after chilling in the fridge; it intensifies the taste while providing a cool contrast.
- Experiment with Toppings: You can add toppings like fruit or chocolate shavings for an extra flair.

Nutrition Information
Understanding the nutritional value of Pollo Tropical Cuatro Leches is crucial for health-conscious individuals. While indulgent, this dish can be enjoyed in moderation. Here’s a rough breakdown per serving:
- Calories: Approximately 350 per serving
- Protein: 9g
- Carbohydrates: 40g
- Fat: 18g
- Fiber: 1g
How Do You Store This Pollo Tropical Cuatro Leches?
Storing your Pollo Tropical Cuatro Leches is simple! Just make sure the cake is fully cooled and the meringue is set before placing it in an airtight container.
It can stay fresh in the refrigerator for up to 3-4 days. Just remember, the meringue might lose its firm texture over time. Always serve it chilled for the best flavor experience.
What Other Substitutes Can You Use in Pollo Tropical Cuatro Leches?
There are always alternatives in cooking! Here are some substitutes you may consider:
- Greek Yogurt for Heavy Cream: This can be a healthier alternative while bringing a creamy texture.
- Almond Milk or Coconut Milk for Whole Milk: These options provide unique flavors and cater to dairy-free diets.
- Honey for Granulated Sugar: If you prefer natural sweeteners, honey can be a good substitute, but it may alter the structure.
- Silken Tofu for Eggs: For those avoiding eggs, silken tofu can be blended to create moisture in your cake without sacrificing structure.
- Nut Extracts for Almond Extract: If you’re not a fan of almond flavor, vanilla or hazelnut extracts can work beautifully.

Pollo Tropical Cuatro Leches Recipe
Equipment
- Oven
Ingredients
Cake
- 1 tablespoon baking powder
- 2 cups all-purpose flour
- 3 large eggs at room temperature
- 1/2 cup granulated sugar
- 1/2 cup whole milk
Quatro Leches Filling
- 2 cups heavy whipping cream
- 1/2 cup whole milk
- 1 14-oz can sweetened condensed milk
- 1 12-oz can evaporated milk
- 1 tablespoon pure vanilla extract
- 1/2 teaspoon almond extract for a subtle nutty flavor
Frosting
- 4 large egg whites
- 1/4 teaspoon cream of tartar for stability in the meringue
- 1/2 cup granulated sugar
Instructions
- Let’s dive into creating this culinary masterpiece. Follow these steps closely to ensure success!
Step 1: Prepare the Cake
- Start by preheating your oven to 350°F (175°C). Grease and flour a rectangular cake pan. In a mixing bowl, whisk together the baking powder and flour. In a separate bowl, cream together the granulated sugar and the eggs until light and fluffy. Gradually add the dry ingredients and mix until combined. Finally, stir in the milk until smooth.
Step 2: Bake the Cake
- Pour the batter into the prepared pan, smoothing out the top with a spatula. Place it in the oven and bake for 25 to 30 minutes, or until a toothpick inserted into the center comes out clean. Let it cool in the pan for 10 minutes before transferring it to a wire rack to cool completely.
Step 3: Prepare the Cuatro Leches Mixture
- While the cake cools, it’s time to make the filling. In a mixing bowl, combine the heavy cream, whole milk, sweetened condensed milk, evaporated milk, vanilla extract, and almond extract. Whisk until well combined.
Step 4: Soak the Cake
- Once the cake has cooled completely, poke holes all over the surface using a fork. This allows the milk mixture to seep into the cake. Slowly pour the Cuatro Leches mixture over the cake, ensuring it soaks in evenly. Let the cake rest in the refrigerator for several hours or overnight.
Step 5: Make the Meringue Frosting
- In a clean mixing bowl, beat the egg whites and cream of tartar until soft peaks form. Gradually add the sugar while continuing to beat until stiff peaks form and the meringue is glossy.
Step 6: Frost the Cake
- Once the cake is completely soaked, spread the meringue frosting evenly on top. You can use a spatula or the back of a spoon to create peaks for a decorative finish.
Step 7: Chill and Serve
- Refrigerate the frosted cake for at least an hour. This gives the meringue time to set. When ready to serve, slice into pieces and enjoy the delicious layers of flavor!
Notes
- Use Room Temperature Ingredients: Room temperature eggs and milk incorporate better and contribute to a fluffier cake.
- Don’t Rush the Soak: Allow the cake enough time to absorb the milk mixture. Overnight soaking yields the best results.
- Whip the Egg Whites Properly: Ensure that your bowl and utensils are grease-free. Any oil can prevent the whites from whipping to peak perfection.
- Chill Before Serving: The flavors improve after chilling in the fridge; it intensifies the taste while providing a cool contrast.
- Experiment with Toppings: You can add toppings like fruit or chocolate shavings for an extra flair.
Nutrition
Frequently Asked Questions
Can I make this dish gluten-free?
Absolutely! Use gluten-free all-purpose flour instead of regular flour. It works surprisingly well, and no one will notice the difference.
Why does my meringue weep?
Weeping meringue usually indicates excess moisture in the egg whites. Avoid adding sugar too quickly and ensure your utensils are clean. You can also add cornstarch which helps absorb moisture.
How can I make this dish dairy-free?
Use dairy-free milk alternatives, like almond, soy, or oat milk. Replace the heavy cream with coconut cream for sweetness.
What’s the best way to serve Pollo Tropical Cuatro Leches?
This dish is perfect when chilled. Serve slices alongside fresh fruit like berries or a scoop of sorbet for a refreshing finish.
Can I freeze Pollo Tropical Cuatro Leches?
While it’s best consumed fresh, you can freeze the cake before adding the meringue. When you’re ready to eat it, thaw it in the refrigerator and add the meringue.
How can I add more flavor to the cake base?
You can introduce citrus zest or spices like cinnamon to the batter. This adds complexity and makes it even more enjoyable.
Conclusion
In closing, Pollo Tropical Cuatro Leches is more than just a meal; it’s an experience. With every layer of flavor and every bite, you’re transported to a place of comfort and satisfaction. Its unique blend of sweet and savory makes it truly special.
Whether you are cooking for a crowd or just craving something delicious for yourself, this dish delivers on all fronts. Keep the ingredients handy, follow the steps, and let yourself indulge for a moment.
As you gather around the table with friends and family, remember that sharing good food creates lasting memories. Happy cooking!