Ah, summer gatherings! Picture this. It’s a bright afternoon, the sun is shining, and the barbecue is about to kick off. Friends are mingling, laughter fills the air, and what’s that? A colorful dessert sitting pretty on the table, practically calling your name.
That’s right, I’m talking about fruit pizza rectangular style! This treat is fantastic, and the bright fruits just sing against the sweet, creamy backdrop. Perfect for outdoor shindigs or a little something sweet at home, fruit pizza simply steals the show.

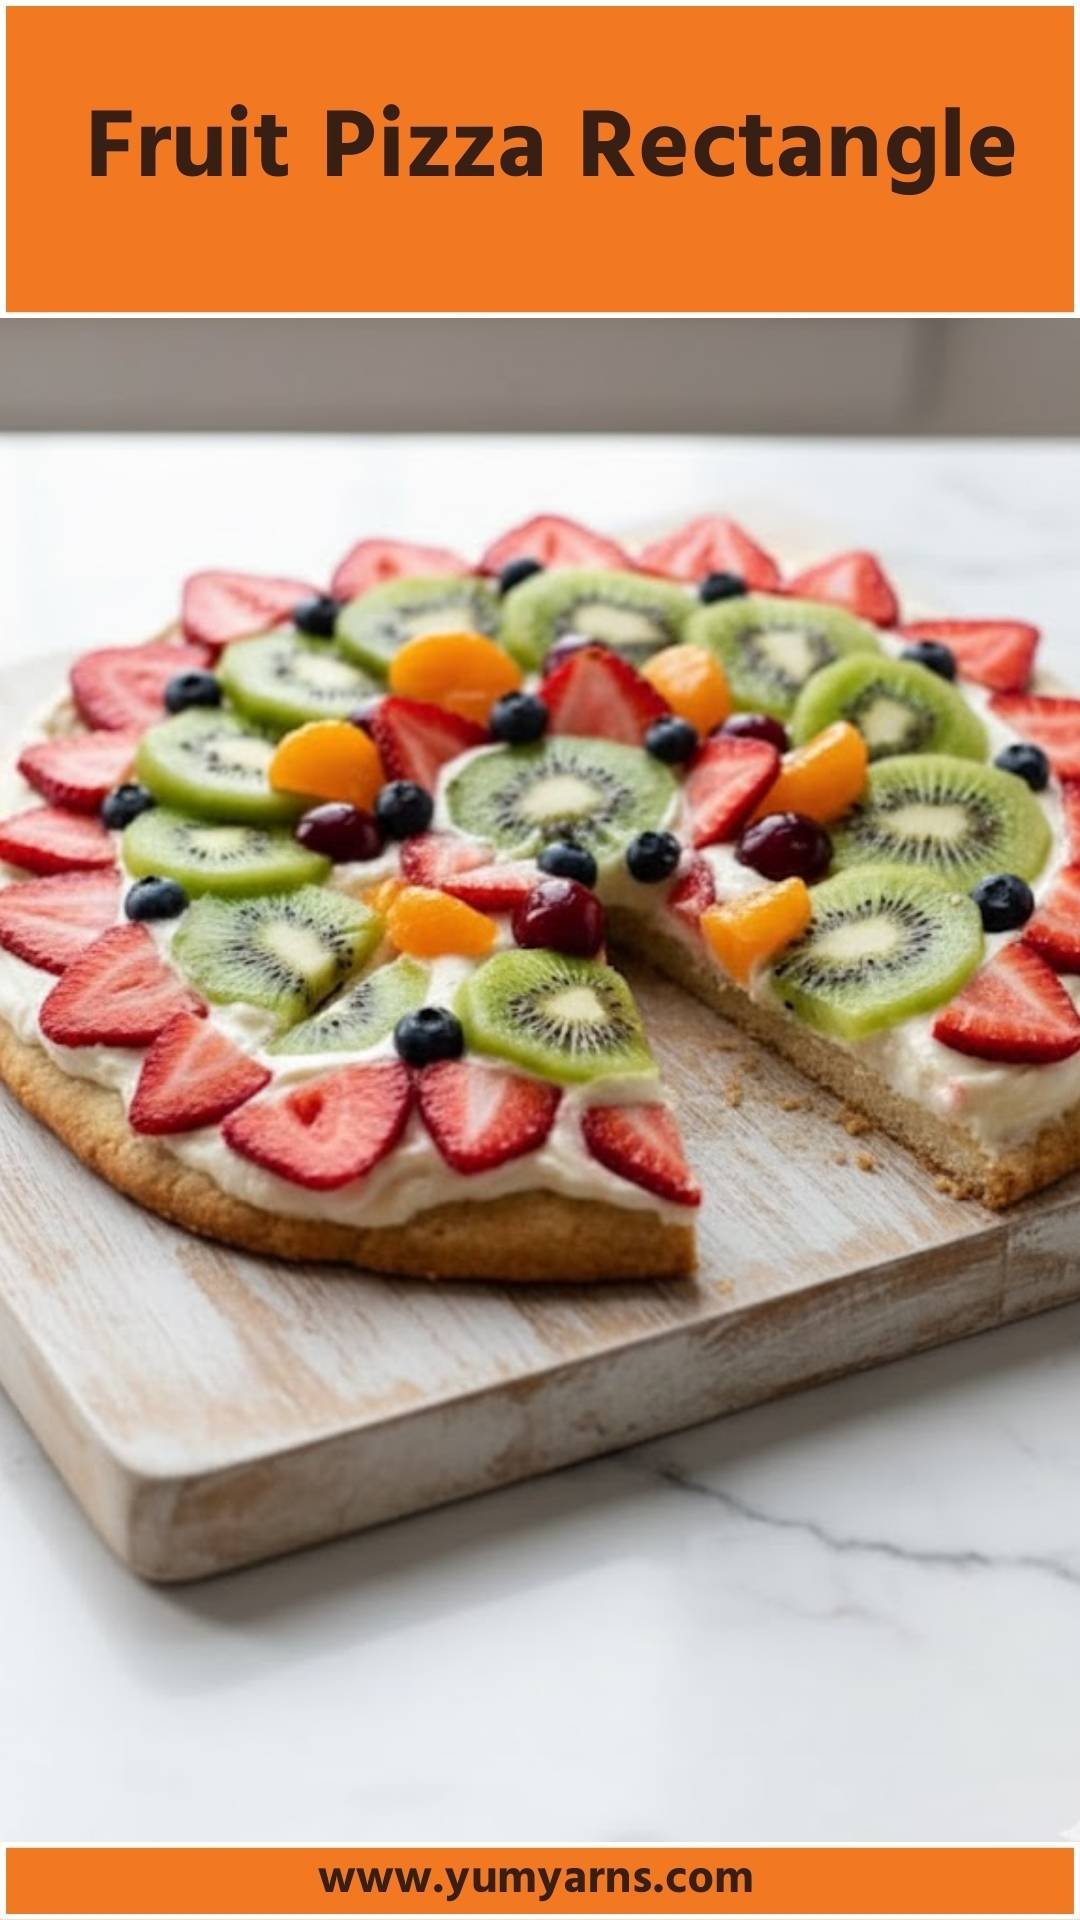
Fruit pizza rectangle has become a seasonal favorite, and for good reason. It combines a buttery cookie base with a rich cream cheese frosting and an array of vibrant fruits. This dessert is a true crowd-pleaser, inviting everyone to dig in for a slice of happiness.
It’s also quite easy to whip up, making it ideal for those of us who desire something fun and delicious without spending the whole day in the kitchen.
You Might Like These Recipes!
Four Layer Dessert Recipe Chocolate Pudding Recipe
What is fruit pizza rectangle?
Fruit pizza rectangle is a delightful twist on traditional pizza, swapping the savory toppings for a sweet sugar cookie crust adorned with cream cheese frosting and a medley of fresh fruits. It’s usually laid out in rectangular slices, making it easy to serve and share. This dessert allows for creativity, too—your fruit selections can be as unique as you like, harmonizing beautifully with the creamy layer beneath.
Why You’ll Love this fruit pizza rectangle?
You’ll love this fruit pizza rectangle because it embodies the best of warm-weather desserts—light, refreshing, and irresistibly sweet. It’s incredibly versatile; feel free to swap fruits based on what’s in season or what you have on hand. Plus, it’s make-ahead friendly! Pop it in the fridge and let it chill until you’re ready to serve. I also adore that it looks stunning on a serving platter; it’s definitely a dessert that brings a smile to everyone’s face.
The Ingredients You Will Need To Make This Dish

Here’s what you’ll need to create that blissful fruit pizza rectangle:
Sugar Cookie Crust
– 1 and 1/2 cups (188g) all-purpose flour, spooned and leveled
– 1 and 1/2 teaspoons cornstarch
– 1/4 teaspoon salt
– 1 teaspoon baking powder
– 1/2 cup (113g) unsalted butter, softened at room temperature
– 3/4 cup (150g) granulated sugar
– 1 large egg, brought to room temperature
– 1 teaspoon pure vanilla extract
Toppings
– 8 ounces (226g) full-fat brick cream cheese, softened to room temperature
– 3 Tablespoons (43g) unsalted butter, softened
– 1 and 1/4 cups (150g) confectioners’ sugar
– 1 teaspoon pure vanilla extract
– 3 cups (about 400g) assorted fresh fruits, sliced (think strawberries, blueberries, kiwis, and bananas)
– Optional: 1/4 teaspoon almond extract for extra flavor
– Optional: Zest of one lemon for a zesty kick
Ingredients From : sallysbakingaddiction.com
How to Make Fruit Pizza Rectangle
The preparation of this delightful dessert consists of two main parts: making the crust and whipping up the luscious frosting. The real magic comes when you layer the fruits!
Step-by-Step Directions
Step 1: Prepare the Crust

In a medium-sized bowl, whisk together the all-purpose flour, cornstarch, baking powder, and salt. This dry mixture forms the base for your sugar cookie crust.
Step 2: Cream the Butter and Sugar

In a larger mixing bowl (you can use a handheld mixer or a stand mixer fitted with a paddle attachment), add the softened butter and granulated sugar. Beat on medium-high speed for about three minutes until the mixture becomes creamy and slightly fluffy.
Step 3: Add Eggs and Vanilla

Now, crack the large egg into the buttery mixture along with the pure vanilla extract. Beat everything together until well combined, scraping down the sides and bottom of the bowl as needed to ensure nothing gets left behind.
Step 4: Combine Wet and Dry Ingredients

It’s time to integrate the dry ingredients that you whisked together earlier. Lower your mixer speed to prevent a flour cloud and mix until just combined. Avoid over-mixing to keep your crust soft.
Step 5: Chill the Dough

Once everything is blended, wrap the dough tightly in plastic wrap. Pop it in the fridge for about 20 minutes up to a day. If you chill it longer, let it sit out for 20-30 minutes at room temperature so it softens a bit for easier handling.
Step 6: Preheat and Prepare the Pan

Turn your oven up to 350°F (177°C) while you grease a 12-inch pizza pan with nonstick spray. This step ensures your beautiful creation won’t stick to the pan once it’s baked.
Step 7: Shape the Dough
Take the chilled dough out of the fridge and press it into the prepared pizza pan. Spread it into a circular shape about 9-10 inches in diameter and about 1/3-inch thick. You want it to fill the pan without being too thick.
Step 8: Bake the Crust
Place the crust in your preheated oven and bake for 17-19 minutes. Keep a close eye; the edges should be lightly golden brown. Don’t let it overbake. Remove it from the oven and let it cool completely on a wire rack.
Step 9: Whip up the Frosting
While the crust cools, let’s tackle the frosting. In a medium mixing bowl, start by combining softened cream cheese and butter using your mixer on medium speed for about 2 minutes until smooth. Gradually add the confectioners’ sugar and final vanilla extract, then mix for another minute until everything is creamy.
Step 10: Spread the Frosting
Once the crust is completely cooled, generously spread the delicious cream cheese frosting over it using an offset spatula.
Step 11: Add the Fruit Decoration
Now for the fun part! Decorate the frosted pizza with fresh, sliced fruits of your choice. Play with patterns or simply scatter them all over. It’s your canvas—make it colorful!
Step 12: Slice and Serve
Cut your decorated fruit pizza into slices or squares, depending on how you prefer to serve it. Enjoy right away or chill in the fridge for a short while. Leftovers can be stored, but they’re sure to disappear quickly!
Notes
– Always Chill: Allow the dough to chill for better shape and texture.
– Mix It Up: Feel free to experiment with different fruits based on the season.
– Go Vegan?: You can swap out the cream cheese and butter for vegan alternatives.
– Gluten-free Version: Use gluten-free flour to make a gluten-free crust.
– Zest It Up!: Add some citrus zest for an extra flavor kick if you like.
Storage Tips
Store any leftover fruit pizza rectangle in an airtight container in the refrigerator. It will maintain its deliciousness for up to three days. Just remember that the fresher the fruit, the better the overall taste!
Serving Suggestions
1. Picnics: Perfect for an outdoor picnic; just slice it up and package it in portable containers.
2. Birthday Parties: A colorful addition that’s sure to delight young partygoers and adults alike.
3. Brunch Buffets: Pair these with other brunch offerings for a delightful, varied spread.
4. Potlucks: This dish is a great choice for potlucks where you want to impress without a ton of work.
5. Afternoon Snacks: Enjoy a slice with coffee or tea for a sweet afternoon treat.
What Other Substitutes Can I Use in Fruit Pizza Rectangle?
1. Greek Yogurt: Instead of cream cheese, Greek yogurt can be a healthier alternative for the frosting.
2. Fruit Choices: Swap out the fruits based on what’s fresh. Seasonal berries, peaches, or mangoes are fabulous choices.
3. Nut Butter: A layer of almond or peanut butter beneath the cream cheese adds a nutty twist.
4. Flavored Extracts: Replace vanilla with almond or coconut extract for a different flavor profile.
5. Whole Wheat Flour: For a healthier cookie crust, use whole wheat flour instead of all-purpose.

Fruit Pizza Rectangle
Equipment
- Mixing bowls
- 12-inch pizza pan
- Whisk
- electric mixer
- offset spatula
- refrigerator
Ingredients
- Here’s what you’ll need to create that blissful fruit pizza rectangle:
Sugar Cookie Crust
- – 1 and 1/2 cups 188g all-purpose flour, spooned and leveled
- – 1 and 1/2 teaspoons cornstarch
- – 1/4 teaspoon salt
- – 1 teaspoon baking powder
- – 1/2 cup 113g unsalted butter, softened at room temperature
- – 3/4 cup 150g granulated sugar
- – 1 large egg brought to room temperature
- – 1 teaspoon pure vanilla extract
Toppings
- – 8 ounces 226g full-fat brick cream cheese, softened to room temperature
- – 3 Tablespoons 43g unsalted butter, softened
- – 1 and 1/4 cups 150g confectioners’ sugar
- – 1 teaspoon pure vanilla extract
- – 3 cups about 400g assorted fresh fruits, sliced (think strawberries, blueberries, kiwis, and bananas)
- – Optional: 1/4 teaspoon almond extract for extra flavor
- – Optional: Zest of one lemon for a zesty kick
Instructions
Step 1: Prepare the Crust
- In a medium-sized bowl, whisk together the all-purpose flour, cornstarch, baking powder, and salt. This dry mixture forms the base for your sugar cookie crust.
Step 2: Cream the Butter and Sugar
- In a larger mixing bowl (you can use a handheld mixer or a stand mixer fitted with a paddle attachment), add the softened butter and granulated sugar. Beat on medium-high speed for about three minutes until the mixture becomes creamy and slightly fluffy.
Step 3: Add Eggs and Vanilla
- Now, crack the large egg into the buttery mixture along with the pure vanilla extract. Beat everything together until well combined, scraping down the sides and bottom of the bowl as needed to ensure nothing gets left behind.
Step 4: Combine Wet and Dry Ingredients
- It’s time to integrate the dry ingredients that you whisked together earlier. Lower your mixer speed to prevent a flour cloud and mix until just combined. Avoid over-mixing to keep your crust soft.
Step 5: Chill the Dough
- Once everything is blended, wrap the dough tightly in plastic wrap. Pop it in the fridge for about 20 minutes up to a day. If you chill it longer, let it sit out for 20-30 minutes at room temperature so it softens a bit for easier handling.
Step 6: Preheat and Prepare the Pan
- Turn your oven up to 350°F (177°C) while you grease a 12-inch pizza pan with nonstick spray. This step ensures your beautiful creation won’t stick to the pan once it’s baked.
Step 7: Shape the Dough
- Take the chilled dough out of the fridge and press it into the prepared pizza pan. Spread it into a circular shape about 9-10 inches in diameter and about 1/3-inch thick. You want it to fill the pan without being too thick.
Step 8: Bake the Crust
- Place the crust in your preheated oven and bake for 17-19 minutes. Keep a close eye; the edges should be lightly golden brown. Don’t let it overbake. Remove it from the oven and let it cool completely on a wire rack.
Step 9: Whip up the Frosting
- While the crust cools, let’s tackle the frosting. In a medium mixing bowl, start by combining softened cream cheese and butter using your mixer on medium speed for about 2 minutes until smooth. Gradually add the confectioners’ sugar and final vanilla extract, then mix for another minute until everything is creamy.
Step 10: Spread the Frosting
- Once the crust is completely cooled, generously spread the delicious cream cheese frosting over it using an offset spatula.
Step 11: Add the Fruit Decoration
- Now for the fun part! Decorate the frosted pizza with fresh, sliced fruits of your choice. Play with patterns or simply scatter them all over. It’s your canvas—make it colorful!
Step 12: Slice and Serve
- Cut your decorated fruit pizza into slices or squares, depending on how you prefer to serve it. Enjoy right away or chill in the fridge for a short while. Leftovers can be stored, but they’re sure to disappear quickly!
Notes
Nutrition
FAQs
1. Can I use store-bought cookie dough?
Absolutely! This can save you time. Roll it out into a rectangle, bake, and proceed with the frosting and fruits.
2. How can I make it less sweet?
Reduce the amount of confectioners’ sugar in the frosting. You can also choose less sweet fruits or berries.
3. Can I freeze fruit pizza?
I wouldn’t recommend freezing it once the fruits are added. The texture of the fruits doesn’t hold up well in the freezer. However, you can freeze the crust alone for a few weeks.
4. Can I use canned fruit?
While fresh is best for flavor and presentation, you can use canned fruit in a pinch. Just make sure to drain and pat them dry to avoid a soggy crust.
5. How long can I keep leftovers?
Leftovers will stay fresh in the fridge for about three days. But, trust me, it’s unlikely to last that long!
Conclusion
Fruit pizza rectangle is a simple yet delightful dessert that every kitchen should embrace. With a buttery crust, creamy frosting, and the freshest fruits, it’s bound to be a centerpiece at your next gathering. Customize, share, and enjoy, knowing that each slice is a little piece of heaven.
So gather your ingredients, and let’s get baking!