
Brioche French Toast Recipe
There's something deeply comforting about waking up to the aroma of golden French toast sizzling in a warm skillet. This brioche French toast recipe brings together the richness of tender, buttery bread with a silky custard coating that reminds me of lazy weekend breakfasts with family. If you're looking to pair this with something savory, consider serving it alongside Fried Salmon Tacos for a brunch that spans both comfort and sophistication.
Ingredients
- ½ teaspoon ground cinnamon freshly ground if possible for maximum aroma
- ¼ teaspoon nutmeg optional but adds subtle warmth and depth
- 1 cup whole milk full-fat creates the creamiest custard and deepest flavor
- 5 large eggs room temperature for even cooking and better emulsification
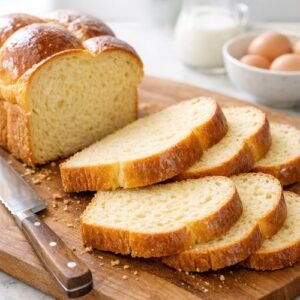
- 10 slice brioche bread cut about ¾-inch thick for the perfect custard absorption
- 1 tablespoon honey or maple syrup for serving and optional mixing into custard
- 1 tablespoon pure vanilla extract (never imitation
- 2 tablespoon unsalted butter for cooking, divided between batches
Instructions
Step 1: Prepare Your Custard Mixture
- In a medium-sized shallow bowl—I prefer a wide ceramic dish or pie plate—crack your five eggs directly into the bowl. Using a fork or whisk, gently beat the eggs until the yolks and whites are completely combined. The key here is gentle; you're not making an omelet, so you don't need aggressive whisking. Pour in your whole milk slowly while whisking continuously. This creates a smooth, lump-free custard base. Add your vanilla extract and ground cinnamon, stirring until the mixture is completely uniform and the cinnamon is fully dissolved. If you're including the optional nutmeg, add it now. Let this mixture rest for a moment while you prepare your bread.

Step 2: Slice and Arrange Your Brioche
- Take your brioche loaf and slice it into pieces that are approximately ¾-inch thick. This thickness is important—too thin and your toast becomes crispy and dries out; too thick and the custard won't penetrate the center. You want that perfect balance where the exterior gets that gorgeous golden crust while the interior remains creamy and custardy. Arrange your sliced brioche pieces on a cutting board or large plate nearby. You want everything prepped and ready to go before you start cooking, since the process moves quickly once your skillet is hot.
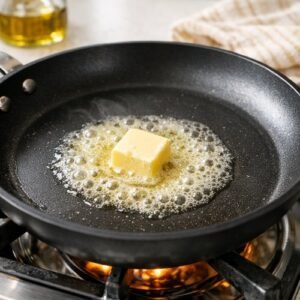
Step 3: Heat Your Skillet and Butter
- Place a large skillet or griddle over medium-low heat. This is an important detail—medium-low, not medium. High heat will burn the outside before the custard can cook through, and low heat means you'll be standing there for ages. Medium-low gives you that perfect golden-brown exterior with a cooked-through interior. Add one tablespoon of unsalted butter to the skillet and let it melt completely, coating the cooking surface evenly. You'll know it's ready when it's foaming gently and smells nutty and inviting. This should take about 2-3 minutes.
Step 4: Dip and Coat Your Bread
- Working with one slice at a time, gently dip both sides of your brioche slice into the custard mixture. This is where patience matters. You want each side to spend about one second in the mixture—just enough to coat thoroughly but not so long that the bread becomes saturated and breaks apart. The bread will continue absorbing the custard as it rests, so err on the side of brevity. I like to dip one side, let it soak for exactly one second, flip it, soak the other side for one second, then immediately place it in the hot skillet. This rhythm becomes natural after a few slices.

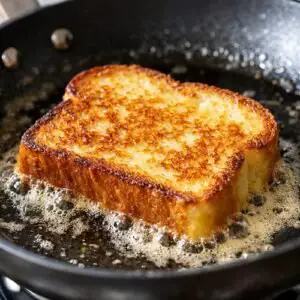
Step 5: Cook the First Side Until Golden
- Carefully place your dipped brioche slice in the hot buttered skillet. You should hear a gentle sizzle—that's the sound of the custard-coated bread beginning to caramelize. Let it cook undisturbed for 3-4 minutes on the first side. You're looking for a deep golden-brown color, almost approaching burnished bronze. This creates that beautiful contrast between the crunchy exterior and the creamy interior. During this time, continue dipping additional slices and preparing them. You can have multiple slices cooking simultaneously if your skillet is large enough, but don't crowd the pan—they need space to cook evenly.
Step 6: Flip and Cook the Second Side
- Using a spatula, carefully flip each slice. The second side won't need quite as long—usually 2-3 minutes for that perfect golden finish. The first side was thickest with the egg mixture, so the second side cooks a bit faster. You're looking for the same rich golden-brown color on this side. If you notice your slices browning too quickly, lower your heat slightly. If they're not browning at all after a few minutes, your butter might not be hot enough—turn up the heat just a touch. Cooking is about adjustments and observation.

Step 7: Transfer and Keep Warm
- As each piece finishes cooking, transfer it to a warm plate or baking sheet. If you're cooking multiple batches, you can keep the finished pieces warm in a 200°F oven while you continue cooking the remaining slices. This ensures everyone at your table gets warm French toast at the same time. When you've cooked the second half of your batch, you may need to add the remaining tablespoon of butter to your skillet. Follow the same process—let it melt and become foamy before adding new dipped slices.

Step 8: Plate and Serve Immediately
- Arrange your finished brioche French toast on serving plates while they're still warm. This is when the texture is at its absolute best—crispy outside, creamy inside, and the aromatics of cinnamon and vanilla are most vibrant. Serve immediately with your choice of toppings. The window for peak texture is about 5-10 minutes after cooking, so get everything to the table promptly. This is one dish where timing truly enhances the eating experience.

Notes
- Use day-old or slightly stale brioche when possible - Fresh brioche is wonderful, but bread that's a day or two old has less moisture content and won't become soggy. If you only have fresh brioche, that's absolutely fine; just reduce your dipping time by half a second on each side.
- Keep your butter at the right temperature - This is the secret to gorgeous browning. Butter that's too cool won't create that caramelized crust; butter that's too hot will burn before the custard cooks. Medium-low heat with properly foaming butter is the sweet spot.
- Don't skip the vanilla extract - Real vanilla extract contains flavor compounds that imitation vanilla simply doesn't have. It transforms this from good to genuinely memorable.
- Room temperature eggs emulsify better - Eggs straight from the refrigerator won't blend as smoothly with the milk. Remove them 10 minutes before cooking, and your custard will be noticeably creamier.
- Taste your custard mixture - This might sound unusual, but I always take a tiny taste. If it needs more sweetness, add a touch of honey. If you want deeper spice notes, add a whisper more cinnamon. This hands-on approach helps you customize it to your preferences.
Nutrition
Calories: 292kcalCarbohydrates: 31gProtein: 13gFat: 12gSaturated Fat: 6gCholesterol: 181mgSodium: 375mgFiber: 2gSugar: 6g
Tried this recipe?Let us know how it was!